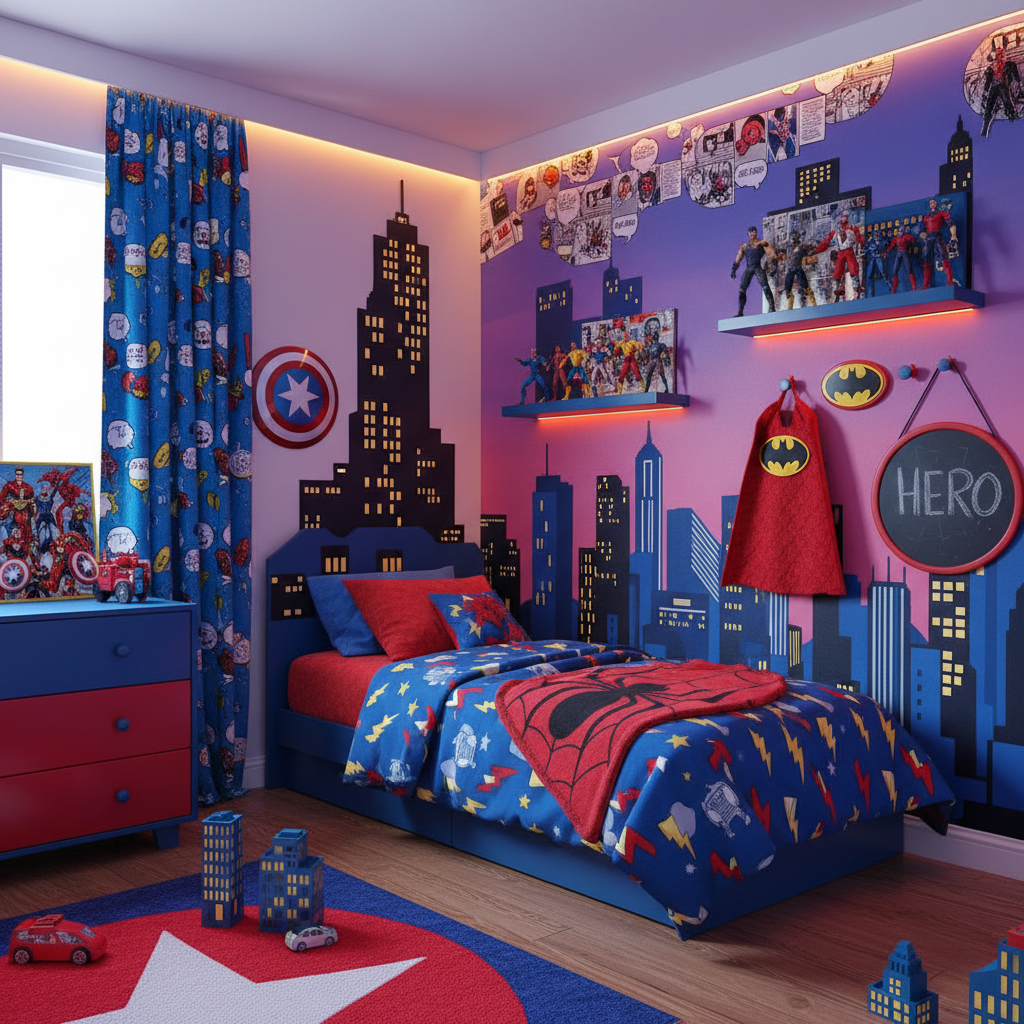
Planning a set of superhero themed kids room DIY projects is one of the most fun ways to give a child a bold, imaginative space that reflects their favorite heroes. Whether your kid loves capes, masks, or rooftop rescue missions, these projects mix creative décor, smart storage, and simple safety-conscious updates you can build in a weekend or over several afternoons.
Why choose a superhero theme?
Superhero rooms encourage pretend play, storytelling, and a sense of identity. A themed bedroom can anchor routines (like tidy-up time) with playfully designed storage and provide a cozy, stimulating environment that grows with your child if you build with flexible, modular elements.
Planning your superhero makeover
Start with a simple plan before buying supplies. Consider these essentials:
- Room size and layout: Which wall is main focal point? Where will bed and play area go?
- Primary colors and accent palette: Classic superhero palettes use bold reds, blues, yellows, plus neutrals to keep the space grounded.
- Budget and time: Mix one bigger DIY (e.g., headboard or mural) with quicker crafts (hooks, pillows).
- Age appropriateness and safety: Use non-toxic paints, secure wall mounts, and avoid small detachable parts for younger kids.
Materials & tools checklist
Most projects use easy-to-find items. Stock these basics before you start:
- Plywood or MDF board, craft wood, and picture rails
- Sandpaper, screws, anchors, basic drill and screwdriver
- Primer and water-based, low-VOC paint
- Painter’s tape, drop cloths, foam brushes and rollers
- Hot glue gun, fabric, stuffing, Velcro, iron-on transfers
- Adhesive wall hooks or heavy-duty anchors for larger pieces
Top 12 superhero themed kids room DIY projects (with step-by-step guides)
1. City skyline headboard (big visual impact)
Why it works: A skyline silhouette instantly communicates “city-of-heroes” vibe without committing to a full mural.
Materials: 1/2″ plywood, black paint, primer, jigsaw, sandpaper, mounting brackets, screws.
Steps:
- Measure bed width and add 4–6″ on either side for visual balance.
- Draw a skyline silhouette on plywood or print a template and trace it.
- Cut with a jigsaw, sand edges smooth, prime, and paint matte black (or a silhouette color).
- Mount securely to wall using studs or heavy-duty anchors and hide brackets with trim if desired.
Time: 3–5 hours. Difficulty: Moderate. Cost: $40–$120 depending on materials.
2. Emblem wall art (superhero logo made personal)
Why it works: A large emblem becomes a focal point and can be personalized with initials.
Materials: Round wooden plaque or canvas, stencils or vinyl cutter, bold paint colors, clear coat.
Steps:
- Create or download a simple emblem template. For personalization, incorporate child’s initial.
- Transfer the design to the plaque with transfer paper or stencil. Paint in layers.
- Seal with a clear matte coat and hang with picture hangers.
Time: 1–2 hours. Difficulty: Easy. Cost: $10–$40.
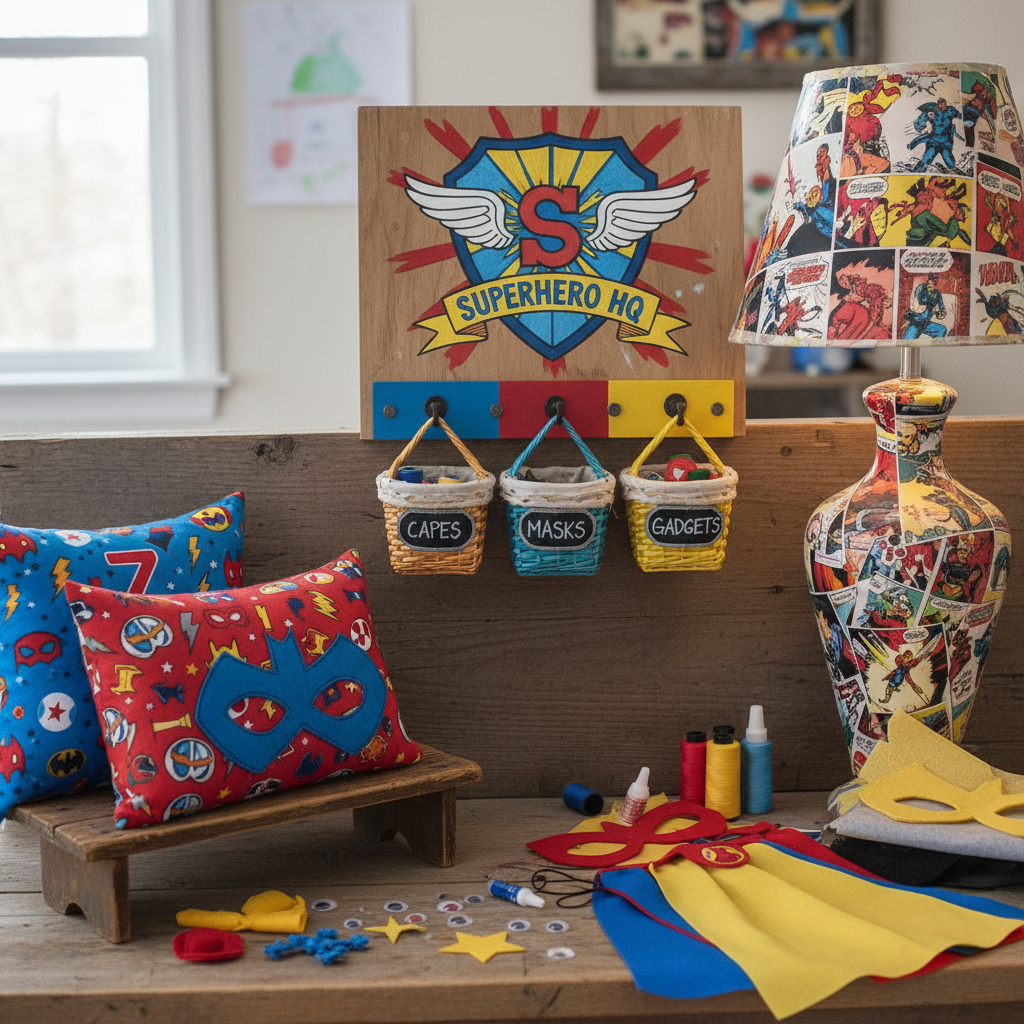
3. Cape and mask organization station (functional + fun)
Why it works: Keeps costume pieces tidy and within reach so imaginative play is easy and cleanup is part of the game.
Materials: Wooden plaque, coat hooks or pegs, paint, small baskets or canvas bins for masks and gloves.
Steps:
- Paint plaque in hero colors; add vinyl emblems or personalized label.
- Attach staggered hooks for capes and costumes—make the highest reachable by the child but not too high.
- Add labeled baskets below for masks and accessories.
Time: 1–2 hours. Difficulty: Easy. Cost: $15–$50.
4. DIY shield chalkboard (play + practical)
Why it works: A shield-shaped chalkboard is a prop for play and a place for notes and schedules.
Materials: Thin plywood or MDF, chalkboard paint, jigsaw, sandpaper, wall anchor.
Steps:
- Draw a shield shape and cut out; sand edges.
- Prime and apply 2 coats of chalkboard paint, allowing full drying between coats.
- Mount with wall anchors. Pair with magnetic strips if you want to add magnets (use paint for a magnetic chalkboard primer).
Time: 2–3 hours. Difficulty: Easy to moderate. Cost: $20–$60.
5. Comic book decoupage lampshade
Why it works: Transforms an ordinary lamp into a themed accent that glows with color and texture.
Materials: Plain fabric lampshade, matte Mod Podge or decoupage glue, trimmed comic book pages or printed comic panels, brush.
Steps:
- Cut comic panels to size. Apply a thin layer of Mod Podge to the lampshade, smooth panels in place and seal the top with a full coat.
- Allow to dry fully and choose a soft, warm LED bulb to avoid overheating the shade.
Time: 1–3 hours (plus drying). Difficulty: Easy. Cost: $10–$30.
6. Superhero mask pillowcases
Why it works: Quick textile upgrade that brings the theme into bedtime.
Materials: Plain pillowcases or fabric, fabric paint or iron-on patches, stencils for eye holes or emblems.
Steps:
- Lay stencil on pillowcase and paint emblem or mask outline using fabric paint. Alternatively, iron on patches.
- Heat-set per paint instructions so it holds up in the wash.
Time: 30–60 minutes. Difficulty: Easy. Cost: $5–$20 per pillowcase.
7. Floating city shelves (display + storage)
Why it works: Shelves shaped like rooftops or skyscrapers are both decorative and useful for toys, trophies, or books.
Materials: Fence pickets or craft wood, miter saw, brackets, paint.
Steps:
- Cut shelf pieces to varying heights to mimic buildings. Paint in coordinating colors and mount securely with hidden brackets.
- Keep heavy items low and use anchors for safety.
Time: 3–4 hours. Difficulty: Moderate. Cost: $30–$100.
8. Nightlight cityscape with LED strips
Why it works: Soft, directional light is great for bedtime and creates an atmospheric skyline glow.
Materials: LED strip lights with dimmer, clear acrylic skyline cutout or painted wood, adhesive.
Steps:
- Mount LED strip behind acrylic or wood skyline; ensure wiring is concealed and out of reach.
- Use dimmable settings for bedtime and brighter settings for playtime.
Time: 1–2 hours. Difficulty: Easy. Cost: $20–$60.
9. Mission control command board (chore + schedule center)
Why it works: Turns chores and routines into “missions” with checklists, star rewards, and magnetic pieces.
Materials: Large framed magnetic board or painted metal sheet, vinyl stickers, magnets, chalk markers.
Steps:
- Design sections for “Today’s Missions,” “Weekly Training,” and “Chore Rewards.”
- Use magnets for movable tasks and a small pouch for reward tokens.
Time: 1–2 hours. Difficulty: Easy. Cost: $25–$75.
10. Masked door curtain (for play tents or closet)
Why it works: Creates a secret superhero hideout entrance using fabric and simple sewn hems or no-sew fabric adhesive.
Materials: Heavy cotton fabric, iron-on hem tape or sewing machine, curtain rod.
Steps:
- Cut fabric to door dimensions; hem edges. Add a painted emblem or applique if desired.
- Hang using tension rod or small curtain rod for easy removal.
Time: 1–2 hours. Difficulty: Easy. Cost: $15–$50.
11. Upcycled crate toy chest painted like a comic crate
Why it works: Gives rugged, playful storage that can double as bench seating with a cushion.
Materials: Wooden crate or pallet box, sandpaper, primer, paint, cushion foam.
Steps:
- Sand and prime; paint with comic-style graphics or stripes. Add sturdy handles and wheels if needed.
- Top with a removable cushion for seating.
Time: 2–4 hours. Difficulty: Easy to moderate. Cost: $20–$80.
12. Personalized comic strip gallery wall
Why it works: Shows off your child’s interests and artwork—rotate pieces as they grow.
Materials: Assorted frames, printed comic pages, your kid’s drawings scanned and printed.
Steps:
- Create a gallery layout using paper templates taped to the wall to plan spacing.
- Mix frames with matting for a polished look or use clip frames for easy swaps.
Time: 1–2 hours. Difficulty: Easy. Cost: $20–$150 depending on frames.
Safety and paint tips
When working in a child’s room, prioritize low-VOC or zero-VOC paints and secure all fixtures to studs or with appropriate anchors. Keep small parts out of reach of young children and avoid open flames near fabric projects. For guidance on safe paints and kids room finishes, resources like HGTV offer practical tips on kids’ room paint selection and finishes that are durable and safer for indoor use: HGTV Kids’ Room Ideas.
Design tips for longevity
- Choose washable textiles and removable covers for pillowcases and cushions.
- Use modular elements (shelves you can repaint, removable decals) so you can update the theme later.
- Keep bed and larger furniture neutral—let accessories and wall art supply the hero flair.
Budgeting your superhero room
Mix higher-cost anchor pieces (custom headboard or shelving) with low-cost swaps (pillows, wall decals). Typical budgets break down like this:
- Under $100: One big DIY (shield chalkboard or emblem) + several small crafts.
- $100–$300: Headboard, shelves, lighting, and textiles.
- $300+: Custom built-ins, professional mural, or updated furniture.
Tips for involving kids in the projects
Let children help with age-appropriate tasks: choosing colors, pressing decals, painting stencils, or arranging frames. This builds ownership and reduces resistance to tidying—when something is “their” creation, they’re likelier to take care of it.
Maintenance and seasonal refreshes
Keep hero décor fresh with seasonal updates: swap pillowcases, rotate framed art, or repaint a single accent wall in a different hero color. Small changes keep the room exciting without a full overhaul.
Frequently Asked Questions (FAQs)
How do I choose non-toxic paint for a child’s room?
Look for labels that say “low-VOC” or “zero-VOC” and check product safety data sheets. Ventilate well during and after painting and allow paints to cure fully before returning furniture and textiles to the room.
Can these DIY projects be adapted for younger kids?
Yes—adapt by lowering hooks, using soft-close hinges, avoiding small detachable pieces, and substituting lighter materials (foam board instead of plywood) to reduce weight and hazard risk.
How do I attach heavy items safely to the wall?
Always anchor heavy items to wall studs when possible or use heavy-duty anchors rated for the item’s weight. For shelves and large headboards, consider using brackets with multiple screw points and consult installation instructions for weight limits.
What if I want a superhero look without committing to a long-term theme?
Use removable solutions: peel-and-stick wallpaper or decals, plug-in LED lights, clip frames, and textiles that can be switched out easily. This preserves your ability to change to a new theme later.
How do I keep the room balanced—fun but not overstimulating?
Anchor the room with neutral large furniture and soft neutrals on floors and large surfaces. Use the hero colors in concentrated accents—pillows, one accent wall, or focal headboard—so the room feels energetic without overwhelming the senses.
Project quick-start checklist
- Choose one anchor DIY (headboard, shelves, or mural).
- Select 2–3 small craft projects (pillows, hooks, lamp shade) to complete in evenings.
- Buy low-VOC paint and safety anchors before starting.
- Schedule: Plan an afternoon for construction, then separate evenings for painting and finishing touches.
Transforming a bedroom into a superhero sanctuary doesn’t require a professional—just a good plan, the right materials, and a few weekend afternoons. Mix bold visuals with sensible safety and storage, and you’ll have a room that’s exciting to play in, easy to keep tidy, and simple to update as tastes change.
Explore more creative room design ideas or consider a tailored approach to your living spaces by visiting internal link (https://mdasid.org/) How to Design A Comfortable Modern Living Space


