If your floorboards are lifting after a water spill, act quickly—this common household emergency can escalate from a small cosmetic issue to a structural and mold problem if ignored. In this guide you’ll find practical steps to assess the damage, proven drying and repair techniques for different flooring types, when to call a professional, and how to prevent future incidents.
Why floorboards lift after a water spill
Floorboards lift for a few predictable reasons tied to how wood and other flooring materials react to moisture:
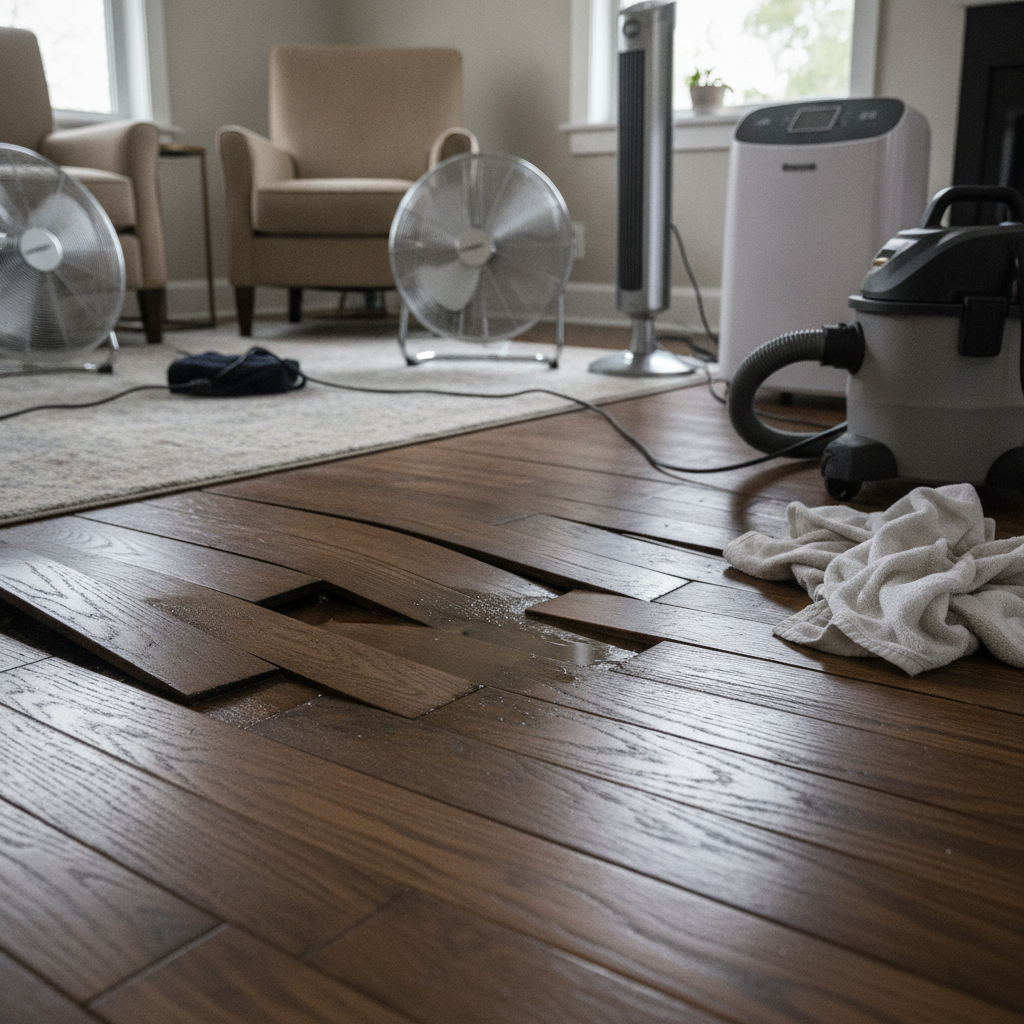
- Expansion: Wood absorbs water and swells across the plank width, which can cause boards to push upward or buckle if there is no room for expansion.
- Cupping: Moisture that soaks into the bottom of a board more than the top causes the edges to rise higher than the center.
- Crowning: If the top surface dries faster than the bottom, the center can rise above the edges.
- Adhesive failure: For glued-down floors (vinyl or engineered hardwood), water weakens the glue, allowing boards to lift.
- Subfloor damage: Saturated underlayment or joists that have shifted or decayed can push the finished floor out of alignment.
First things first: immediate actions after a spill
When you notice floorboards lifting after a water spill, the speed of your response has a major effect on repair success. Follow these immediate steps:
- Stop the source. Shut off water if the spill was from a leak or appliance.
- Remove standing water. Use absorbent towels, a wet/dry vacuum, or mop to remove as much liquid as possible.
- Protect unaffected areas. Place towels or plastic sheeting at thresholds to prevent water traveling to other rooms.
- Turn on ventilation. Open windows and doors if weather allows; use fans and a dehumidifier to speed drying.
- Document damage. Take clear photos and notes for insurance claims if visible damage is significant.
How to assess the extent of damage
Not every lifted board needs replacement. Use these checks to evaluate the scope:
- Size of the affected area: Is it a single plank, a row, or several square meters?
- Type of flooring: Solid hardwood, engineered hardwood, laminate, vinyl plank, and cork react differently and require different fixes.
- Surface condition: Are the boards cracked, delaminated, or simply raised?
- Moisture level: Use a moisture meter if you have one. For wood, a moisture content above 12–15% indicates retained moisture.
- Subfloor condition: If you can, check below by removing baseboard trim or a transition strip—wet or stained subfloor or odor indicates deeper damage.
Drying techniques that actually work
Proper drying is the foundation of any repair. Rushing to sand or refinish a damp floor will make the problem worse.
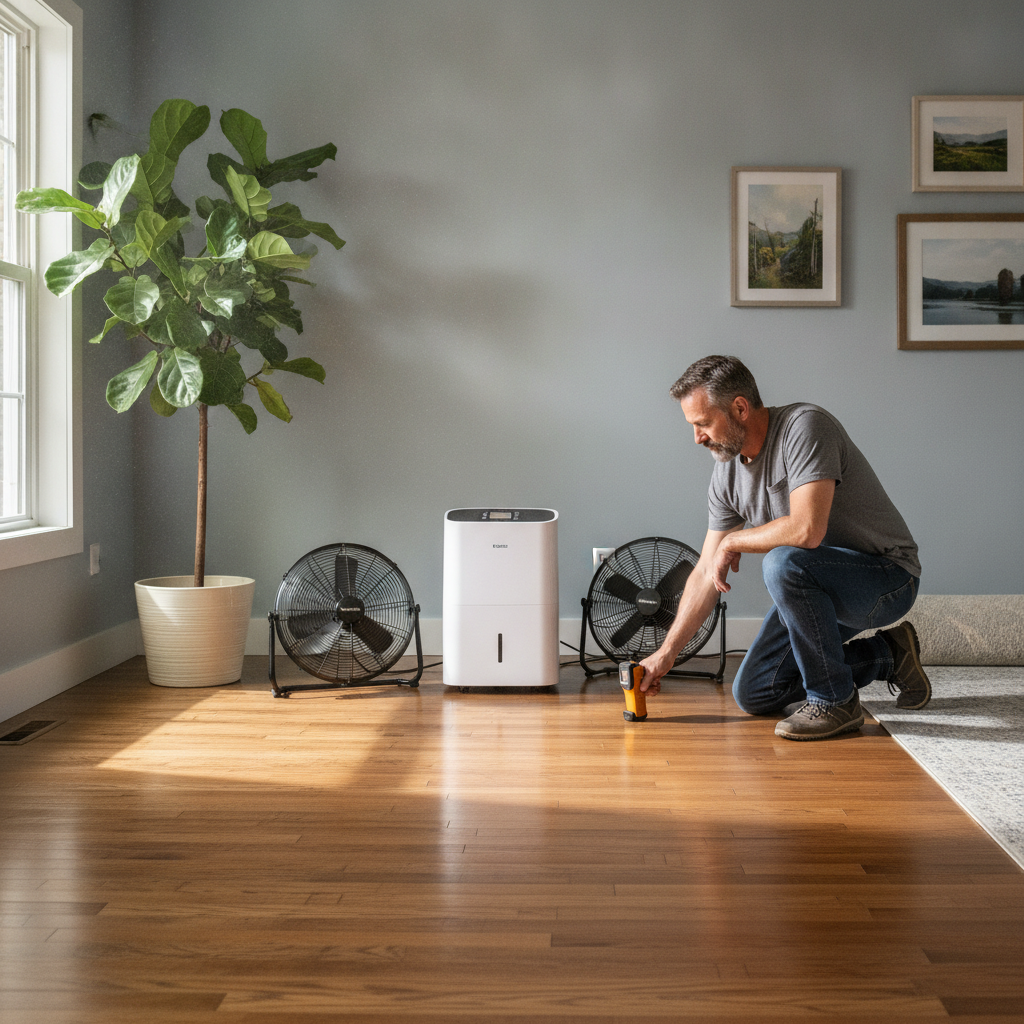
Short-term tools
- High-capacity fans: Position them to circulate air across the floor, not just blow directly at the boards.
- Dehumidifiers: A must in closed spaces; they extract moisture from the air and help wood return to equilibrium more quickly.
- Wet/dry vacuum: Removes residual standing water from joints and seams.
- Absorbent towels and mops: For initial removal only—follow with mechanical drying.
Advanced drying strategies
- Remove baseboards or quarter round to allow air to flow along the edges and underboards; this speeds drying and reduces cupping/crowning.
- Create a drying cavity: For severe cases, professionals may drill small holes into the flooring to permit warm, dry air to flow under boards.
- Heat and dehumidify in tandem: Warm air holds more moisture, so a controlled rise in temperature plus a dehumidifier helps pull moisture out of wood faster.
DIY repair options by flooring type
Choose methods that match your flooring material and the severity of the lift.
Solid hardwood
- Minor lift: If boards have only slightly raised edges and are mostly tight, use weights and drying: place plastic between the wood and heavy weights to gently push boards flat as they dry.
- Loose boards: If nails have popped, re-fastening with trim-head or finishing nails (through the tongue, into the subfloor) can work after the boards are dry. Angle-nailing through the tongue or using a flooring nailer gives a hidden, strong hold.
- Severe warping/cupping: Replace affected boards after the subfloor is dry and treated; you may need to plane or sand and refinish surrounding boards for a uniform look.
Engineered hardwood
- Glued-down: If adhesive failed, you may be able to clean both surfaces and re-adhered with the manufacturer-recommended flooring adhesive once fully dry.
- Floating engineered floors: Remove the affected section, let the subfloor dry, then re-install. Make sure to keep boards acclimated before re-laying to prevent repeat issues.
Laminate and vinyl plank
- Floating laminate: Swelled boards usually cannot be restored—replace affected planks and ensure the new planks are acclimated and locked properly.
- Glue-down vinyl: If the adhesive has failed, you may be able to reapply adhesive after thorough drying; if the vinyl has detached or puckered, replacement is often necessary.
Bamboo and other engineered products
Bamboo behaves like hardwood when solid and like engineered wood otherwise. Treat as you would hardwood or engineered hardwood depending on the construction.
Step-by-step DIY for a small lifted hardwood plank
For a single lifted plank or small localized section, try this careful DIY approach:
- Dry: Use fans and a dehumidifier until moisture readings are within normal ranges (or until visually dry and stable).
- Remove trim: Take off baseboard or threshold to access plank edges.
- Clean joint: Clear any debris, old adhesive, or trapped moisture under the edges.
- Press and secure: Apply a small bead of flooring adhesive under the plank edge and clamp or weigh it down. Alternatively, use screws or nails through the tongue where possible (and countersink/plug the visible holes if needed).
- Allow cure: Let adhesive dry fully per manufacturer instructions before walking on it.
- Refinish if needed: Sand and refinish surrounding boards for a seamless look.
When to replace boards or the whole floor
Replacement becomes the right choice when:
- Boards are delaminated, cracked, or permanently distorted.
- There is ongoing cupping or crowning that doesn’t correct after thorough drying.
- Large areas (several square feet) are affected, or the subfloor shows rot or structural damage.
- Mold or persistent odor indicates contamination of the subfloor and underlayment.
Signs you should call a professional
Some situations are best handled by experienced technicians:
- Water damage over a large area—professionals have industrial drying equipment and can lift boards safely if needed.
- Visible mold, mildew, or musty smells—mold remediation may be necessary to protect indoor air quality.
- Structural concerns: sagging floors, joist rot, or compromised subfloor require contractor evaluation.
- Insurance claims: professionals can provide documentation and damage assessments that insurers require.
For guidance on drying and repair best practices, reputable home-improvement resources such as Better Homes & Gardens provide helpful overviews and tips: How to fix water-damaged hardwood floors.
Tools and supplies you might need
- Wet/dry vacuum
- High-capacity fans and oscillating fans
- Dehumidifier (20+ pint daily capacity for serious jobs)
- Moisture meter (pin or pinless)
- Flooring adhesive and trowel
- Finishing nails or flooring cleats and a flooring nailer
- Sander and sanding discs (for refinishing)
- Replacement planks and matching stain/finish
- Safety gear: gloves, eye protection, and a respirator if mold is present
Costs to expect
Costs vary widely by material and region. Rough ranges:
- Minor DIY drying and repair: $0–$200 for fans, towels, adhesives.
- Professional drying for a small room: $300–$1,000 depending on equipment and duration.
- Localized board replacement and refinishing: $200–$1,000.
- Full floor replacement: $1,500–$10,000+ depending on flooring type and room size.
Get multiple quotes from reputable contractors for larger jobs and check that they are licensed and insured.
Preventive measures to keep floorboards from lifting
Once repaired, reduce future risk with these practical steps:
- Act fast on spills: Wipe up liquid immediately and dry the area well.
- Maintain indoor humidity: Keep relative humidity between 30–50% to prevent wood movement.
- Use mats and rugs near sinks, dishwashers, and entryways to catch water.
- Seal vulnerable seams: Use manufacturer-recommended sealants around wet areas (bathroom, kitchen) where appropriate.
- Check appliances: Inspect hoses and fittings on dishwashers, washing machines, and refrigerators regularly.
- Allow acclimation: When installing new boards, acclimate them in the room to balance moisture content with the home environment.
Dealing with insurance and warranty issues
If the spill comes from a sudden event (burst pipe, appliance failure), homeowners insurance may cover repairs caused by the event. However, wear-and-tear or lack of maintenance often isn’t covered. Keep thorough records—photos, receipts for drying and repairs, and contractor estimates—to support any claim. Also check flooring warranties: many manufacturers void coverage when moisture protocols are not followed.
Real-life scenarios and best responses
Here are a few common situations and the most practical responses:
- Spill from a dropped glass or small leak: Dry immediately with towels, run fans and a dehumidifier, monitor for 48–72 hours. Most small problems can be resolved without replacement.
- Dishwasher leak overnight affecting several planks: Shut off the appliance, remove standing water, call for professional drying and evaluate subfloor—this often requires pro help due to hidden saturation.
- Flooding from outside: Treat as an emergency—shut off electricity in the area if water is deep, document everything, and call both your insurance and a remediation company.
Mold risks and indoor air safety
Persistent moisture encourages mold growth behind floorboards and under underlayment. If you notice a musty odor, visible mold, or allergy-type symptoms, engage a remediation specialist. Do not sand or disturb moldy surfaces without proper containment and respiratory protection, as this spreads spores.
Summary checklist: what to do when floorboards lift after a water spill
- Stop the water source and remove standing liquid immediately.
- Dry thoroughly: fans, dehumidifier, and removal of trim to increase airflow.
- Assess flooring type and damage severity; use a moisture meter if available.
- Attempt minor DIY fixes for small areas once fully dry; avoid sanding while boards are damp.
- Replace boards when warped, delaminated, or structurally compromised.
- Call professionals for large-area damage, structural concerns, or mold.
- Document everything for insurance and inspect appliances/fixtures to prevent repeat events.
Frequently asked questions (FAQs)
How long does it take for floorboards to dry after a spill?
Drying time depends on the severity of the spill, the flooring type, ventilation, and humidity. Small spills on hardwood with good airflow can be dry in 24–72 hours. Larger saturations or closed spaces with high humidity may take several days to a couple of weeks using fans and dehumidifiers.
Can I sand down and refinish water-damaged boards?
Only after boards are thoroughly dry and stable. Sanding damp wood will cause further damage and reveal moisture problems later. If boards are permanently distorted or delaminated, sanding won’t fix the underlying issue—you’ll need replacement.
Are engineered floors less likely to lift after a spill?
Engineered hardwood is generally more dimensionally stable than solid hardwood because of its layered construction, but edges and glued installations still fail when exposed to substantial water. Floating engineered floors can be easier to replace in sections.
Will weights flatten cupped or crowned boards?
Weights can help in mild cases by encouraging boards to return to a flatter profile as they dry, but they won’t fix boards that are permanently deformed or delaminated. Monitor moisture levels while using weights.
When is it safe to return furniture to the area?
Wait until moisture readings are back to normal for your flooring (typically under 12–15% for many woods) and the boards feel solid and stable. Putting heavy furniture on damp boards increases the chance of permanent distortion and trapping moisture beneath the furniture.
If your floorboards are lifting after a water spill and you want more ideas about making your living space comfortable and resilient, consider exploring additional design and maintenance strategies at How to Design A Comfortable Modern Living Space.
How to Design A Comfortable Modern Living Space