Paint bubbling on bathroom ceiling is one of the most common and unsightly problems homeowners face — and it usually signals excess moisture, a water leak, or paint applied over a poorly prepared surface. In this comprehensive guide you’ll learn how to diagnose the cause, choose the right materials, perform a safe and lasting DIY repair, estimate costs, and implement prevention strategies so the problem doesn’t return.
Why paint bubbles form on bathroom ceilings
Understanding why paint bubbles helps you choose the right repair method. The main causes are:
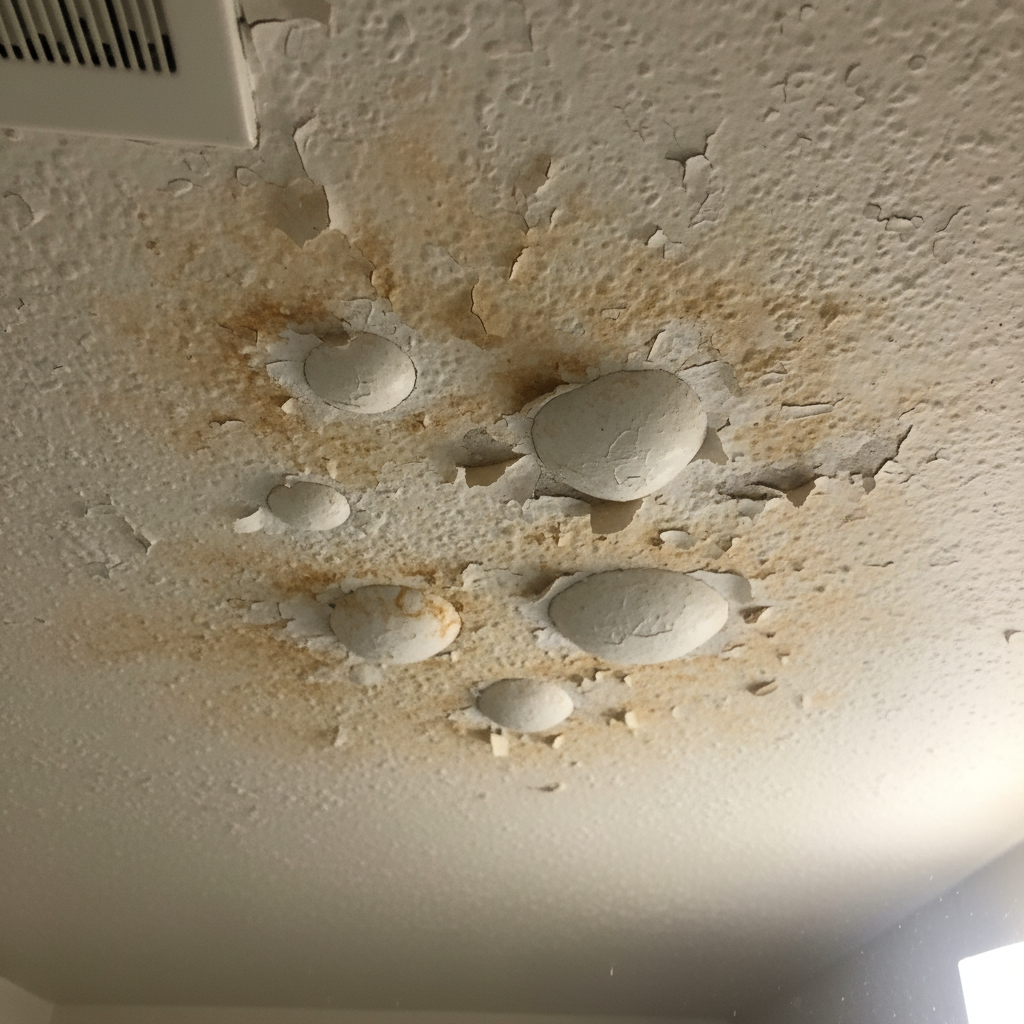
- Excess humidity and condensation: Frequent hot showers in a poorly ventilated bathroom trap moisture against the ceiling. Over time, this moisture causes the paint to lift and form bubbles.
- Active water leaks: Plumbing leaks, roof leaks, or water from a shower/tub enclosure above can saturate the drywall or plaster. Paint bubbles often appear where water intrusion is present.
- Poor surface preparation or incompatible products: Painting over glossy paint without proper sanding or primer, or using the wrong type of paint (non-mildew-resistant) in bathrooms, can lead to adhesion failure and bubbling.
- Mold or mildew growth: Microbial growth underneath the paint weakens adhesion and can push the paint up in uneven patches.
How to diagnose the cause
Before you start scraping and repainting, diagnose whether the bubbling is due to moisture from humidity, a leak, or just paint failure.
- Look for water stains or discoloration: Brownish or yellow stains often indicate a leak, while fresh white bubbling without staining may indicate condensation.
- Check when bubbles appear or get worse: If bubbling worsens after heavy rain or when a fixture is used upstairs, suspect a leak. If it follows long hot showers, suspect humidity.
- Perform a touch and probe test: Press a screwdriver into the bubbed area. Soft, crumbly drywall means soaked material; firm but loose paint suggests adhesive failure.
- Use a moisture meter (optional): This can help confirm elevated moisture levels in the ceiling material.
- Inspect plumbing and roof areas: If a bathroom is under another bathroom or beneath an attic, check pipes, flashing, and roof penetrations.
Safety first: what to prepare before repair
Whenever you work overhead, take basic safety and health precautions.
- Turn off electricity to any fixtures in the ceiling area before working near light fixtures.
- Wear safety glasses, a dust mask (N95 recommended), and gloves.
- Use a stable ladder or step stool. Keep your work area well lit.
- If you suspect mold across a large area (more than about 10 square feet), follow CDC/EPA guidance and consider professional remediation.
Tools and materials you’ll need
Basic DIY repair supplies for most bubbling paint issues:
- Ladder, safety glasses, N95 mask, gloves
- Paint scraper, putty knife, wire brush
- Medium and fine-grit sandpaper
- Patch compound or joint compound
- Drywall saw (for removing damaged drywall)
- Stain-blocking primer (shellac- or oil-based recommended) such as a BIN or Zinsser-type product
- High-quality latex bathroom paint or mildew-resistant semi-gloss/satin enamel
- Anti-mildew cleaner (or diluted bleach solution) and sponges for cleaning
- Painter’s tape, drop cloths, paint roller with extension pole, brush
Step-by-step DIY repair: small bubbling areas (cosmetic)
For small, dry bubbles where the ceiling material underneath is sound:
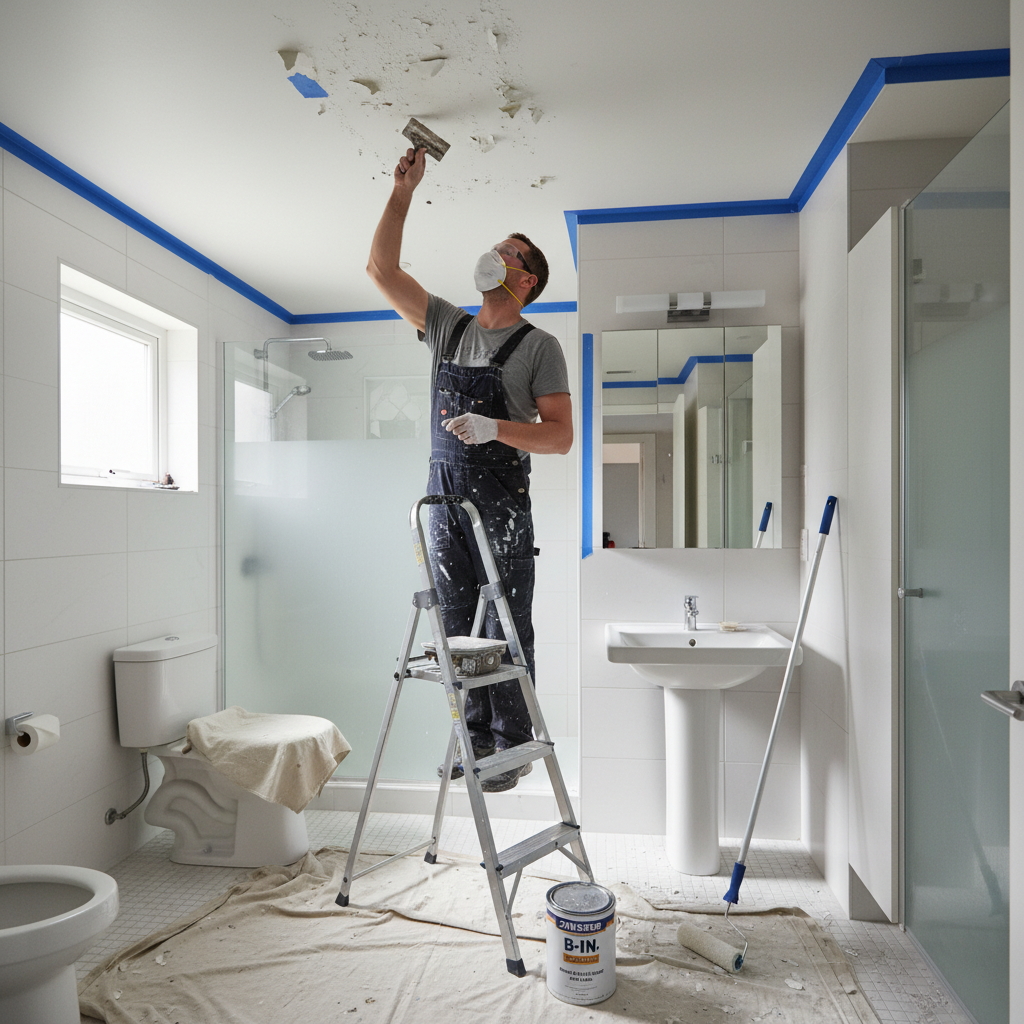
- Prep the area: Put down drop cloths and protect fixtures. Ensure the room is ventilated.
- Remove loose paint: Use a scraper or putty knife to lift away all bubbled and loose paint. Feather the edges back to sound paint.
- Clean the surface: Wipe with a damp cloth and an anti-mildew cleaner if mildew is present. Rinse and let dry thoroughly.
- Sand: Smooth the edges with medium then fine sandpaper so the patch blends into the surrounding ceiling.
- Prime: Apply a stain-blocking primer to the patched area — shellac or oil-based primers work best for sealing any stains and ensuring adhesion.
- Patch (if needed): If there are shallow depressions, apply joint compound, sand smooth after drying, then prime the patched area.
- Repaint: Use a quality bathroom paint with mildew resistance and apply at least two coats following the manufacturer’s drying recommendations.
Step-by-step repair: large or wet damage (structural or leak-related)
If drywall is soft, sagging, or the bubbles keep returning, a more thorough repair is required.
- Find and stop the source of water: Fix the leak—whether it’s plumbing, roofing, or condensation—before you repair the ceiling.
- Remove damaged material: Cut out wet or crumbling drywall back to the studs. Dispose of saturated insulation if present.
- Dry the cavity: Use fans and dehumidifiers until the framing and remaining drywall are dry; this can take days.
- Treat mold if present: Scrub small mold patches with a commercial cleaner or a diluted bleach solution (1 cup bleach to 1 gallon water), wearing protective gear. For large infestation, hire a pro.
- Replace drywall and tape joints: Install new drywall, tape and compound seams, sand smooth.
- Prime and paint: Use a stain-blocking primer over all repaired surfaces and then apply mildew-resistant paint.
Which primer and paint should you use?
For durability and moisture resistance in bathrooms:
- Primer: Choose a shellac- or oil-based stain-blocking primer to seal water stains and ensure adhesion. These are excellent at blocking tannin and water discoloration.
- Paint: Use a high-quality 100% acrylic latex paint formulated for bathrooms or kitchens; select a semi-gloss or satin finish that tolerates moisture and is easier to clean. Many brands offer mildew-resistant formulations.
Cost and time estimates
Costs vary depending on scope:
- Small cosmetic repair: $30–$150 in materials; a few hours to one day of work.
- Moderate repair with drywall patching: $150–$600 in materials and possible professional labor; 1–3 days depending on drying times.
- Major damage from leaks (plumbing/roof replacement, insulation, full drywall): $1,000–$5,000+ depending on extent and contractor rates.
DIYers save on labor but must ensure the root cause (e.g., leak) is fully resolved to avoid repeated repairs.
Prevention: how to stop paint from bubbling again
Prevention is mostly about controlling moisture and using the right products:
- Install or upgrade ventilation: An exhaust fan sized for your bathroom should move at least 50 cubic feet per minute (CFM) for small baths and more for larger ones. Run the fan during and for 20–30 minutes after showering.
- Improve airflow: Leave doors or windows ajar after showering to disperse steam.
- Use mildew-resistant paint: Repaint ceilings every 5–10 years depending on wear and humidity.
- Lower shower temperature or shorten showers to reduce steam volume.
- Inspect plumbing and roof regularly: Catch small leaks before they saturate ceilings.
- Use proper surface prep: When repainting, sand glossy surfaces and always prime before painting.
When to hire a professional
Call a pro in these situations:
- Active leaks you cannot locate or fix (plumbing, roof, or structural leaks).
- Extensive mold growth (larger than about 10 square feet) — professionals follow EPA/CDC remediation standards.
- Structural sagging, rotten joists, or widespread ceiling collapse risk.
- You lack the tools, time, or experience to perform safe drywall replacement.
Quick troubleshooting checklist
- If bubbles appear only after showers: improve ventilation and use mildew-resistant paint.
- If bubbles coincide with rainfall or upstairs bathroom use: inspect for a leak.
- If paint peels but ceiling is dry: likely poor adhesion—remove loose paint, prime, and repaint.
- If mold is visible or persistent musty odor: treat for mold and confirm the area is dry before repair.
Useful resources
For guidance on choosing the right paint and tips for painting bathrooms, see Better Homes & Gardens’ painting section for expert tips and product recommendations: Better Homes & Gardens — Painting Tips.
Frequently asked questions (FAQ)
Q: Can I paint over bubbled paint without removing it?
A: No. Painting over bubbled paint traps moisture and prevents proper adhesion; loose paint must be removed and the surface prepared before repainting.
Q: Will a dehumidifier alone stop bubbling?
A: A dehumidifier helps reduce humidity but will not fix existing paint damage or stop bubbling if there’s an active leak. Combine dehumidification with improved ventilation and repairs.
Q: How long should I let the ceiling dry before patching?
A: Drying time varies—at least 24–72 hours with fans/dehumidifiers for small patches, longer (days) for wet cavities. Ensure the material reaches normal moisture levels using a moisture meter if unsure.
Q: Is bleach the best way to remove mold from a ceiling?
A: Bleach can remove surface mold on porous materials but may not penetrate to kill mold roots. For small areas, a commercial mold cleaner or a diluted bleach solution (with caution and ventilation) can be used. For extensive mold or porous materials, consult a professional.
Q: How do I choose the right exhaust fan?
A: Choose a fan rated by CFM for the bathroom size. As a general rule, 1 CFM per square foot is a baseline, but bathrooms with tubs/showers should have higher airflow. Consider fans with timers and humidity sensors for better control.
Final checklist before you start
- Confirm cause (humidity vs. leak).
- Fix the leak and allow full drying if moisture intrusion occurred.
- Remove loose paint and damaged drywall, then clean and prime.
- Use mildew-resistant paint and ensure proper ventilation going forward.
Dealing with paint bubbling on bathroom ceiling is often straightforward when it’s caused by humidity and cosmetic paint failure — but if you suspect a leak or structural damage, prioritize stopping the water source and consider hiring a professional. With the right diagnosis, materials, and preventative measures, you can restore a clean, durable finish and avoid repeated repairs.
More reading
For additional tips on bathroom ventilation and moisture control, check our guide to bathroom ventilation and routine home maintenance to keep ceilings and walls dry and mold-free.


