Noticing your chimney leaking during storms is stressful — water stains, damp masonry, and puddles on the hearth are signs that rain is finding its way into places it shouldn’t. This guide explains how to identify the source, perform safe temporary fixes during bad weather, make permanent repairs, and keep your chimney dry year-round so storms stop turning into costly home repairs.
Why a Chimney Leaks in Storms
Chimneys are complex structures made of multiple materials (brick, mortar, metal, flashing, caps) and all points where materials join are potential entry points for water. During storms, driving rain, wind-driven water, and rapid freeze-thaw cycles exploit weak spots. Common causes include:
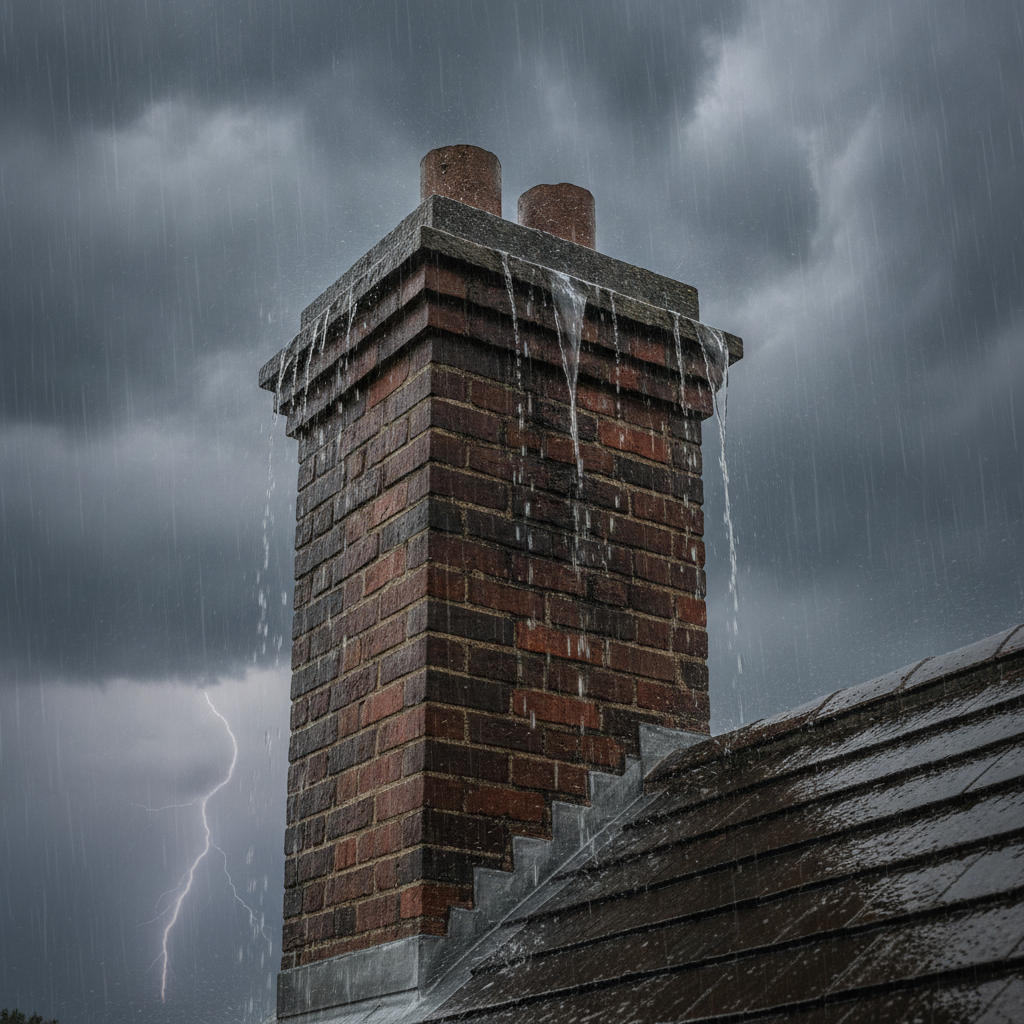
- Damaged or missing flashing: Flashing is the metal seal between the chimney and roof. When it’s cracked, corroded, or improperly installed, water can run under shingles and into the chimney base.
- Cracked chimney crown: The crown (a concrete or mortar cap at the top of a masonry chimney) can crack from weathering and let water run down the masonry.
- No chimney cap or damaged cap: A missing cap allows rain, birds, and debris into the flue. Caps with cracked mortar or missing mesh let spray in during windy storms.
- Deteriorated mortar joints (tuckpointing failure): Mortar can erode or spall, allowing moisture to penetrate the brickwork.
- Flue liner issues: A cracked or missing flue liner can permit water entry and accelerate liner deterioration.
- Chase cover or prefabricated chase problems: For factory-built chimneys, a failed chase cover can be the culprit.
- Roof problems near the chimney: Broken shingles, blocked gutters, or sagging valleys adjacent to the chimney can divert water into the chimney structure.
Signs Your Chimney Is Leaking (Outside and Inside)
Knowing where to look helps you make the right repair decisions quickly.
Exterior signs
- Streaks or efflorescence (white mineral deposits) on chimney masonry
- Cracks in the crown or missing crown mortar
- Rust or separation around flashing
- Missing chimney cap or visible holes in the cap mesh
- Spalling bricks (flaking or powdering surface)
Interior signs
- Water dripping into the fireplace or onto the hearth during rain
- Water stains on ceilings or walls near the chimney chase
- Mildew or musty smells in the chimney or nearby rooms
- Puddles in the firebox, wet logs, or damp insulation in attic space
- Smoke not drafting properly (a wet flue can affect draft)
Immediate Actions During a Storm
When you discover a leak while it’s raining, prioritize safety and minimize interior damage:
- Contain the water: Place buckets or pans under drips and lay down towels or a tarp to protect floors and furniture.
- Move valuables away: Remove rugs, electronics, and decor from the affected area.
- Dry the fireplace: If water has collected in the firebox, remove wet materials (wood, ashes) once it’s safe and dry the area with towels and fans when rain stops.
- Temporary sealing (if safe to access): Apply roof cement or a roll of rubberized roofing tape to the flashing or visible cracks for a short-term patch. Only attempt rooftop work if conditions and your experience make it safe — otherwise wait until the storm passes and call a pro.
- Turn off electricals if necessary: If water has reached electrical fixtures or outlets, switch off the breaker and call an electrician.
How to Diagnose the Leak After the Storm
Perform a careful inspection once the weather clears, or hire a certified chimney professional or roofer. A thorough diagnostic checklist:
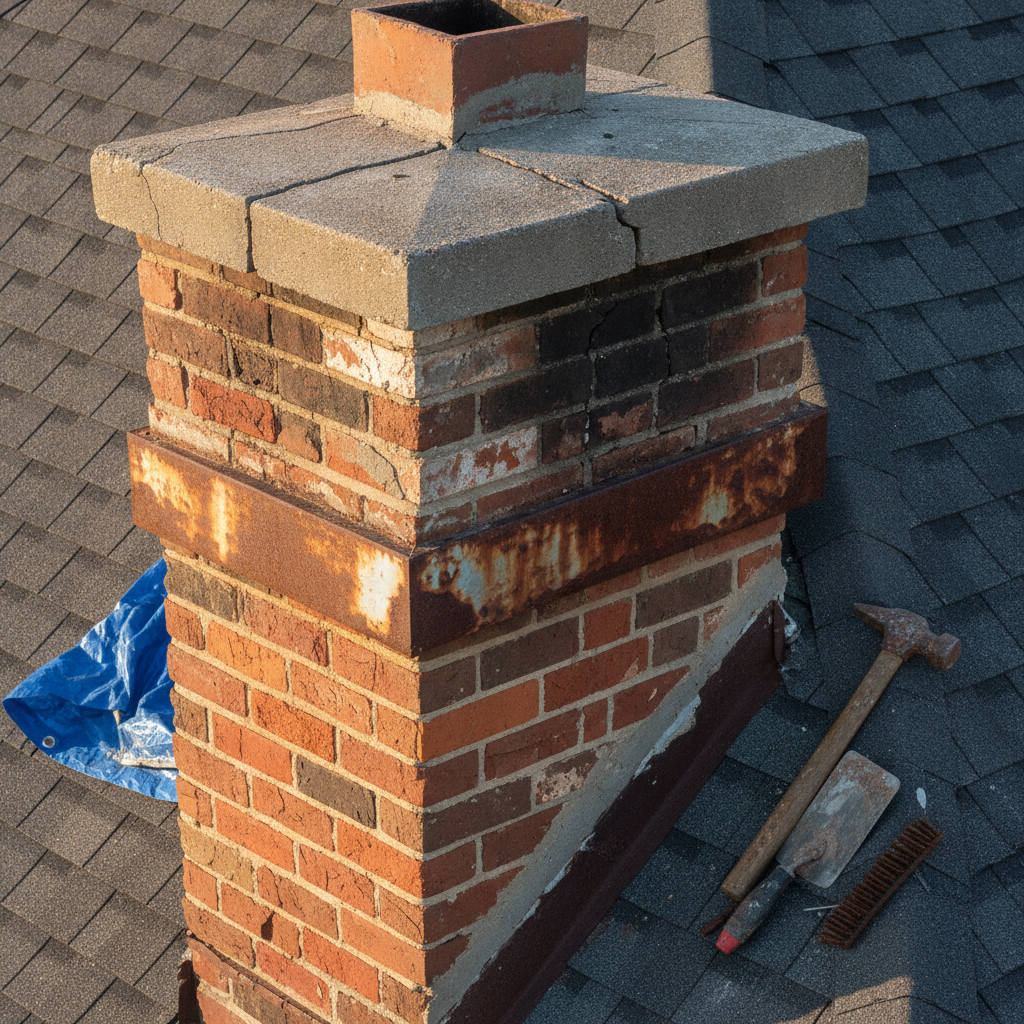
- Inspect the crown for cracks and detachment. Small hairline cracks are common; wide cracks or crumbling edges indicate repair or rebuild.
- Check flashing for gaps, rust, and sealant failure. Lift shingles where flashing meets the shingles to inspect for trapped water.
- Look for missing mortar or gaps in masonry. Use a flashlight inside the flue to look for cracks and water stains.
- Confirm the chimney cap is in place, correctly sized, and that mesh is intact.
- Examine attic space and roof deck near the chimney for stains, wet insulation, or mold.
- Consider a water test: A professional can perform a controlled hose test to pinpoint where water is entering.
Permanent Repairs and What They Cost
Repair cost varies by region, chimney type, and severity. Use these estimates as general guidance; get written quotes from licensed contractors for accuracy.
- Replace or repair flashing: $300–$1,200. Properly integrated flashing often solves roof-chimney leaks.
- Rebuild or repair chimney crown: $300–$1,800. Recasting or installing a concrete crown with proper slope and drip edge is essential.
- Install or replace chimney cap: $100–$600. Stainless steel caps last longer than galvanized caps.
- Tuckpointing (replacing mortar joints): $500–$3,000 depending on area and extent.
- Install a liner or relining: $1,000–$4,000. A relined flue resists water and improves safety for masonry chimneys used for wood-burning appliances.
- Chase cover replacement (for prefabricated chimneys): $300–$1,000.
- Waterproofing (breathable masonry sealer): $200–$800 for a typical chimney. Use siloxane-based breathable treatments rather than cementitious coatings.
Best Waterproofing and Materials
Choosing the right products prevents further damage while allowing trapped moisture to escape:
- Breathable silicone-based water repellents: These penetrate masonry and repel liquid water while allowing vapor to escape, reducing freeze-thaw damage.
- Avoid non-breathable coatings: Tar paints and cementitious parging seal water in and accelerate brick deterioration.
- Stainless steel flashing and caps: Resist corrosion and last longer in wet climates.
- Proper crown materials: Use a reinforced, sloped concrete crown with a drip edge, or specially designed crown products to prevent water running down the masonry face.
Prevention: Maintenance Checklist to Keep Your Chimney Dry
Proactive maintenance prevents most storm-related leaks:
- Annual chimney inspection by a certified technician; schedule pre-winter and post-storm checks.
- Clean the chimney and flue annually if you burn wood; creosote buildup holds moisture.
- Inspect and maintain flashing, gutters, and surrounding roof shingles.
- Install or maintain a durable chimney cap with mesh to keep out rain and animals.
- Apply a breathable water repellent every 3–5 years on exposed brick chimneys in rainy climates.
- Address small masonry and mortar problems early—repoint mortar joints when cracks appear.
- Trim trees near the chimney to minimize debris and reduce moisture buildup.
When to Call a Professional
Some situations require trained professionals:
- Extensive masonry damage (spalling bricks, large cracks, leaning chimney)
- Repeated leaks after repairs
- When a hole or gap in flashing is large or flashing is integrated under shingles
- Possible structural issues (chimney separation from house, sagging)
- Concerns about carbon monoxide, persistent smoke backflow, or an unusable flue
Look for chimney masons certified by organizations such as the Chimney Safety Institute of America (CSIA) or roofers with local licensing and insurance. Ask for references, proof of insurance, and written warranties before hiring.
Health and Safety Concerns
Water in the chimney can cause more than property damage:
- Mold and mildew growth in walls and attic insulation can trigger respiratory issues.
- Wet creosote increases the risk of chimney fires when you next use the fireplace.
- Buildup of moisture can accelerate deterioration of the flue liner, increasing carbon monoxide risk.
- Electrical hazards if water reaches wiring near the chimney chase or attic junctions.
DIY Repairs You Can Consider (and When to Avoid)
Small homeowners’ projects can help, but know your limits:
- Safe DIY: Cleaning debris from the chimney top, replacing a chimney cap, applying breathable water repellent to dry masonry, and minor tuckpointing on low sections that are safely accessible.
- Avoid DIY: Working on high roofs during storms, replacing integrated flashing under shingles without roof experience, rebuilding crowns or relining flues — leave these to licensed professionals.
Real-World Example: Finding a Hidden Flashing Leak
A homeowner noticed water stains on the living room ceiling after heavy winds and rain. A professional performed a hose test and discovered water running down between the chimney and roofing underlayment — the metal step flashing had separated from the chimney due to settled mortar and missing counter-flashing. The repair required removing shingles around the chimney, installing new stainless steel step and counter flashing, and repointing the lower mortar joints. The fix stopped leaks and protected the roof deck from further rot.
How Climate Affects Chimney Leaks
Coastal and northern climates face different challenges:
- Coastal areas: Wind-driven rain and salt can corrode metal flashing faster; choose stainless steel flashings and caps.
- Northern climates: Freeze-thaw cycles make masonry more susceptible to spalling; breathable water repellents and prompt mortar repairs are crucial.
- Humid climates: Persistent moisture raises mold risk and accelerates mortar erosion—annual inspections recommended.
Further Reading and Resources
For trusted practical tips on home repairs and chimney care, Better Homes & Gardens offers approachable guides on chimney maintenance and related roofing topics: Better Homes & Gardens: How to Repair a Chimney.
FAQ — Frequently Asked Questions
Why does my chimney only leak during storms?
Storms increase driving rain and wind, forcing water into small openings that go unnoticed in light rain. Strong winds can push water under caps, through mesh, or under damaged flashing that wouldn’t let water in under calm conditions.
Can I use silicone caulk to seal chimney flashing?
Silicone temporarily seals small gaps but doesn’t replace proper flashing. It’s not a long-term solution because it can peel, trap moisture, and may not adhere well to corroded metal or aged roofing materials. For permanent repair, replace or properly reseal flashing and integrate it under shingles.
How long does a chimney crown last?
With proper materials and construction, a concrete chimney crown can last 10–30+ years. Poorly mixed or improperly formed crowns deteriorate faster. Regular inspection and repairs extend life significantly.
Does waterproofing a chimney cause trapped moisture inside?
Not if you use a breathable water repellent (siloxane-based). Breathable products repel liquid water but allow vapor to escape. Avoid non-breathable paints or tar coatings, which trap moisture and cause masonry damage.
How much will it cost to fix a leaking chimney?
Small fixes like caps or minor repointing can be a few hundred dollars; more extensive work like flashing replacement, crown rebuilds, or relining can range from $1,000 to $4,000 or more. Get at least two written estimates and ensure contractors are insured and experienced with chimney work.
Practical Homeowner’s Checklist After a Storm Leak
- Remove water and dry interior spaces; dehumidify if needed.
- Document damage with photos for insurance.
- Schedule a professional chimney inspection (level 2 if there are interior signs).
- Check attic/roof decking for rot; involve a roofer if decking is compromised.
- Repair flashing, crown, cap, and mortar promptly to prevent recurrence.
- Apply breathable water repellent once repaired and dry.
Storms are a reminder that your home’s exterior systems work together. Tackling a chimney leak promptly preserves masonry, prevents mold, and keeps the fireplace usable and safe. If you’re planning larger renovations or want to rethink your living spaces while solving structural issues, you may find additional inspiration and guidance in How to Design A Comfortable Modern Living Space.
If you’d like more practical home maintenance guides or step-by-step checklists for seasonal care, explore trusted home improvement sites and consult certified chimney and roofing professionals for personalized assessments.
How to Design A Comfortable Modern Living Space