Floorboards Lifting After Water Spill: What to Do Now, How to Repair, and How to Prevent It
Floorboards lifting after water spill is a common and stressful household problem — but with the right steps you can minimize damage, dry materials safely, and decide whether a DIY fix or professional repair is needed. This guide walks you through immediate actions, assessment, repair options for different flooring types, prevention tips, cost expectations, and when to call an expert.
Why floorboards lift after a water spill
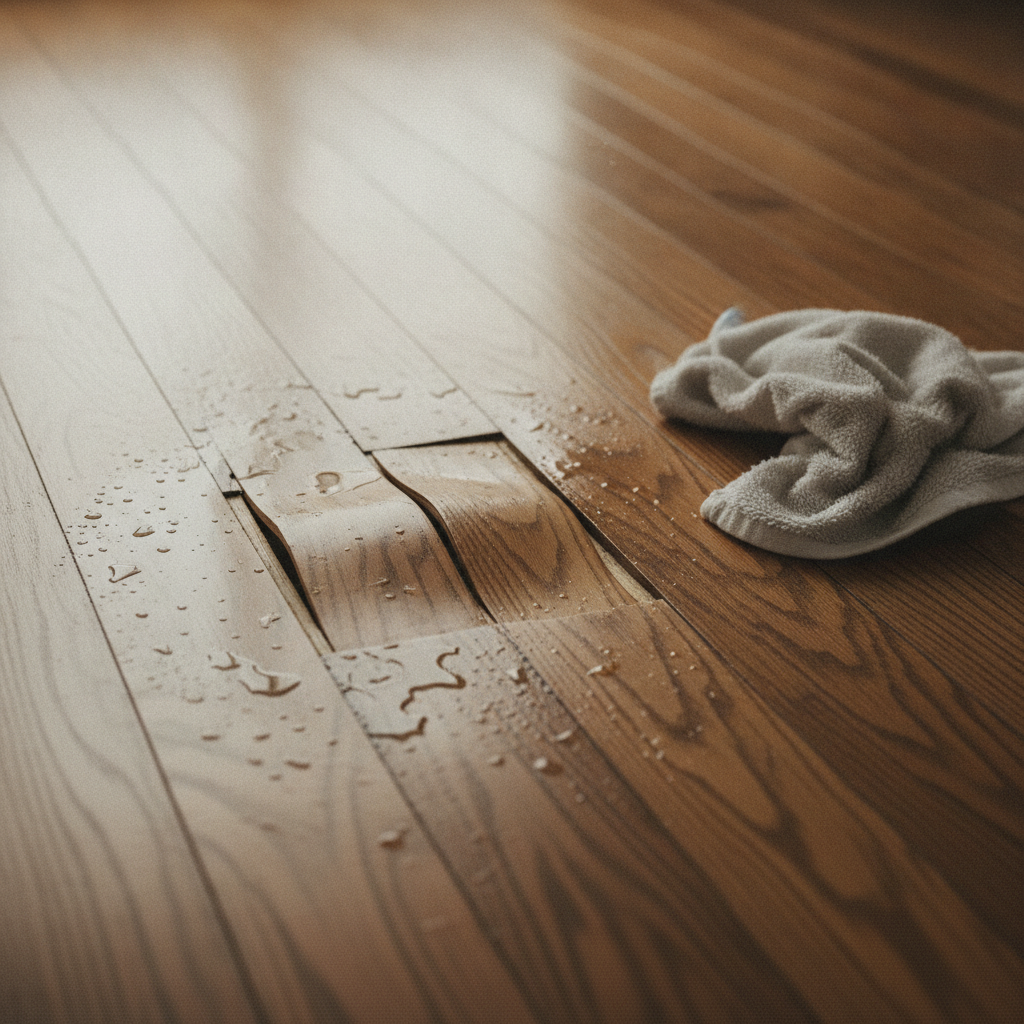
Wood and many engineered flooring materials absorb moisture. When they take on water they expand, and when drying is uneven or too rapid they can cup, warp, buckle or lift from the subfloor. Adhesives may fail, tongue-and-groove joints can separate, and finishes can blister—leading to visible lifting of floorboards. The damage depends on flooring type, how long the boards were wet, the amount of water, and the subfloor condition.
Common mechanisms of lifting
- Swelling of wood fibers causes expansion and pressure against adjacent boards.
- Adhesive breakdown for glued-down floors allows boards to lift.
- Delamination in engineered flooring or vinyl leads to layers separating and warping.
- Trapped moisture in subfloor or underlayment can push boards upward.
- Fast drying on one side only (surface dry, underside wet) creates cupping and arching.
First 30–60 minutes: immediate steps to limit damage
Act quickly — the faster you remove water and start drying, the greater the chance of saving the boards.
- Safety first: turn off electricity in the affected area if water reached outlets or appliances.
- Stop the source of water. Fix leaks, shut off valves, or remove obvious standing water with towels or a wet vacuum.
- Remove rugs, furniture, and anything that traps moisture. Move items to a dry area.
- Blot — don’t scrub abrasive surfaces. Use clean absorbent towels or a wet/dry vacuum to remove as much surface water as possible.
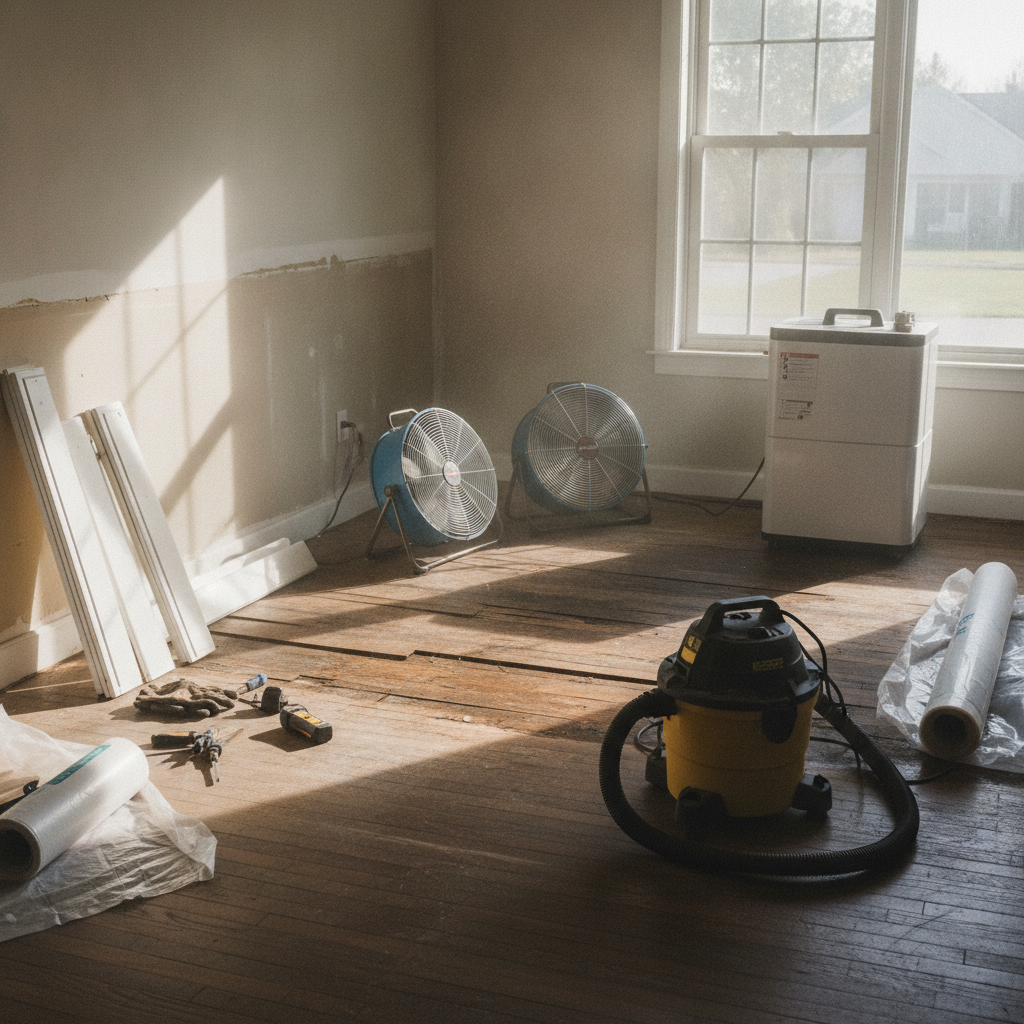
- Open windows and doors to increase ventilation if weather permits. Place fans to move air across the floor. Set up a dehumidifier as soon as possible.
How to dry floorboards safely
Improper drying can make lifting worse. Slow, even drying is usually better than blasting with extreme heat.
Recommended drying approach
- Remove moisture thoroughly from the surface and edges with towels or a wet/dry vacuum.
- Use multiple fans to circulate air across the floor. Point them along the length of the boards to promote airflow between seams.
- Run a dehumidifier to pull water vapor from the air — this accelerates natural drying without overheating the wood.
- If baseboards or transition strips allow, carefully lift an edge to check for trapped water and to allow ventilation underneath.
- Avoid heat guns or high heat from space heaters directly on the wood; they can dry the surface too fast and cause cracking or cupping.
Tools that help
- Moisture meter (pin or pinless) to monitor moisture levels in boards and subfloor.
- Wet/dry shop vacuum for standing water removal.
- Commercial drying fans and desiccant or refrigerant dehumidifiers for severe cases.
- Floor lifts or pry bars (for professionals) if boards need to be removed to dry the subfloor.
Assessing the damage: what to look for
After initial drying, inspect closely to decide on repairs.
- Visual signs: raised seams, buckled boards, cupping (edges higher than center), crowning (center higher than edges), discoloration, or finish blistering.
- Structural signs: spongy or soft spots indicating subfloor or joist damage.
- Odor or visible mold: indicates prolonged moisture and possible biological growth.
- Loose boards: check if boards can be re-seated or if they separate from adhesive.
Repair options by flooring type
Solid hardwood
Solid hardwood can often be repaired if damage is limited and the boards have not warped irreversibly.
- Minor lifting: after thorough drying, you may be able to re-seat boards, secure with finishing nails, and sand/refinish the surface.
- Cupping or mild warping: sanding and refinishing can remove some minor cupping, but only after boards are fully dry and moisture levels are stable.
- Severe buckling or splitting: affected boards generally need replacement. If many boards are damaged, you may replace a whole section and sand for color match.
Engineered hardwood
Engineered planks fare better against moisture because of their plywood-like core, but top-layer veneer can delaminate.
- Surface swelling: can sometimes be sanded and refinished if veneer is thick enough.
- Delamination: when layers separate, boards should be replaced — glue repairs rarely restore original strength.
- Floating engineered floors: these can often be lifted, dried underneath, and relaid if the locking mechanism is intact and boards didn’t deform.
Laminate
Laminate flooring is vulnerable to water seeping into the core, causing permanent swelling. In most cases replacement is the only option for damaged planks.
Vinyl and LVT (luxury vinyl tile)
Vinyl can lift when adhesive fails or if moisture reaches the subfloor. Some vinyl can be re-adhered; others require panel/tile replacement. Waterproof luxury vinyl often survives short spills better than wood.
DIY repair steps for minor lifting
Only attempt repairs if you are confident the floor is dry, the damage is small, and you have basic carpentry tools.
- Confirm moisture levels are back to normal with a moisture meter (follow manufacturer guidelines).
- Remove lifted boards carefully if needed. Clean and dry the subfloor thoroughly.
- For glued floors, clean old adhesive and apply new recommended adhesive. Clamp or weight the board down until cured.
- For nailed floors, re-nail into joists with finishing nails; countersink and fill holes before finishing.
- Sand and refinish to blend repaired area with surrounding floor (match stain and sheen carefully).
When to call a professional
Some situations need a flooring contractor, restoration company, or structural professional:
- Moisture persisted for more than 48–72 hours or water was contaminated (sewage, floodwater).
- Large areas (several square meters/feet) are affected.
- Subfloor or joists appear damaged, soft, or moldy.
- Insurance claim or documentation is needed. Professionals can provide reports and mitigation records.
- Specialty floors (wide plank, reclaimed wood, or expensive engineered systems) where correct restoration is critical.
Costs and timeframes
Costs vary widely by flooring type, region, and severity.
- Small DIY repairs (re-glue, re-nail, sand/finish): $50–$500 for materials and tools if you do the work.
- Professional repair for a few boards: $200–$800 depending on access and finish match.
- Partial replacement (room-sized): $800–$3,000 depending on materials and labor.
- Full replacement of damaged flooring: $1,500–$10,000+ depending on square footage and material quality.
Time to resolve: immediate cleanup in hours; drying an affected area often takes 24–72 hours with proper equipment. Severe cases where subfloor must be replaced can take days to weeks including drying and rebuild.
Insurance and documentation
Take photos and notes immediately, keep receipts for emergency repairs or equipment rentals, and contact your homeowner’s insurer to check coverage. Wear protective gear and avoid re-entering an area with significant structural or electrical risk until cleared. If water was contaminated (sewage, flood) do not attempt DIY repairs — hire professionals and follow health guidance.
Prevention: reduce future risk of lifting floorboards
- Wipe up spills immediately—never let water sit on wood floors.
- Use mats near sinks, dishwashers, entrances, and laundry machines.
- Maintain indoor humidity between 30–50% to avoid seasonal expansion and contraction.
- Ensure appliances with water lines (dishwasher, refrigerator, washing machine) have secure connections and drip pans where appropriate.
- Seal floors and refinish as recommended to keep a protective barrier against moisture.
- Consider water sensors near vulnerable areas to get early alerts.
- When installing new wood, allow proper acclimation time for boards to match indoor humidity and temperature.
Mold risk and health considerations
Prolonged moisture creates ideal conditions for mold. Visible mold or persistent musty odor requires professional remediation, especially for contaminated water. For guidance on cleaning and safety best practices for water-damaged spaces, consult reputable home-care resources such as Better Homes & Gardens for additional tips and safety advice: Better Homes & Gardens.
Frequently Asked Questions (FAQs)
How long does it take for floorboards to dry after a spill?
Small spills that are wiped up right away can dry in hours. If water soaked into seams or under the boards, drying typically takes 24–72 hours with fans and a dehumidifier. Large or concealed wet areas may require days or longer and sometimes professional drying equipment.
Will my floor go back to normal once it dries?
Sometimes — if the boards only swelled slightly and the finish remains intact, they may settle back. However, cupping, buckling, or delamination are often permanent and require sanding, repair, or replacement.
Can I sand out water stains and lift myself?
Sanding can correct surface discoloration and minor texture changes, but only after the wood is fully dry and moisture content is stable. Deep cupping or structural separation cannot be fixed with sanding alone and may need board replacement.
Is a dehumidifier enough or do I need an industrial dryer?
For small spills, a household dehumidifier and fans are usually sufficient. For larger incidents, contaminated water, or when moisture has migrated into subflooring or walls, professional dryers and extraction equipment are recommended.
Will insurance cover water-damaged floors?
Coverage depends on your policy and the source of water. Sudden accidental leaks (like a burst pipe) are commonly covered under standard homeowners insurance; gradual damage from neglected maintenance often is not. Document damage and contact your insurer promptly.
Quick troubleshooting checklist
- Stop the water source and ensure electrical safety.
- Remove standing water and move furniture away.
- Start fans and a dehumidifier immediately.
- Monitor moisture with a moisture meter when possible.
- Assess lifting: if small, dry and repair; if extensive, call a pro.
- Document damage for insurance and remediation purposes.
Final thoughts
Floorboards lifting after water spill can range from a minor inconvenience to a costly repair. Fast action, careful drying, and accurate assessment help you salvage as much flooring as possible. When in doubt—especially with extensive water damage, contamination, or mold—bring in a restoration professional to protect your home and health.
If you’d like more ideas on designing resilient, comfortable living spaces and integrating practical flooring choices, explore further resources and guidance like How to Design A Comfortable Modern Living Space: How to Design A Comfortable Modern Living Space.