Floorboards lifting after water spill is one of the most stressful home incidents—what begins as a small puddle can quickly lead to buckling, cupping, or gaps that ruin the look and stability of wood floors. Knowing how to act fast, evaluate damage, and choose the right repair approach will save you time and money. This guide walks you through step-by-step actions, DIY fixes, when to call a pro, cost expectations, and long-term prevention strategies to keep your floors stable and beautiful.
Why do floorboards lift after a water spill?
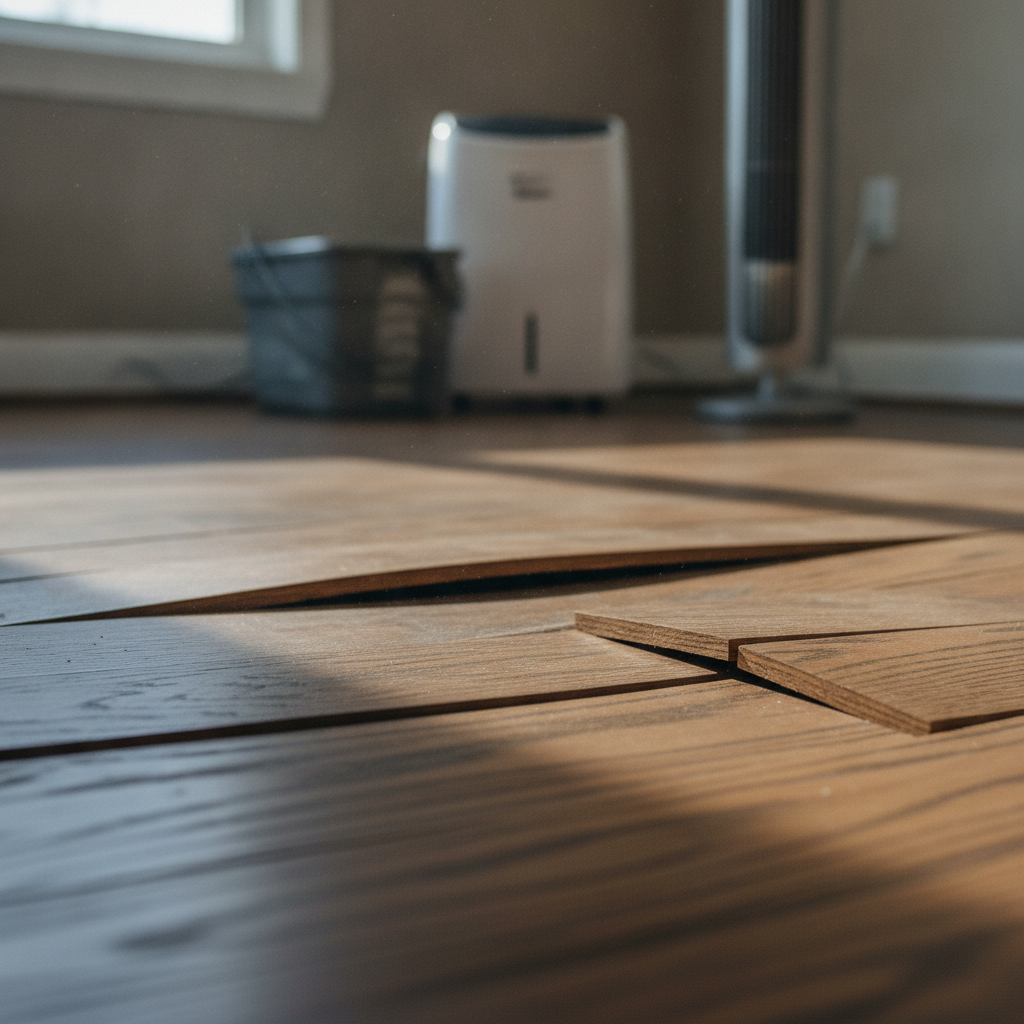
Wood is hygroscopic, meaning it absorbs and releases moisture from its environment. When floorboards encounter excess water—whether from a spill, leak, or flood—the wood fibers swell. If moisture is uneven or the subfloor holds water, some boards expand more than others, causing lifting, cupping (edges higher than centers), crowning (centers higher than edges), or buckling (boards lifting entirely). The problem is worse when boards were installed tightly without expansion gaps, when subflooring traps moisture, or when prolonged exposure allows mold and rot to develop.
Immediate steps to take after a water spill
Speed matters. The faster you act, the better the chance of preventing permanent damage.
- Stop the source. Fix leaks, turn off water lines, or remove standing water using towels, mops, or a wet vacuum.
- Remove furniture and rugs. Lift any items that could trap moisture against the floor.
- Improve ventilation. Open windows and doors to promote air circulation.
- Use fans and dehumidifiers. Point high-capacity fans across the floor and run a dehumidifier to speed drying. For large spills or flooding, consider commercial drying equipment.
- Document the damage. Take photos for insurance claims and to track progress during drying.
Assessing the damage: what to look for
Once the initial cleanup is underway, evaluate how seriously the floorboards have been affected. Look for these signs:
- Visual warping: boards that look raised, curved, or separated.
- Tactile changes: soft, spongy, or springy spots indicating subfloor or joist problems.
- Gaps or buckling along seams and near walls.
- Discoloration, staining, or lingering damp odor—possible mold or rot.
- Loose nail heads or popping sounds when stepped on.
If damage is limited to a few boards and the subfloor is dry and structurally sound, a DIY repair is often feasible. Widespread buckling, persistent moisture, or signs of mold call for professional assessment.
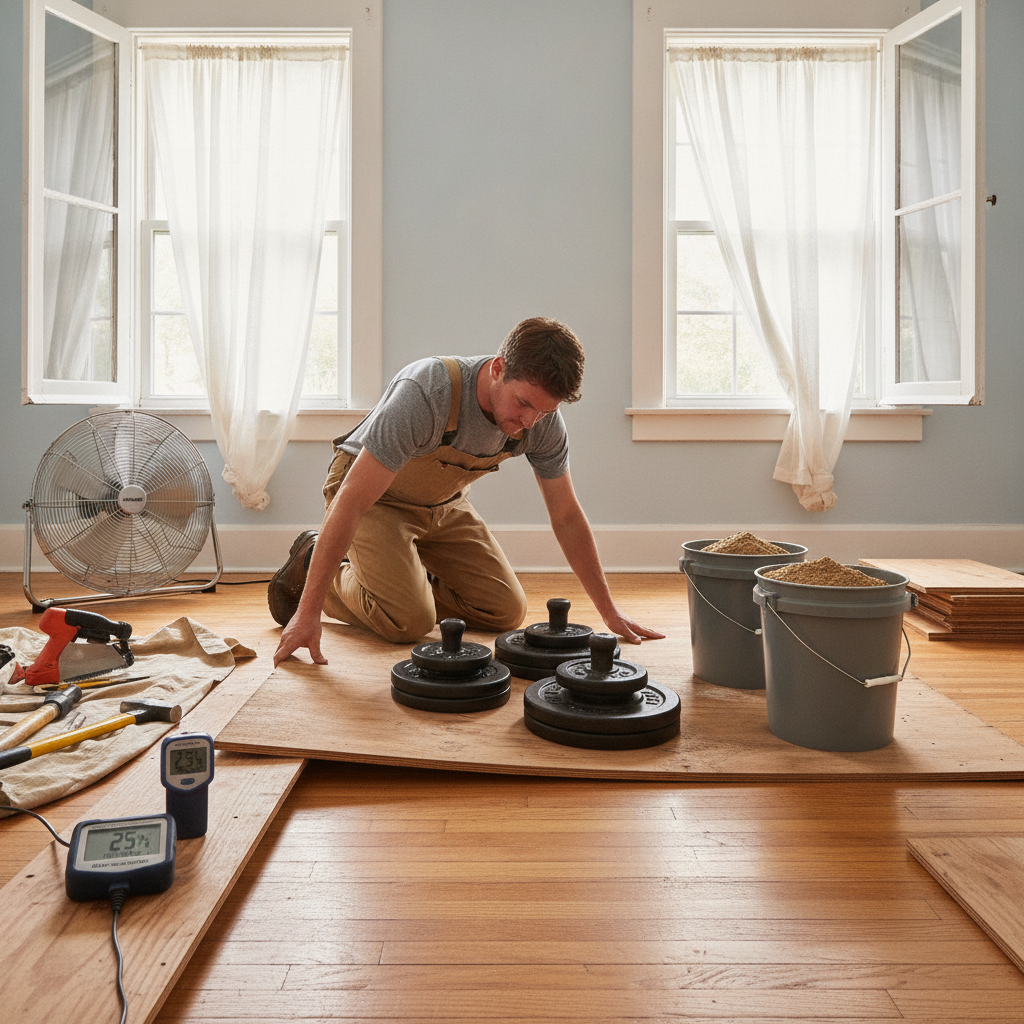
DIY fixes for minor lifting and cupping
For small areas with no structural damage, try these controlled steps.
1. Continue drying until equilibrium
Often, boards will settle back once moisture levels normalize. Keep fans and dehumidifiers running 48–72 hours beyond surface dryness. Monitor progress.
2. Apply weight or clamps for slight buckling
If a single board or small area has lifted and is not cracked, you may be able to flatten it with weight. Place a flat board or sheet of plywood over the affected area and add 20–40 lbs of evenly distributed weight. Leave weights for several days while drying. For plank removal and reinstallation, specialized floor clamps and straps help draw boards back together.
3. Tighten loose boards with screws
For areas where nails have popped, drive wood screws into the joists through the face of the board at inconspicuous locations (near baseboard or under furniture) and countersink the screw head. Fill holes later with wood filler and sand smooth.
4. Replace single damaged boards
If a board is cracked, severely warped, or rotten, remove and replace it. Match the plank size and finish, slide the replacement into position, and nail or glue according to floor type. For floating floors, follow manufacturer instructions for cutting and fitting.
When lifting means bigger problems: advanced signs
Consider professional help if any of the following are true:
- Large sections are buckled or lifted.
- Subfloor feels soft or has visible rot.
- Persistent damp smell or visible mold growth.
- Water reached flooring underlayment or insulation.
- Structural movement or joist issues are suspected.
Professionals can perform moisture readings, remove affected subflooring, replace joists, and ensure sanitization if mold is present.
Repair options professionals use
- Moisture mapping and hygrometer readings to determine moisture content throughout the floor system.
- Specialized drying with industrial air movers, dehumidifiers, and injection drying for under-floor moisture.
- Board replacement including careful matching, sanding, and refinishing to restore uniform appearance.
- Subfloor removal and replacement if rot has compromised structural integrity.
- Mold remediation and EPA-recommended sanitizing if required.
Costs: what to expect
Costs vary by floor type, extent of damage, and location. Approximate ranges:
- Minor repairs (tightening nails, replacing a few boards): $100–$800.
- Moderate repairs (several boards replaced, sanding/refinishing a room): $800–$3,000.
- Severe damage (subfloor or structural replacement, mold remediation): $3,000–$10,000+.
Get written estimates from at least two qualified contractors. Confirm they use moisture meters and offer a remediation plan with timelines.
Preventing floorboards from lifting in the future
Prevention centers on moisture control, good installation practices, and choosing flooring suited to your home’s environment.
- Clean spills immediately and dry the area thoroughly.
- Maintain indoor humidity between 30–50% to prevent seasonal expansion and contraction.
- Install proper expansion gaps at walls and door thresholds during installation.
- Seal hardwood floors with quality finishes, and reseal periodically.
- Choose water-tolerant materials in moisture-prone areas: engineered hardwood, luxury vinyl plank (LVP), tile, or waterproof laminate.
- Use water alarms near appliances, washers, and water heaters.
- Ensure proper exterior drainage and roof/gutter maintenance to limit water intrusion near foundations.
Material-specific tips
Solid hardwood
Solid hardwood is more susceptible to swelling because it reacts to moisture through its full thickness. Proper acclimation before installation (storing planks in the room for 48–72 hours) and leaving expansion gaps are essential.
Engineered hardwood
Engineered hardwood is more dimensionally stable due to plywood backing; it performs better in areas with fluctuating humidity and is often a safer choice for below-grade installations.
Luxury vinyl plank (LVP) and tile
LVP and tile are water-resistant or waterproof and are excellent alternatives for kitchens, bathrooms, and basements. They eliminate many of the swelling issues associated with wood.
How to dry floors safely: best practices
Effective drying reduces the chance of permanent damage and mold:
- Remove baseboards if necessary to allow airflow under edges.
- Use high-capacity fans; position them to promote cross-ventilation.
- Run dehumidifiers continuously until moisture readings are in safe range (usually below 12–15% for wood floors, but follow manufacturer or contractor guidance).
- Avoid excessive heat—rapid heating can crack or warp wood. Aim for consistent, mild airflow and humidity reduction.
Insurance and documentation
Water damage may be covered depending on your policy and the cause. Document everything: time-stamped photos, receipts for professional services, and written estimates. Contact your insurer early to report the loss and ask about preferred vendors and coverage for mitigation and repairs.
When mold is a concern
Mold can develop within 24–48 hours in a wet environment. If you see visible mold, smell mildew, or have health symptoms, stop DIY work and hire a certified mold remediation specialist. Professionals will contain the area, remove affected materials, and sanitize remaining structures per industry standards.
Quick checklist: 24–72 hours after a spill
- Remove standing water and dry the surface.
- Clear the area of furniture and rugs.
- Start high-capacity fans and a dehumidifier.
- Inspect for visible warping, buckling, or soft spots.
- Document damage for insurance.
- Call a professional if damage is widespread or mold is visible.
Resources and further reading
For general household guidance on preventing and handling water damage, Better Homes & Gardens offers practical, consumer-friendly tips on water-damaged floors and restoration techniques that can complement the steps above: how to handle water-damaged floors.
Frequently asked questions (FAQs)
Q: Will lifted floorboards go back down once they dry?
A: Sometimes minor lifting will reverse as boards dry and return to their original dimensions. However, if boards have buckled or the tongue-and-groove joints are damaged, they often require mechanical reinstallation or replacement.
Q: How long should I run a dehumidifier after a spill?
A: Continue until moisture readings are back to safe levels and the subfloor is dry—commonly 48 hours to several days for small spills, longer for larger incidents. Monitor moisture content with a meter or follow contractor guidance.
Q: Can I sand and refinish water-damaged hardwood?
A: Only after the wood is completely dry and stable. Sanding prematurely can expose compromised wood and worsen problems. A professional can advise if refinishing will restore appearance or if replacement is necessary.
Q: Is it worth repairing or should I replace the entire floor?
A: If damage is localized and subfloor is sound, repair and refinishing are usually cost-effective. If damage is widespread, subfloor is compromised, or multiple rooms are affected, full replacement might be safer and provide longer-term value.
Q: Are engineered floors immune to water damage?
A: No floor is entirely immune, but engineered wood tolerates moisture changes better than solid hardwood. Even engineered floors can suffer if water sits long enough to reach the locking mechanism or subfloor.
Final notes
Floorboards lifting after a water spill is alarming, but prompt, informed action greatly improves the outcome. Prioritize stopping the water source, fast drying, and careful assessment. Mild problems can often be resolved with DIY fixes; more extensive damage requires professional remediation. Investing in moisture prevention and choosing stable materials for vulnerable areas reduces future risk.
If you want to explore practical design ideas to make living spaces more resilient and comfortable, consider reading this design guide for inspiration: How to Design A Comfortable Modern Living Space