Dirty HVAC coils affecting airflow is one of the most common—and most fixable—causes of poor home cooling and higher energy bills. When coils inside your air conditioner or heat pump become clogged with dust, pollen, grease, or lawn debris, the system struggles to move air, transfer heat, and keep your rooms comfortable. This guide explains exactly how dirty coils reduce airflow, how to inspect and clean them safely, and which maintenance steps will keep your HVAC running efficiently.
Why HVAC coils matter: evaporator vs. condenser
Your HVAC system relies on two main types of coils to move heat: the evaporator coil (inside the air handler) and the condenser coil (in the outdoor unit). Both are made of thin metal fins wrapped around refrigerant tubing. Clean coils allow refrigerant to absorb and release heat efficiently. When those fins become dirty, performance drops.
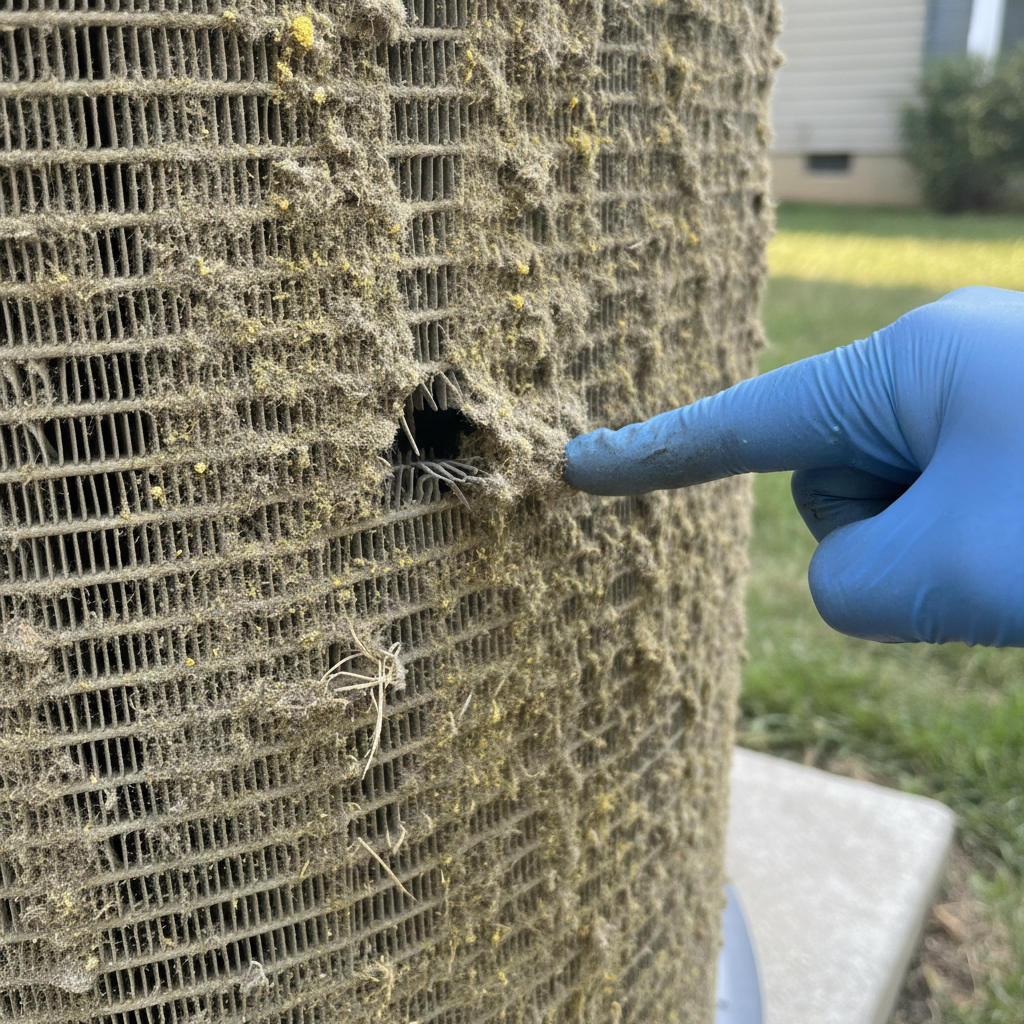
- Evaporator coil: Located inside the air handler or furnace plenum, it absorbs heat from indoor air. A dirty evaporator reduces indoor cooling and can freeze over.
- Condenser coil: Located in the outdoor unit, it releases heat to the outside. A soiled condenser coil makes it harder to reject heat and increases compressor workload.
How dirty coils affect airflow and system performance
Dirty coils reduce airflow and overall system performance in several interrelated ways:
- Restricted air movement: When dust and debris clog the coil surface and fins, air moving across the coil meets more resistance—so less air flows through the system.
- Reduced heat transfer: Dirt acts as an insulating layer, preventing refrigerant from absorbing or releasing heat efficiently. The blower must run longer, and cooling capacity drops.
- Increased static pressure: Clogged coils raise resistance in the duct/blower system. Higher static pressure forces the blower to work harder and reduces effective airflow at the vents.
- Coil freezing: A dirty evaporator coil can cause refrigerant temperatures to drop below freezing, creating ice that further blocks airflow and can lead to water damage when it melts.
- Compressor strain and higher bills: The compressor compensates for reduced heat transfer by running longer and more often, raising energy use and increasing the risk of early equipment failure.
Common signs your coils are dirty (quick checklist)
If you notice any of the following, dirty coils could be the culprit:
- Weak or reduced airflow from vents
- Higher-than-normal energy bills
- Uneven cooling between rooms
- Unit running almost continuously but failing to reach set temperature
- Ice forming on or near the indoor coil or refrigerant lines
- Excessive dust coming from vents shortly after cleaning
- Visible debris on the outdoor condenser coil (leaves, grass clippings, pet hair)
Safety first: what to know before you touch coils
Coils are delicate and refrigerant systems can be hazardous. Follow these safety rules:
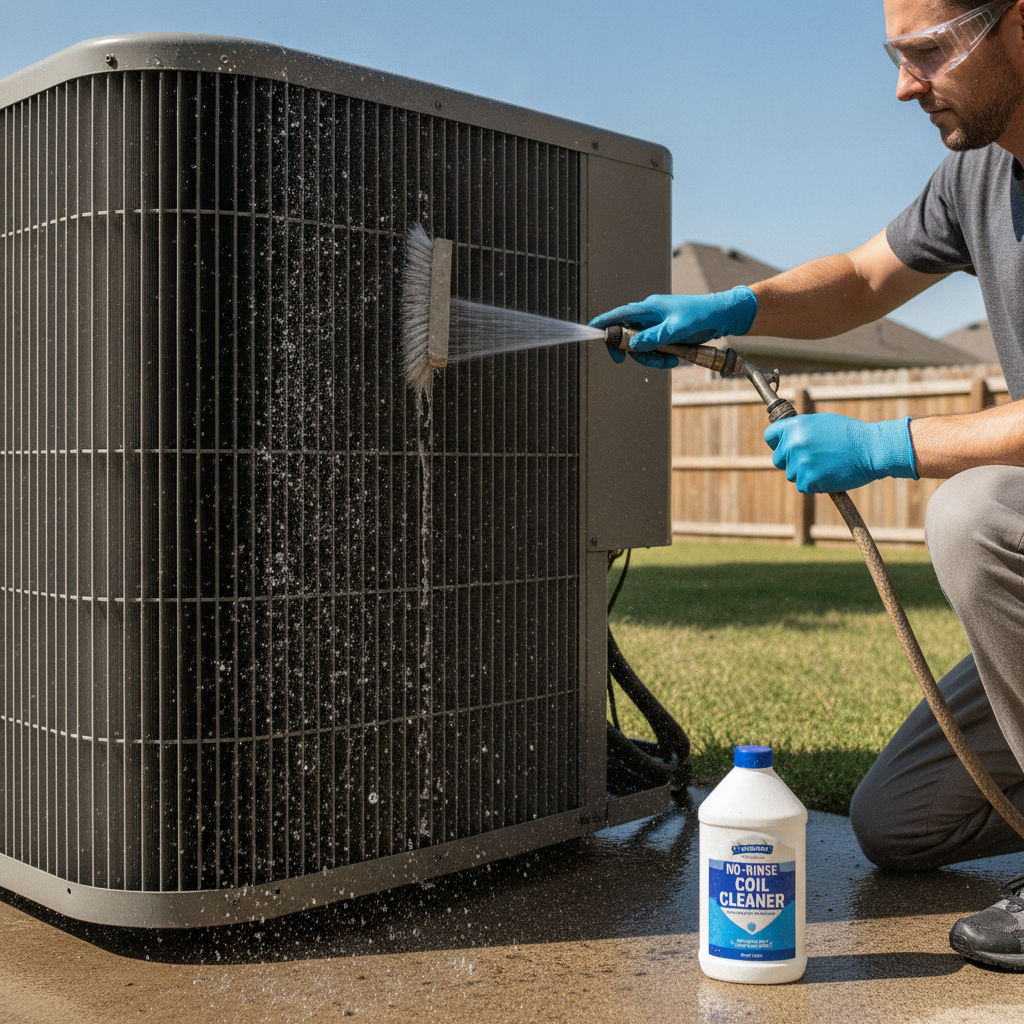
- Always turn off power to the unit at the breaker and use the service switch on the outdoor unit if present.
- Wear gloves and eye protection—coil cleaners and debris can irritate skin and eyes.
- Avoid forcing fins or using high-pressure water directly on the coils; bent fins and blunt force can permanently reduce airflow.
- If you see refrigerant leaks, oil stains, or you’re unsure where the access panels are, stop and call a licensed technician.
Tools and materials you’ll need for cleaning coils
For light to moderate cleaning of the condenser coil and basic upkeep of the evaporator coil, gather:
- Soft bristle brush or coil brush
- Garden hose with a gentle spray nozzle (no pressure washer)
- Fin comb to straighten bent fins (optional but helpful)
- Foaming, no-rinse coil cleaner (non-acidic for aluminum coils)
- Shop vacuum with brush attachment for indoor access panels
- Disposable gloves and safety glasses
- Flashlight and screwdriver for access panels
How to clean an outdoor condenser coil (step-by-step)
The outdoor condenser is the easiest coil to maintain yourself. Regular cleaning keeps airflow high and prevents many common problems.
- Turn off power at the disconnect switch and breaker.
- Remove loose debris—leaves, twigs, grass—from around and on top of the unit.
- Use a soft brush to sweep away surface dirt and dust on the coil fins. Work gently along the fin direction to avoid bending them.
- Apply a foaming, no-rinse coil cleaner according to the label. Allow it to penetrate grime—usually 5–10 minutes.
- Rinse with a garden hose on a gentle setting from the inside out to push debris away from the fins.
- Straighten any bent fins with a fin comb to restore airflow paths.
- Restore power and listen briefly for normal startup; check for improved airflow after a cycle.
Cleaning the evaporator coil: proceed with caution
The evaporator coil is often buried inside the air handler or furnace and is more sensitive than the condenser coil. Light maintenance is feasible for many homeowners, but deep cleaning is usually a job for a professional.
DIY light cleaning steps:
- Turn off the system at the breaker.
- Open the air handler access panel and inspect the coil for heavy buildup or mold.
- Vacuum dust gently from the coil surface with a soft brush attachment—do not force the vacuum between fins.
- If surface grime is present, use a no-rinse evaporator coil cleaner made for indoor use. Follow label instructions and protect surrounding insulation from overspray.
- Check and clean the condensate drain and pan—stagnant water and slime contribute to coil contamination and odors.
When to call a professional for evaporator coils:
- The coil is coated in heavy grime, oil, or mold
- The access panels require disassembly beyond basic tools
- There is evidence of refrigerant leaks, corrosion, or unusual odors
- You’re uncomfortable working near controls, wiring, or insulated refrigerant lines
Why professionals may be the better option
Licensed HVAC technicians have commercial-grade cleaners, wet vacs, and training in safely removing coils or using wet cleaning methods that require proper drainage. Professional cleaning also includes checking refrigerant levels, testing static pressure, inspecting blower motors and belts, and spotting problems you might miss. Typical professional cleaning costs vary by region and complexity: expect about $100–$300 for a basic condenser coil clean and $150–$500 (or more) for an indoor evaporator coil service and full tune-up.
Maintenance habits that prevent dirty coils and maintain airflow
Keeping coils cleaner longer is mostly about regular maintenance:
- Change or clean air filters every 1–3 months. A clogged filter dumps dirt directly onto the evaporator coil and forces the system to work harder.
- Use the correct filter MERV rating for your system—higher MERV filters trap more particles but can restrict airflow if the blower isn’t sized for them.
- Keep the outdoor unit clear: trim plants and remove debris within 2–3 feet of the condenser.
- Schedule annual HVAC tune-ups before cooling season—the technician will clean coils, check refrigerant, and measure airflow.
- Seal and insulate ductwork to prevent dust ingress and reduce the workload on the system.
- Keep return grills free and unobstructed by furniture, curtains, or rugs.
- Consider adding a media filter or whole-house air cleaner if dust is a chronic problem, but consult your HVAC contractor about blower compatibility.
Common mistakes to avoid when cleaning coils
- Using a pressure washer on coils—high pressure can bend fins and damage coils.
- Using acidic or corrosive cleaners on aluminum coils—stick to manufacturer-recommended products.
- Neglecting the condensate drain—clogged drains lead to water build-up and mold around the evaporator coil.
- Skipping filter changes—this is the single most effective step to reduce coil contamination.
How dirty coils affect indoor air quality
Dirty coils can harbor mold, bacteria, and accumulated dust that reduce indoor air quality and may circulate through your ductwork. Keeping coils and condensate pans clean helps minimize musty odors, allergic triggers, and microbial growth—especially if anyone in the home has allergies or respiratory sensitivities.
Cost vs. benefit: is regular coil cleaning worth it?
Yes. Clean coils improve energy efficiency, extend equipment life, and restore proper airflow. A system with clean coils uses less electricity, cools more quickly, and reduces the likelihood of expensive compressor replacement. Regular preventive care and timely cleaning pay for themselves in lower utility bills and fewer emergency repairs.
When reduced airflow isn’t coil-related
Not all airflow problems stem from dirty coils. If coils are clean but airflow remains weak, consider these possibilities:
- Clogged air filters or obstructed return vents
- Blower motor or fan issues
- Collapsed, disconnected, or undersized ductwork
- Closed or blocked supply registers
- Incorrectly sized HVAC equipment for your home
Professional inspection checklist
When you call a pro, ask them to check:
- Coil cleanliness and whether a deep clean is needed
- Refrigerant charge and leak inspection
- Static pressure and airflow measurements
- Blower wheel and motor condition
- Drain pan and condensate drain condition
- Overall system safety and thermostat calibration
Additional resources and safe cleaning tips
For general maintenance tips and safe cleaning practices, reputable home-lifestyle sources provide helpful guidance on seasonal HVAC upkeep. Good Housekeeping, for example, publishes practical home maintenance articles that cover basic cleaning and safety considerations for household systems. Visit their home care section for more tips on keeping your home systems running smoothly: Good Housekeeping home cleaning & maintenance resources.
FAQs
Q: How often should HVAC coils be cleaned?
A: Outdoor condenser coils should be inspected and cleaned at least once a year—ideally before the cooling season. Indoor evaporator coils typically need servicing every 1–3 years depending on filter maintenance, household dust levels, and whether you have pets or smokers. Annual professional tune-ups catch problems early.
Q: Can I clean evaporator coils myself?
A: You can perform light cleaning—vacuuming dust and using a no-rinse coil cleaner—if you are comfortable opening the air handler access panel and take proper precautions. Deep cleaning, removal, or work around refrigerant lines is best left to licensed technicians.
Q: Will cleaning coils fix low airflow completely?
A: If dirty coils are the cause, cleaning will significantly improve airflow. If airflow remains poor, additional issues like clogged filters, duct problems, or blower failures should be investigated.
Q: How do I prevent coils from getting dirty quickly?
A: Change filters regularly, keep the outdoor unit clear of vegetation and debris, consider higher-quality filters compatible with your system, and schedule annual HVAC maintenance. Address sources of indoor dust, such as pets and open windows, to reduce contamination.
Q: Are coil-cleaning chemicals safe for my system?
A: Use cleaners designed for HVAC coils and follow instructions. Avoid strong acids or solvents that can damage aluminum fins. When in doubt, consult your system manufacturer or an HVAC technician.
Final thoughts
Dirty HVAC coils affecting airflow may start as a small nuisance—slightly weaker vents or longer run times—but left unchecked they create higher bills, decreased comfort, and a greater risk of major repairs. Regular inspection, timely filter changes, basic DIY cleaning for outdoor coils, and an annual professional tune-up are the most effective ways to keep airflow strong and your system healthy.
If you want to dig deeper into improving your home’s comfort and layout to help your HVAC perform better, explore How to Design A Comfortable Modern Living Space.
How to Design A Comfortable Modern Living Space