Floorboards lifting after water spill can be scary — a visible sign that moisture has entered wood flooring and caused cupping, buckling, or warping. Whether the spill was a one-time accident, a leaking appliance, or a slow leak, quick, informed action can often limit damage and save you time and money. This guide walks you through immediate steps, drying techniques, repair options, prevention, and when to call a professional.
Why do floorboards lift after a water spill?
Wood is hygroscopic, meaning it absorbs and releases moisture relative to surrounding humidity. When floorboards absorb water unevenly (for example, from a spill concentrated in one area), the wood fibers expand. Depending on how the boards are fixed and the flooring type, this expansion can cause:
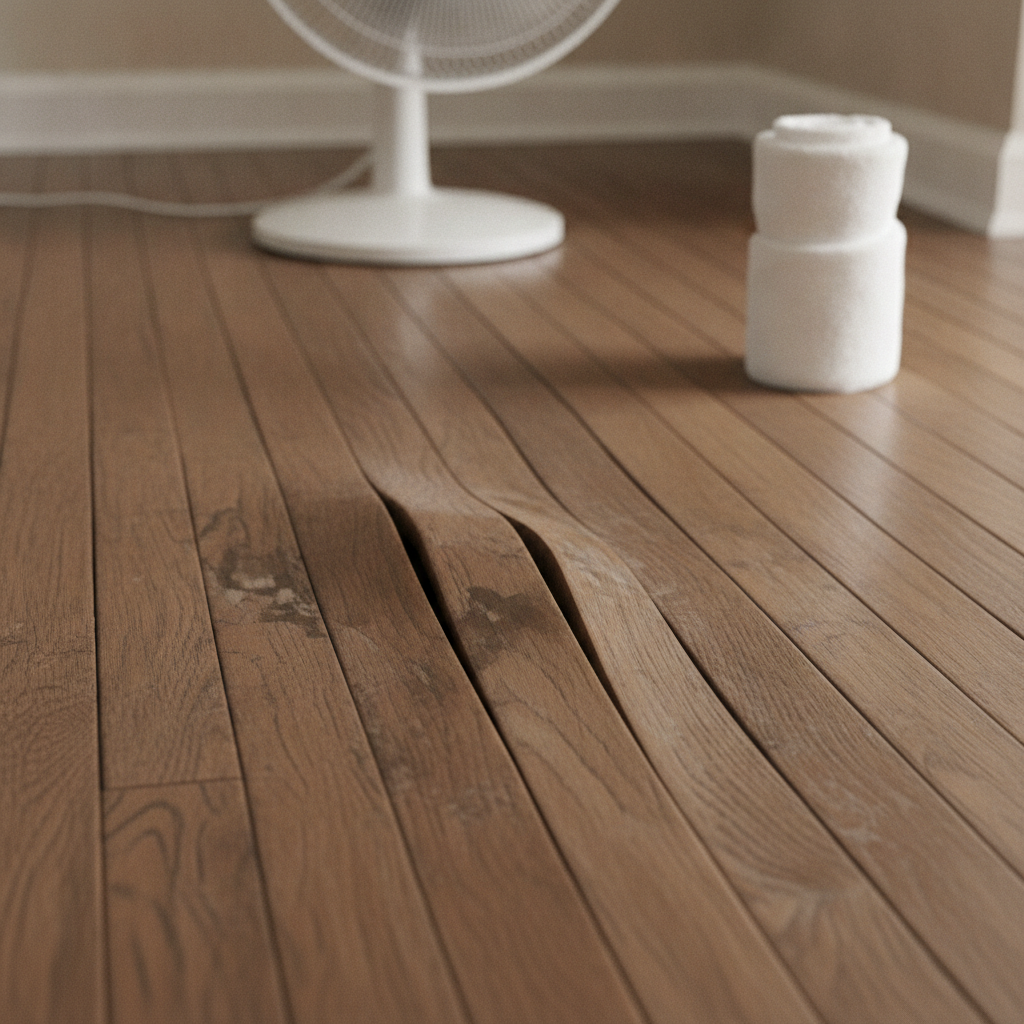
- Cupping — edges of boards rise higher than the center.
- Crowning — center of the board raises after it dries from the top but stays wet underneath.
- Buckling — entire boards pull up from the subfloor, sometimes lifting out of place.
- Gaps and separation — when wood shrinks after drying, gaps can appear.
Immediate steps to take right after a spill
React quickly: the longer wood stays wet, the more likely it will permanently deform or grow mold. Follow these immediate actions:
- Stop the source. Turn off water or unplug and move leaking appliances.
- Remove standing water. Use towels, a wet/dry vacuum, or mops to remove as much surface water as possible.
- Protect unaffected areas. Place towels or plastic sheeting at doorways to prevent moisture spread.
- Move furniture and rugs away from the wet zone. Elevate items if possible to let the floor breathe.
- Ventilate and dehumidify. Open windows and run fans and a dehumidifier to speed drying.
How to dry lifting floorboards safely
Drying must be controlled to avoid causing more damage. Rapid drying from the top while the underside remains wet can create crowning; drying too slowly encourages mold. Here are safe drying methods:
1. Immediate air movement
- Place box fans or oscillating fans to move air across the surface.
- Combine with open windows, if outdoor humidity is lower than indoors.
2. Dehumidifiers
A quality dehumidifier is one of the best investments for drying hardwood. Place it in the affected room and run continuously until moisture readings normalize. Aim to keep relative humidity in the 30–50% range while drying.
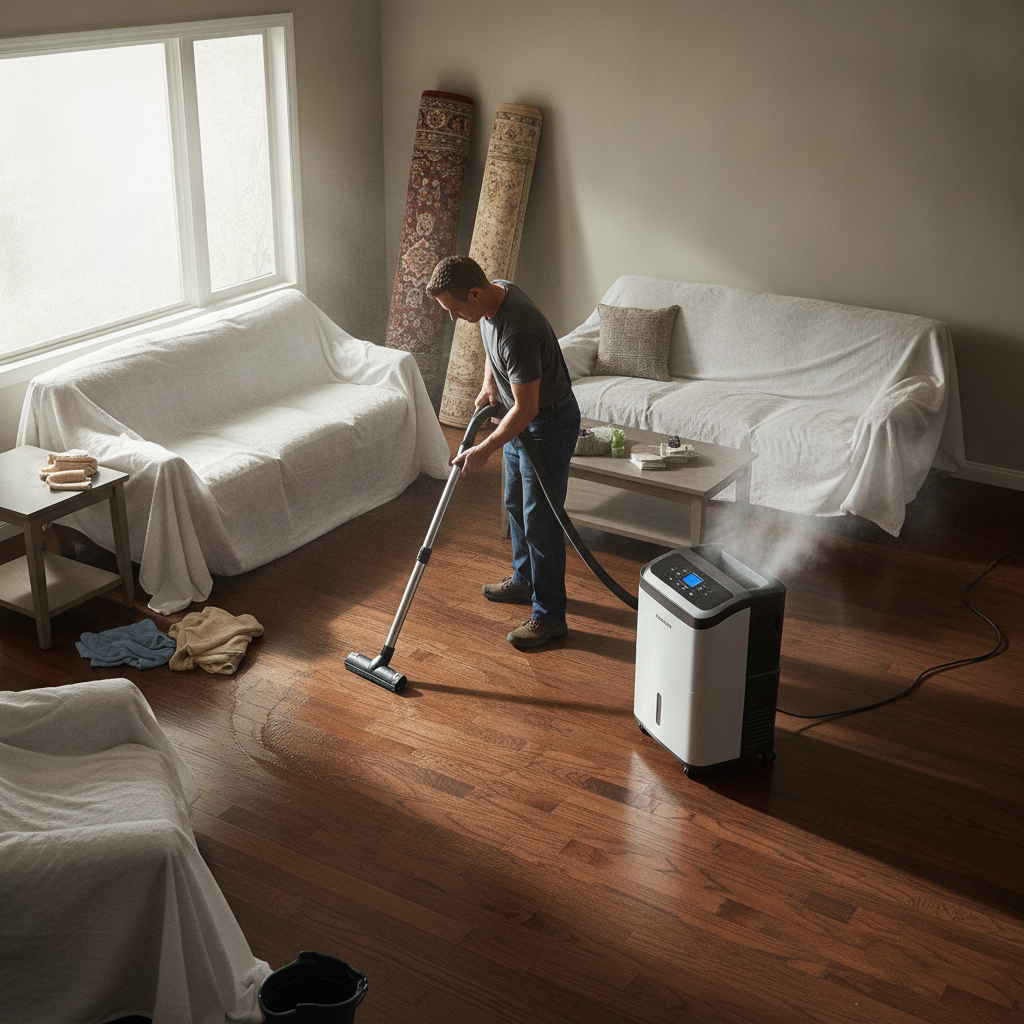
3. Use of wet/dry vacuums and mopping
Wet/dry vacs remove surface and shallow standing water quickly. After extracting water, mop with absorbent towels to remove residual moisture.
4. Access the subfloor (if needed)
If water soaked through to the subfloor, you may need to lift a board or two to allow air to circulate underneath. This can relieve trapped moisture but should be done carefully to avoid extra damage.
5. Controlled drying and monitoring
- Use a moisture meter to monitor both the surface and subfloor moisture levels.
- Drying time varies: small spills may take 48–72 hours; larger or deep wetting can take days to weeks.
Do-it-yourself repairs for lifted floorboards
The repair approach depends on the severity and whether boards have permanently deformed.
Minor lifting and cupping
- Allow the floor to dry fully first. Don’t sand or refinish until moisture readings are normal.
- Once dry, sand lightly, fill small gaps with wood filler, and refinish the area to blend.
Boards that are loose but not permanently warped
- Remove the affected boards carefully and dry the subfloor.
- Re-secure boards with flooring adhesive or appropriate screws/nails designed for hardwood.
Severely warped or buckled boards
- Replace the damaged boards. For solid hardwood, you can often remove and replace individual planks; engineered wood may be even easier to replace.
- Match new boards to existing finish and thickness. It may be necessary to sand and refinish a whole room to blend new and old boards.
When to call a professional
If the water damage is extensive, you notice mold growth, or boards have buckled significantly, bring in a flooring or water-damage restoration professional. Consider professionals for:
- Large-scale water events (flooding, appliance failure affecting multiple rooms).
- Persistent moisture after several days of drying attempts.
- Visible mold or a mildew smell.
- Structural concerns: if joists, subfloor, or fasteners were compromised.
Understanding the difference: engineered vs solid hardwood
Flooring type affects how water impacts your floor and how it should be repaired:
- Solid hardwood: constructed from a single piece of wood, more prone to swelling and shrinking across the board thickness. Can often be sanded and refinished multiple times.
- Engineered hardwood: plywood base with a thin hardwood veneer. More dimensionally stable and less likely to cup, but the thin veneer limits sanding. Replacement of planks is common.
Mold, mildew, and health risks
If moisture sits long enough for mold to grow (often 24–48+ hours under ideal conditions), you’ll need to address it immediately. Mold can cause health issues, especially for those with allergies or respiratory conditions. Steps to take:
- Do not sand or dry-scrape moldy surfaces yourself — this can release spores into the air.
- Use a professional remediation service for extensive mold. For small areas, consult guidance from trusted sources or a contractor experienced with mold cleanup.
Costs and timeline: what to expect
Costs vary widely by severity, material, labor rates, and whether insurance covers the damage.
- Minor repairs (sanding/filling): a few hundred dollars to a few thousand depending on room size.
- Board replacement (DIY materials): tens to hundreds per plank; professional labor adds to cost.
- Large-scale restoration (drying, remediation, full floor replacement): thousands to tens of thousands.
Timeline: small events may be resolved in days; major problems and replacement projects can take several weeks including drying, repair, and finishing.
Insurance and documentation
Document the damage immediately with photos and notes about when and how the spill occurred. Your homeowners or renters insurance may cover sudden, accidental water damage (like a burst pipe); gradual leaks are often excluded unless they result from a covered peril. Steps to take:
- Document everything: photos, videos, receipts for emergency repairs and drying equipment.
- Contact your insurer quickly for claims guidance.
- Keep any replaced materials for inspection if requested.
Prevention: reduce future risk of lifting floorboards
Prevention combines smart home habits and periodic maintenance:
- Use area rugs and moisture barriers near sinks, dishwashers, and washing machines.
- Install water leak detectors near appliances and under sinks for early alerts.
- Maintain relative indoor humidity between 30–50% with a humidifier or dehumidifier depending on season.
- Check appliances, hoses, and under-sink plumbing regularly for signs of slow leaks.
- Use proper installation methods — leave recommended expansion gaps and ensure the subfloor is dry before installing new flooring.
Tools and materials that help with DIY drying and repair
- Moisture meter — to track wood and subfloor moisture.
- Wet/dry vacuum — for quick water removal.
- High-capacity dehumidifier and box fans — to accelerate drying.
- Flooring nails/screws and adhesive — for re-securing loose boards.
- Wood filler, sandpaper, stain, and finish — for cosmetic repairs after drying.
Common mistakes to avoid
- Not removing standing water immediately.
- Assuming the floor is dry because the surface feels dry — check with a moisture meter.
- Refinishing or sanding too soon — this can trap moisture and cause future problems.
- Using heat guns or direct heat to dry floors quickly — this can cause cracking or additional distortion.
When drying doesn’t fix the problem: replacement and refinishing
If drying and minor repairs don’t restore the floor, you may need partial or full replacement. Consider:
- Replacing only damaged planks when possible to save cost and time.
- Sanding and refinishing the entire room if replacements won’t match the finish.
- Upgrading to more water-resistant flooring in moisture-prone areas (e.g., waterproof laminate, luxury vinyl plank, or sealed engineered wood).
Further reading and trusted resources
If you want a professional perspective on handling water-damaged hardwood, HGTV has an informative guide on what to do when water affects hardwood floors: what to do when you have water-damaged hardwood floors.
Frequently asked questions (FAQs)
How long does it take for floorboards to dry after a spill?
Small spills may dry within 48–72 hours with good ventilation and dehumidification. Larger or deep-soaked areas can take several days to weeks depending on the extent, subfloor materials, and humidity control.
Will warped floorboards return to normal after drying?
Sometimes mild cupping can relax as boards dry, but crowning and buckling are often permanent and require sanding, repair, or replacement.
Can I use a hair dryer or heat gun to fix lifting floorboards?
No. Applying localized heat can dry the top surface too quickly, causing additional stress, cracks, or crown. Use fans and dehumidifiers for even, controlled drying.
Is mold likely after a water spill?
Mold can develop within 24–48 hours if moisture persists. Prompt drying, ventilation, and professional remediation for visible mold are important to protect health and property.
Should I turn off the HVAC during drying?
Not necessarily. Running HVAC with a dehumidifier can help circulate and dry air, but consult an HVAC or restoration professional if you suspect the system has been contaminated by water or mold.
Dealing with floorboards lifting after water spill is stressful, but acting quickly, drying methodically, and knowing when to call a pro will minimize damage and cost. If you’re unsure, a flooring contractor or restoration specialist can assess the severity and recommend the best path forward.
If you want more ideas on creating resilient, comfortable home spaces and learn how to protect surfaces and materials for long-term durability, explore this resource: How to Design A Comfortable Modern Living Space.


