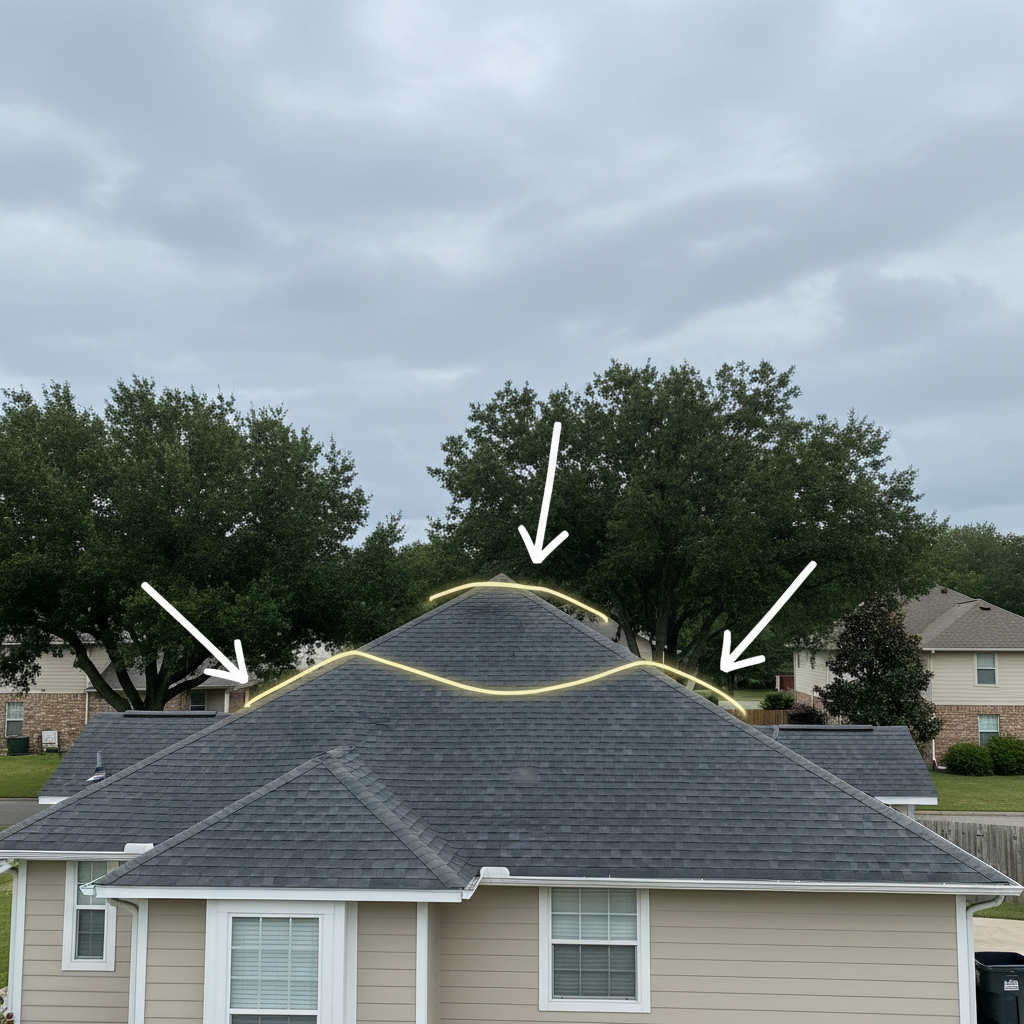
Roof sheathing sagging is one of those roofing problems that starts subtle and can quickly become a major structural and safety concern if left unchecked. Whether you notice visible dips from the curb, uneven shingles, or water stains inside the attic, recognizing and addressing roof sheathing sagging early can save you thousands in repairs and protect the rest of your home.
What is roof sheathing (roof decking) and why it matters
Roof sheathing—also called roof decking—is the layer of boards or plywood that sits on top of the rafters or trusses and provides a flat base for underlayment and shingles. It transfers loads (snow, wind, people walking on the roof) to the structure, ties rafters together, and protects the home from weather. When sheathing sags, it indicates that support or the sheathing material itself is compromised.
Common signs of sagging roof sheathing
- Visible dips or uneven rooflines from ground level.
- Shingles that appear cupped, cracked, or loose in a concentrated area.
- Daylight visible in the attic where it shouldn’t be.
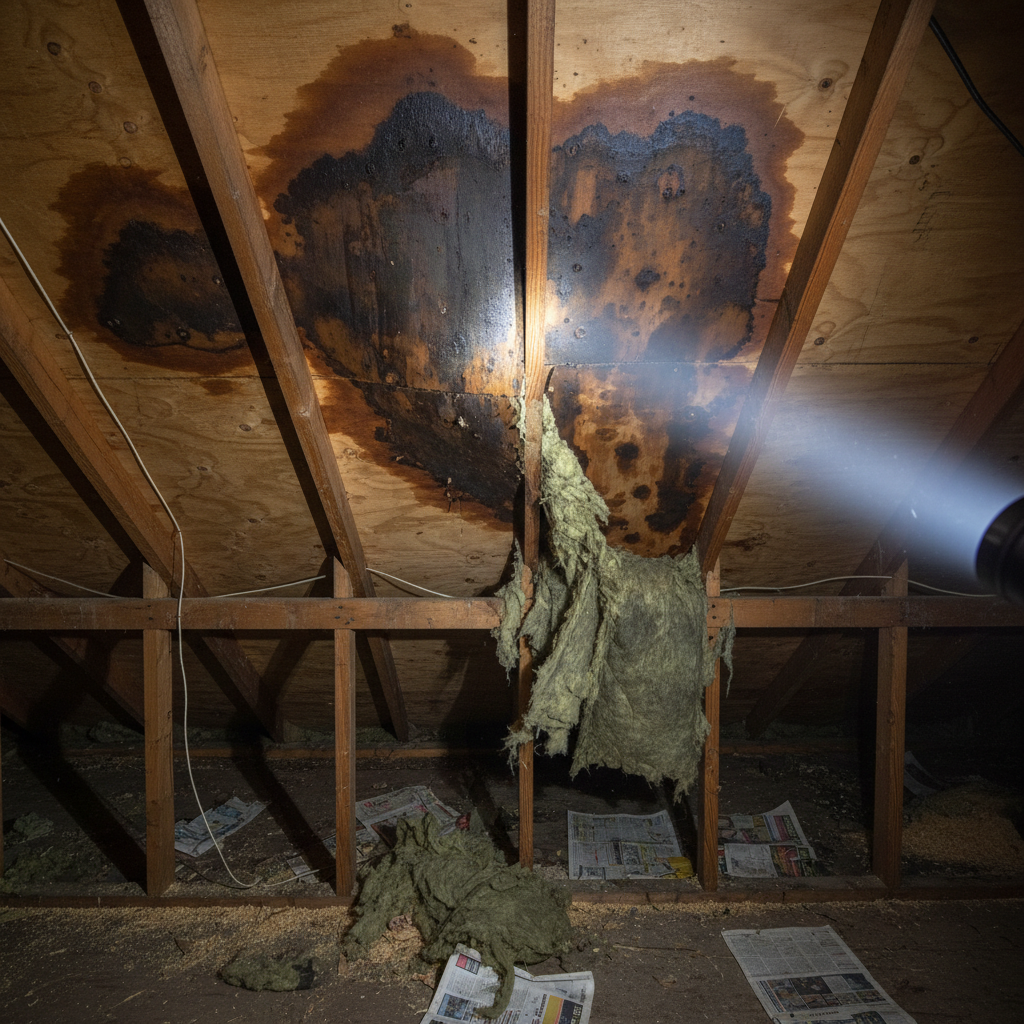
- Water staining, mold, or rot on sheathing or rafters in the attic.
- Interior ceiling cracks or sagging directly beneath a roof section.
- Unusual bouncing or flexing when walking in the attic over a roof span.
- Gaps at roof edges or flashing pulling away.
What causes roof sheathing to sag?
Understanding the root cause helps determine the right repair. Common causes include:
- Water damage and rot: Leaks, ice dams, or prolonged moisture exposure weaken plywood or OSB and adjacent rafters.
- Insufficient framing or undersized rafters: Older homes sometimes have weaker framing that wasn’t intended for modern loads (insulation, solar panels, heavier shingles).
- Poor installation: Improper fastener spacing, missing blocking, or using under-thickness sheathing can lead to sag over time.
- Excessive loads: Heavy snow, ice, or stored materials on the roof can exceed design capacity.
- Age and material fatigue: OSB swells with repeated wet/dry cycles; older plywood can delaminate and lose strength.
- Ventilation and insulation problems: Trapped moisture from poor ventilation can cause gradual deterioration.
- Structural movement: Foundation or wall settling can change roof geometry and cause local sag.
Why you should address sagging sheathing immediately
Sagging roof sheathing is not cosmetic. Left alone it can lead to:
- Accelerated roof covering failure—shingles can crack or blow off.
- Water intrusion, mold growth, and rot spreading to rafters and interior finishes.
- Reduced structural capacity that could lead to partial collapse under heavy loads.
- Higher energy bills from compromised insulation and ventilation.
- Escalating repair costs—what could be a localized sheathing replacement may become rafter or truss replacement later.
How to safely inspect for roof sheathing sagging
Safety first—do not climb a damaged roof alone or in wet/icy conditions. Many issues can be spotted from the ground or inside the attic. A safe inspection routine:
- From the ground: Walk around the house and look for dips in the roofline, shingles clinging differently in one area, or misaligned gutters.
- From the attic: With a bright flashlight, look along the roof plane for bowed or wet sheathing, daylight, cracked rafters, or mold. Gently walk on ceiling joists (not on unsupported sheathing) and feel for soft spots.
- Measure deflection: A string-line at rafter level or simple straightedge can show the extent of a dip. For precise work, a contractor may measure deflection (L/240 or L/360 limits are common).
- Document everything with photos and notes for a contractor or insurer.
Temporary fixes you can use while arranging permanent repairs
Temporary measures help reduce further damage until a full repair can be made:
- Contain leaks: Place a tarp over the affected roof area and seal it properly to keep water out—only a short-term solution.
- Reduce loads: Remove stored items from the attic and clear snow if safe and possible.
- Ventilate: Improve attic ventilation with temporary vents or fans to limit moisture buildup.
- Patch leaks from inside: Use roofing cement on small, accessible leaks in the short term.
Permanent repair options—how pros fix sagging sheathing
Permanent repairs depend on the cause and extent of the sag. Typical professional interventions include:
- Replace damaged sheathing: Remove wet or rotten plywood/OSB and fasten new sheathing of proper thickness (usually 7/16″ OSB minimum or 5/8″–3/4″ plywood for longer spans).
- Reinforce framing: Sistering rafters or trusses—sistering attaches new lumber alongside damaged members to restore strength.
- Add structural blocking or strapping: Blocking between rafters and metal straps can distribute loads and stiffen the deck.
- Install new rafters or trusses: For severe structural failure, partial or full replacement of framing may be required.
- Improve support under long spans: Add collar ties, knee walls, or purlins where code and structure permit.
- Address ventilation and insulation: After structural repairs, fix ventilation and insulation to prevent recurrence.
DIY repair steps for mild sagging (only if you are experienced)
If the sag is localized and limited to sheathing and you’re comfortable with carpentry, a careful DIY approach may be possible. If the rafters are compromised or the sag is large, hire a pro.
- Step 1: Assess and document the problem; locate rot or soft sheathing in the attic.
- Step 2: Remove roof coverings (shingles/underlayment) over the affected area—this often requires a helper and careful planning.
- Step 3: Replace damaged sheathing with plywood of appropriate thickness. Cut boards to fit and stagger seams. Use ring-shank nails or screws per local code.
- Step 4: If rafters are weak, sister new rafters alongside them. Use structural screws and construction adhesive.
- Step 5: Add blocking between rafters and ensure proper fastening pattern (every 6–8 inches at edges, 12 inches in the field for many situations—check local code).
- Step 6: Reinstall roofing underlayment and shingles, following manufacturer guidelines and ensuring proper flashing.
- Step 7: Monitor for leaks and check the attic after the first heavy rain to confirm integrity.
Always follow local building codes and safety standards. Wear fall protection and work with a partner.
When to call a structural engineer or licensed roofer
Hire a professional when:
- Sag covers a large roof area or several rafters are affected.
- Ceiling sag, interior cracks, or floor settlement suggests structural compromise.
- There’s extensive rot, insect damage, or mold through framing members.
- The roof supports heavy loads (solar panels, rooftop HVAC) and you’re unsure of framing capacity.
- Your homeowner’s insurance might be involved—insurers typically require professional assessments for major claims.
A structural engineer will determine the root cause and specify repair loads and methods; a licensed roofer can execute the repairs and pull permits.
Estimated costs for repair
Costs vary widely by region, roof pitch, materials, and the extent of damage. Typical ranges:
- Minor sheathing replacement (single area, no rafter work): $500–$2,500.
- Sistering rafters or moderate framing work: $1,500–$6,000.
- Major structural repairs or partial re-roof with framing replacement: $6,000–$20,000+.
These are ballpark estimates. Always get multiple quotes and ask contractors to itemize sheathing, framing, materials, labor, and permit costs.
Preventing roof sheathing sag in the future
Prevention focuses on keeping the sheathing dry, ventilated, and properly supported:
- Maintain good attic ventilation to reduce moisture buildup—ridge and soffit vents, plus baffles where insulation meets the roof deck.
- Keep gutters and downspouts clean to prevent water backing under shingles and into the sheathing.
- Address ice dam risks with proper insulation and ventilation in cold climates.
- Use the correct sheathing thickness and fastener schedule during any reroofing.
- Limit rooftop storage and remove heavy snow promptly and safely.
- Schedule periodic roofing and attic inspections, especially after major storms.
For practical maintenance tips on roofing care, reputable home-lifestyle resources like Better Homes & Gardens offer easy-to-follow guidance and checklists for roof upkeep: https://www.bhg.com/home-improvement/roof/
Codes, materials, and best-practice standards
Local building codes define acceptable sheathing thickness, nailing patterns, and allowable spans for rafters and trusses. Many jurisdictions follow the International Residential Code (IRC) guidelines for roof decking and framing. Common best-practice materials include:
- Structural plywood (CDX) or oriented strand board (OSB) for sheathing—thickness chosen based on rafter spacing and span.
- Galvanized or zinc-coated fasteners to resist corrosion.
- Construction adhesives between sistered rafters for better load sharing.
Check local building departments before starting major repairs to confirm permit and inspection requirements.
How professionals measure the severity of a sag
Contractors and engineers use several methods to quantify sag:
- Visual inspection and photos with scale references.
- Straightedge or string-line measurements across the roof plane to record deflection.
- Load calculations to determine whether existing framing meets code loads (live load, dead load, snow load).
- Moisture meters, core samples, or removing sheathing for direct inspection of rafter condition.
Real-life case studies (brief examples)
Case 1: A homeowner noticed shingles buckling in a valley. Inspection revealed localized rot from a leaking flashing. Solution: Remove and replace sheathing in the valley, replace flashing, and reinstall shingles. Cost: $1,800.
Case 2: An older bungalow with attic insulation packed against the roof deck showed widespread sag. Analysis: Poor ventilation and repeated moisture exposure weakened OSB. Solution: Replace sheathing across affected bays, add baffles and ridge vents, and improve attic insulation layout. Cost: $8,500.
Frequently asked questions (FAQs)
How much sag in a roof is acceptable?
Building codes usually limit roof deflection to a fraction of the span (commonly L/240 for live load or L/360 for total load in some cases). What this means: a long rafter with too much visible dip likely exceeds acceptable limits and requires repair. When in doubt, get a professional measurement.
Can sagging roof sheathing cause ceiling collapse?
Yes—if the underlying cause is structural failure of rafters or if rot has spread extensively, the ceiling may sag or collapse. Early detection and repair reduce this risk.
Is roof sheathing replacement covered by homeowner’s insurance?
Coverage depends on your policy and the cause. Sudden, accidental damage (storm, falling tree) is more likely covered than gradual wear and tear or maintenance-related issues. Document damage promptly and contact your insurer for guidance.
Can I walk on sagging sheathing to inspect it?
Avoid walking on unsupported sagging sheathing—it may be soft or unstable. Access the attic and walk only on the ceiling joists or other secure framing members. If roof access is required for inspection, use professionals with fall protection.
How long will a repair take?
Minor localized repairs can be completed in a day or two. More extensive work—framing replacement, sheathing across multiple bays, permitting and inspections—can take several days to a couple of weeks depending on complexity and scheduling.
Final checklist before repair
- Document damage with photos and notes.
- Confirm whether the problem is limited to sheathing or includes rafters/trusses.
- Obtain at least three written contractor estimates and check references and insurance.
- Verify permit requirements with your local building department.
- Plan for temporary protection of interiors if leaks are present.
Conclusion
Roof sheathing sagging signals a structural or moisture issue that deserves prompt attention. With the right inspection, temporary protections, and either careful DIY repair or professional work, you can restore roof strength, prevent further damage, and protect your home’s value. Prioritize safety, follow building codes, and don’t hesitate to bring in a licensed roofer or structural engineer when the problem extends beyond a small localized area.
If you’d like a broader look at designing a comfortable home environment while you handle structural repairs, explore this resource: How to Design A Comfortable Modern Living Space
Additional resources
For general roof care and maintenance tips from a trusted home-lifestyle authority, see Better Homes & Gardens: https://www.bhg.com/home-improvement/roof/
Still unsure? Ask a pro
Structural issues can be complex—if you’re uncertain about scope or safety, contact a licensed roofing contractor or structural engineer to evaluate your roof sheathing sagging and recommend a repair plan.

