Flat roofs are a popular choice for their modern aesthetics and efficient space utilization, but like any roofing system, they are susceptible to leaks. One of the most common and frustrating culprits is a leak occurring specifically around roof vents. These seemingly small penetrations can become significant weak points, allowing water to infiltrate your home and cause extensive damage if not addressed promptly. This comprehensive guide will delve into why a flat roof might be leaking around vents, how to accurately diagnose the source of the problem, the steps involved in effective repair, and crucial preventative measures to keep your home dry and safe for years to come.
Understanding Why Flat Roofs Leak Around Vents
Flat roofs, while resilient and aesthetically pleasing, present unique challenges when it comes to water management. Unlike pitched roofs where gravity swiftly carries water away, flat roofs rely on a slight slope and effective drainage systems to prevent pooling. When a breach occurs, particularly at penetration points like plumbing vents, exhaust vents, or skylights, water can accumulate and exploit even the tiniest opening. Understanding the root causes is the first step toward a lasting repair.
Common Causes of Leaks at Vent Penetrations
-
Flashing Failure: This is by far the most common cause. Flashing is the material (often metal or a flexible membrane) installed around roof penetrations to create a watertight seal. On a flat roof, flashing typically consists of a base plate secured to the roof and a collar that fits snugly around the vent pipe, with a cap covering the top. Over time, flashing can:
- Crack or become brittle due to UV exposure and temperature fluctuations.
- Lift or separate from the roof membrane, especially at seams.
- Corrode if made of metal and not properly maintained.
- Be improperly installed, creating vulnerabilities from day one.
-
Degraded Sealants: Sealants, such as caulk, roofing cement, or mastic, are used to waterproof the joints between the flashing and the vent pipe, and between the flashing and the roof membrane. These materials have a finite lifespan. They can:
- Dry out, shrink, and crack over time, creating hairline fractures that allow water ingress.
- Lose their adhesion, pulling away from the surfaces they were meant to protect.
- Be of poor quality or incompatible with the roofing material, leading to premature failure.
-
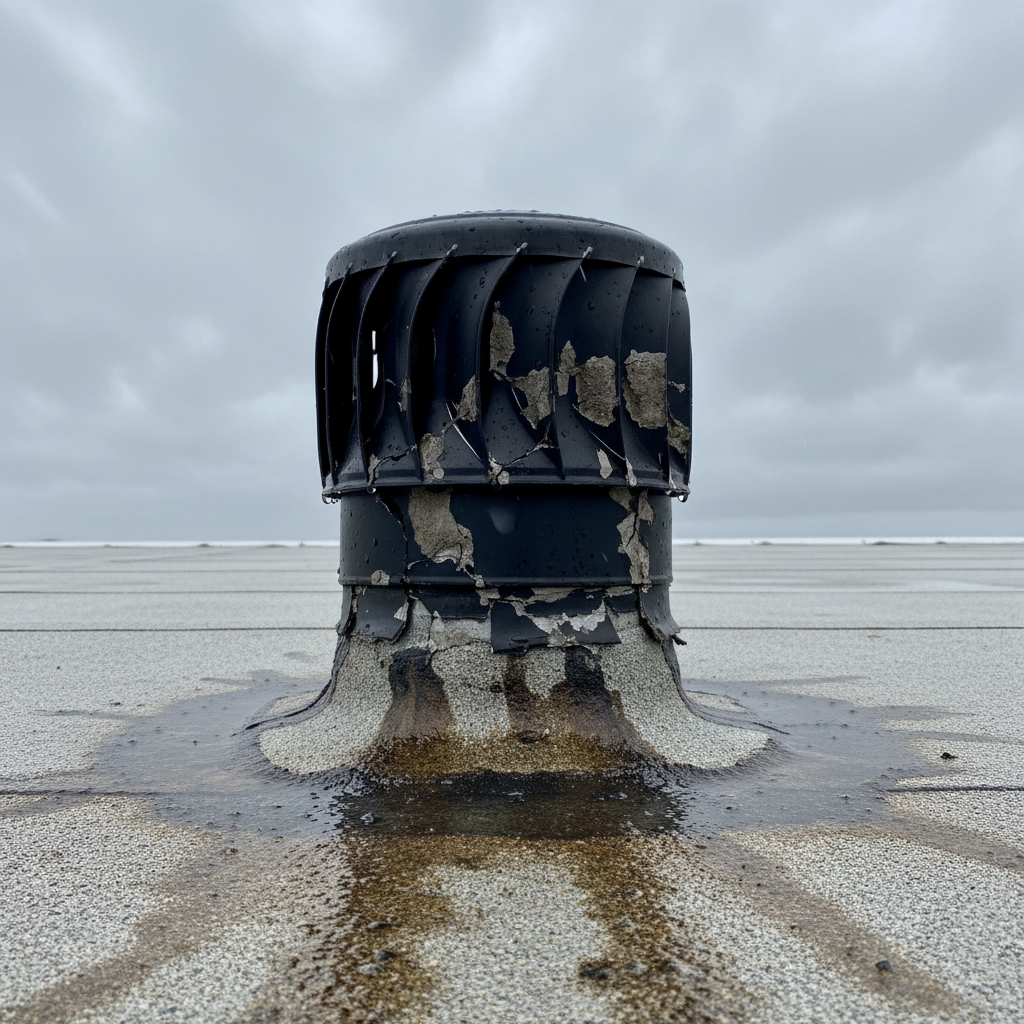
Damaged Vent Caps or Hoods: The cap or hood at the very top of the vent pipe protects the opening from rain, snow, and debris. Physical damage from severe weather, hail, falling branches, or even strong winds can compromise its integrity, allowing water to enter directly into the vent pipe and potentially seep into the roof structure.
-
Clogged Vents: While less common for leaks directly around the flashing, a severely clogged vent can cause water to back up and overflow, potentially finding its way into compromised areas around its base, especially if drainage is poor on the roof surface itself.
-
Poor Installation: Unfortunately, not all roof repairs or installations are done to the highest standards. Inadequate installation of the vent, flashing, or even the surrounding roof membrane can lead to leaks much sooner than expected. This includes insufficient overlap, improper sealing, or using materials incompatible with the roof type.
-
Roof Membrane Damage: The flat roof membrane itself can develop tears, punctures, or widespread deterioration adjacent to the vent due to age, foot traffic, or impact. These membrane failures can extend to the area around the vent, making the vent appear to be the source of the leak when the problem is actually broader.
-
Condensation (False Leak): Sometimes, what appears to be a roof leak is actually condensation. Poor attic ventilation can lead to warm, moist air rising and condensing on cold surfaces like the inside of a vent pipe or the underside of the roof deck, especially in winter. The resulting drips can mimic a roof leak. It’s crucial to differentiate between actual water intrusion and condensation.
Identifying the Source: How to Pinpoint a Leaking Flat Roof Around Vents
Accurate diagnosis is paramount. A leak appearing inside your home doesn’t always mean the entry point is directly above. Water can travel along structural elements, insulation, and vapor barriers before manifesting as a visible stain or drip. A methodical approach is necessary to pinpoint the exact source.
Interior Inspection
Start your investigation indoors, typically in the attic or the top floor directly beneath the suspected leak. This area is often where the earliest signs of water damage appear.
- Look for Visible Signs: Search for water stains on ceilings or walls, peeling paint, discolored plaster, or actual dripping water. Pay close attention to areas around vent pipes or where you know vents are located on the roof above.
- Trace the Path: If you find a stain, try to trace its path upwards. Water often follows gravity and the path of least resistance. It might run down a joist or rafter before dripping onto your ceiling. The actual point of entry on the roof could be several feet away from where the leak appears inside.
- Check for Mold or Musty Odors: A persistent musty smell can indicate hidden mold or mildew growth, which thrives in damp conditions caused by leaks.
- Inspect Insulation: In the attic, check the insulation around and directly below the vents. Wet or compressed insulation is a clear indicator of water intrusion.
Exterior Inspection (Safety First!)
Once you have an idea of the general vicinity, it’s time to inspect the roof. Always prioritize safety when working on a roof. Use a sturdy ladder, wear non-slip shoes, and ideally, have someone spot you. Avoid going on the roof during wet, windy, or icy conditions.
- Visual Inspection:
- Around the Vent: Carefully examine the flashing around the base of the vent pipe. Look for any cracks, tears, lifted edges, or signs of corrosion.
- Sealants: Inspect all caulking and sealants around the vent and flashing. Are they cracked, dried out, or pulling away? Is there any visible peeling or degradation?
- Vent Cap: Check the vent cap or hood for any physical damage, cracks, or loose components.
- Roof Membrane: Look at the surrounding flat roof membrane. Are there any punctures, tears, blisters, or lifted seams close to the vent? Is water pooling around the vent instead of draining away?
- Debris: Clear any leaves, branches, or other debris that may be obstructing the vent or holding moisture around its base.
- Water Test (Use with Caution): If the weather is dry and you can’t visually pinpoint the exact source, a controlled water test can be effective.
- Ensure the roof is completely dry before starting.
- Have someone inside the house to watch for drips.
- Using a garden hose, start applying water to the roof surface *below* the vent area. Gradually move the water stream closer to and then directly onto the vent flashing and pipe.
- Apply water to one section at a time and wait a few minutes before moving on. This helps isolate the leak source.
- When the leak reappears inside, you’ve likely found the general area of entry.
- Remember to be patient; some leaks only manifest after prolonged exposure.
DIY Repair vs. Professional Assistance
Deciding whether to tackle the repair yourself or hire a professional depends on several factors, including the severity of the leak, your comfort level with heights and roofing work, the type of flat roof material, and your budget.
When DIY is an Option
For minor issues, a DIY approach can be cost-effective and relatively straightforward:
- Small, Localized Issues: If you’ve identified a small crack in the sealant, a minor lift in the flashing, or a tiny tear in the membrane directly adjacent to the vent, and you feel confident in your abilities, a DIY repair might be feasible.
- Basic Roofing Knowledge: You should have a basic understanding of roofing materials and repair techniques, particularly for your specific flat roof type (e.g., modified bitumen, EPDM, TPO).
- Good Physical Condition and Comfort with Heights: Roof work requires physical stamina and comfort working at elevated heights.
- Availability of Proper Safety Equipment: Never compromise on safety. If you have access to a sturdy ladder, non-slip shoes, gloves, and ideally a safety harness, you can consider DIY.
When to Call a Professional Roofer
For more complex or extensive problems, professional assistance is highly recommended:
- Extensive Damage or Large Leaks: If the leak is significant, widespread, or has caused visible damage to the roof decking or interior structures.
- Uncertainty of the Cause: If you cannot confidently pinpoint the source of the leak, a professional roofer has the experience and tools for accurate diagnosis.
- Complex Roofing Materials: Some flat roof systems, like TPO or EPDM, require specialized tools and techniques (e.g., heat welding) for proper repair. Attempting these without proper training can do more harm than good.
- Multiple Leaks or Widespread Deterioration: If you observe several leak points or general degradation of the roof membrane, it might indicate a need for more extensive repairs or even a roof replacement.
- Safety Concerns: If the roof is too high, too steep, or if weather conditions make it unsafe for you to work.
- No Time or Tools: If you simply don’t have the time, the necessary tools, or the inclination to perform the repair yourself.
Step-by-Step Guide to Repairing a Leaking Flat Roof Around Vents (DIY)
This guide focuses on common repairs for minor leaks around vents on flat roofs, typically involving sealant application or small patch repairs. Always consult the manufacturer’s recommendations for your specific roofing material.
Gather Your Tools and Materials
- Safety Gear: Sturdy ladder, non-slip work boots, work gloves, safety glasses, and a safety harness if working at significant heights.
- Cleaning Supplies: Stiff brush or wire brush, rags, mineral spirits or a compatible cleaning solvent for your roof material.
- Repair Materials:
- Roofing Cement/Mastic: High-quality, asphalt-based roofing cement for modified bitumen or built-up roofs.
- Exterior-Grade Sealant: A polyurethane, butyl rubber, or silicone sealant specifically designed for exterior use and compatible with your roof material. A caulk gun will be needed.
- Patch Material (if needed): For EPDM or TPO roofs, you’ll need a compatible peel-and-stick patch kit or membrane patch designed for your roof type.
- Utility Knife or Putty Knife: For removing old sealant and trimming materials.
Prepare the Area
Before any repair, thorough preparation is crucial for adhesion and a lasting seal.
- Clear Debris: Remove all leaves, dirt, branches, and other debris from around the vent and the area you will be working on.
- Clean the Surface: Use a stiff brush or wire brush to remove any loose granules, old sealant, or oxidation. For stubborn grime or old adhesive, use mineral spirits or the recommended cleaner for your roof material, ensuring the area is completely dry afterward. A clean, dry surface is essential for proper adhesion of new materials.
- Ensure Dryness: Do not attempt repairs on a wet or damp roof. The roof surface and the vent flashing must be completely dry for sealants and patches to adhere effectively.
Repairing Damaged Flashing or Sealant
This addresses the most common types of leaks.
- Remove Old Sealant: Carefully use a utility knife or putty knife to scrape away any old, cracked, or deteriorated caulk or roofing cement around the base of the vent pipe and where the flashing meets the roof.
- Re-secure Loose Flashing: If any part of the flashing is lifted or loose, apply a generous bead of roofing cement or an appropriate adhesive underneath it, then press it firmly back into place. You might need to temporarily weigh it down until the adhesive sets.
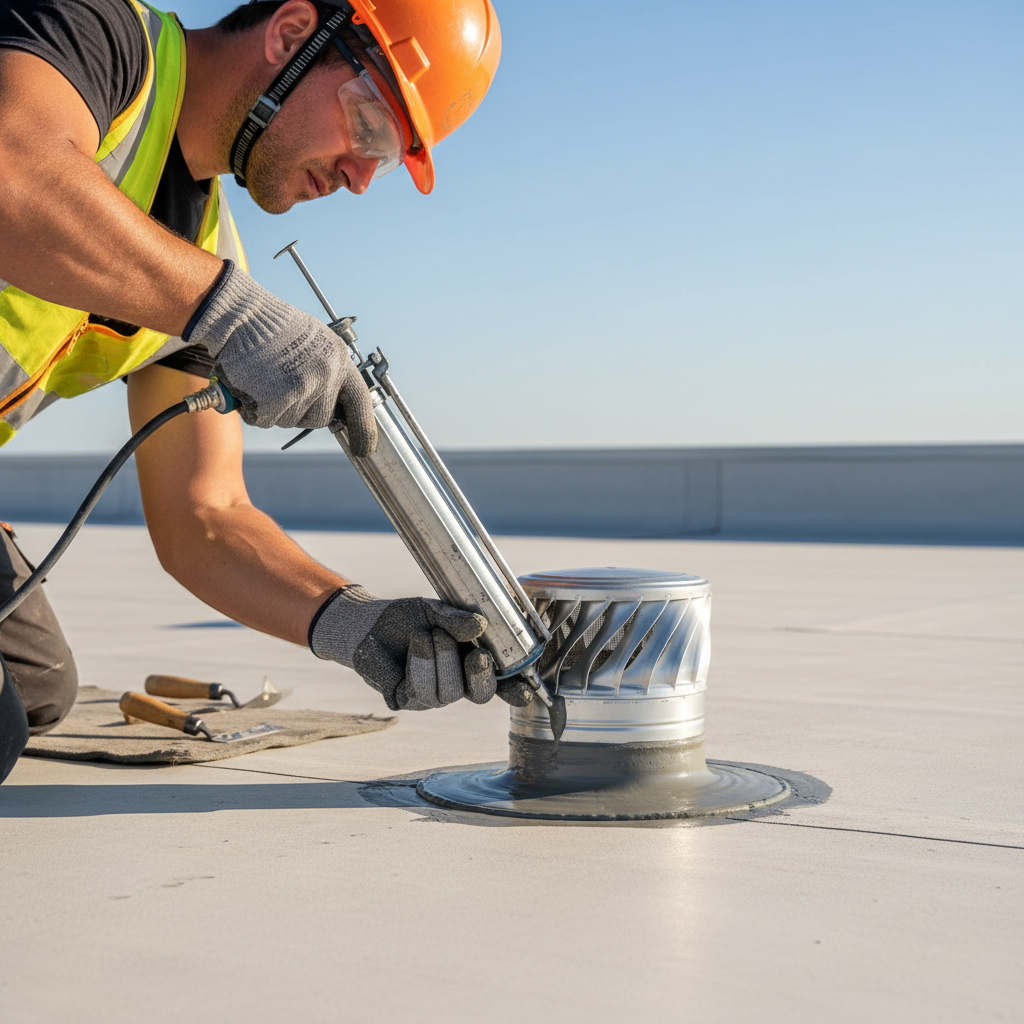
- Apply New Sealant:
- For cracks in metal flashing or where the flashing meets the vent pipe, apply a continuous, thick bead of fresh, exterior-grade sealant (polyurethane or butyl rubber works well for many applications) around the entire base of the vent and any seams in the flashing.
- Smooth the sealant with a wet finger or a putty knife to ensure good contact and a watertight seal, eliminating any gaps or air bubbles.
- If using roofing cement, apply it with a putty knife, ensuring a thick, consistent layer.
- Patching Flashing Cracks (for non-metal flashing): For larger cracks in flexible flashing (like EPDM or TPO membrane flashing), clean the area thoroughly. Cut a patch of compatible material slightly larger than the crack, round the corners, and apply it according to the manufacturer’s instructions, typically using an adhesive or primer followed by the patch itself.
Addressing Small Membrane Tears Near Vents
If the leak is due to a small tear in the main roof membrane near the vent.
- Clean and Dry: As always, ensure the area around the tear is meticulously clean and dry.
- Apply Roofing Cement/Sealant: For very small tears (less than an inch), you might be able to simply clean the area thoroughly and apply a generous dollop of roofing cement or appropriate sealant over and slightly beyond the tear, spreading it with a putty knife.
- Use a Patch: For larger tears (over an inch), a patch is more effective.
- For Asphalt/Modified Bitumen: Apply a thick layer of roofing cement, then embed a piece of compatible roofing fabric or modified bitumen patch material into the cement. Apply another layer of cement over the patch, ensuring all edges are sealed.
- For EPDM/TPO: Use a self-adhesive patch kit designed for your specific roof material. Clean the area with the recommended primer, then peel and stick the patch, rolling it firmly to ensure full adhesion.
Repairing/Replacing Vent Cap
If the leak originates from a damaged vent cap.
- Inspect and Replace: If the vent cap is cracked, rusted, or otherwise compromised, it’s best to replace it. Measure the diameter of the vent pipe to ensure you purchase the correct size replacement cap or hood.
- Installation: Secure the new cap to the vent pipe according to its instructions, typically involving screws or clamps. Ensure any seams or attachment points are sealed with an appropriate exterior sealant for added protection.
Final Inspection and Curing
Once all repairs are made, conduct a final visual inspection to ensure all areas are properly sealed. Allow all sealants and cements to cure fully according to the manufacturer’s instructions before expecting them to be waterproof. This curing time can range from a few hours to several days, depending on temperature and humidity. Before undertaking any DIY roof repairs, always prioritize safety. For essential home safety tips, including ladder safety, refer to resources like Good Housekeeping’s essential home maintenance checklist.
Preventing Future Leaks Around Flat Roof Vents
Proactive measures are always better than reactive repairs. Regular maintenance and attention to detail can significantly extend the life of your flat roof and prevent future leaks around vents.
Regular Roof Inspections
Make a habit of inspecting your flat roof at least twice a year – typically in the spring and fall – and always after severe weather events. Look for:
- Cracks or signs of deterioration in flashing and sealants around all vents.
- Areas of pooling water (ponding) that don’t drain away within 48 hours.
- Any signs of punctures, tears, or blisters on the roof membrane.
- Accumulation of debris near vents or drains.
Keep Vents Clear
Regularly clear away leaves, branches, dirt, and other debris that can accumulate around vents. Debris can trap moisture, accelerate the degradation of materials, and even block vent openings or drainage paths, leading to water backup.
Maintain Sealants
Sealants around vent bases and flashing are the first line of defense. Periodically check their condition. If you notice them drying, cracking, or pulling away, reapply fresh sealant before a leak occurs. Don’t wait until you see water inside your home.
Proper Vent Installation
If you’re having new vents installed or existing ones replaced, ensure they are installed correctly with appropriate flashing systems designed for flat roofs. Proper installation from the outset is crucial for long-term leak prevention. This includes using compatible materials and following manufacturer guidelines meticulously.
Consider Upgrades
If your current vents or flashing are old, made of less durable materials, or have been a recurring source of problems, consider upgrading to more robust and modern materials. For instance, some flexible membrane flashings offer greater longevity and resistance to UV damage than traditional metal flashing.
When to Call a Professional Roofer
While many minor leaks around vents can be DIY projects, knowing when a job is beyond your skill set can save time, money, and prevent further damage. A professional roofer offers expertise, specialized equipment, and guarantees that can be invaluable.
Signs It’s Time for an Expert
- Large, Persistent Leaks: If the leak is extensive, recurs despite your repairs, or shows signs of rapid water ingress.
- Structural Damage: If you observe any sagging in the ceiling, widespread wood rot, or compromised structural elements in the attic.
- Multiple Leak Sources: If you find several points of water entry or if the leak isn’t clearly localized to a single vent.
- Complex Roofing Materials: If your flat roof uses specialized materials like torch-down modified bitumen, PVC, or TPO/EPDM membranes that require heat welding or specific adhesive applications.
- Lack of Confidence or Specialized Tools: If you’re uncomfortable with working at heights, unsure about the diagnosis, or don’t have the necessary tools for a proper repair.
- Safety Concerns: If the roof pitch is unusually steep for a “flat” roof, or if access is difficult and presents a fall risk.
What a Professional Can Offer
- Expert Diagnosis: Professionals have extensive experience identifying subtle leak sources that might elude a homeowner. They can also differentiate between roof leaks and condensation issues.
- Specialized Tools and Materials: They have access to commercial-grade materials and equipment specific to different flat roof types, ensuring a durable and long-lasting repair.
- Guaranteed Work: Reputable roofers typically offer warranties on their repairs, providing peace of mind.
- Long-Term Solutions: Beyond just patching a leak, a professional can assess the overall condition of your roof and recommend long-term solutions, such as reinforcing vulnerable areas or suggesting a roof restoration if needed.
- Safety: They are trained and equipped to work safely on roofs, minimizing risks.
Frequently Asked Questions About Flat Roof Leaks Around Vents
How much does it cost to fix a leaking flat roof around a vent?
The cost varies significantly. DIY repairs might only incur material costs, typically ranging from $20 to $100 for sealants, roofing cement, or small patch kits. Professional repairs for a minor leak around a vent could range from $200 to $600. If flashing needs to be extensively replaced or if the leak has caused underlying structural damage, costs can quickly escalate to $1,000 or more, depending on the complexity and local labor rates.
Can a small leak around a vent cause major damage?
Absolutely. Even a small, slow drip can lead to significant problems over time. Water damage can manifest as stained ceilings, peeling paint, ruined insulation, mold and mildew growth (which poses health risks), and eventually, compromise the structural integrity of your roof deck, rafters, and interior framing. Addressing leaks promptly is crucial to prevent these escalating issues.
How long do flat roof vent flashings last?
The lifespan of flat roof vent flashing depends on its material, installation quality, and exposure to environmental elements. Metal flashings might last 15-25 years, while flexible membrane flashings (part of EPDM/TPO systems) can last 20-30 years. However, the sealants around the flashing usually have a shorter lifespan, often needing inspection and reapplication every 3-7 years to maintain a watertight seal.
What type of sealant is best for flat roof vents?
The best sealant depends on your specific flat roof material. For asphalt-based or modified bitumen roofs, high-quality asphalt roofing cement or mastic is often used. For EPDM, TPO, or PVC roofs, you’ll need sealants specifically designed to be compatible with those membranes, such as butyl rubber sealants, specialized polyurethane sealants, or products recommended by the roof membrane manufacturer. Always ensure the sealant is exterior-grade and has good UV resistance.
Is it safe to walk on a flat roof?
Generally, it is safer to walk on a flat roof than a pitched roof, but caution is still essential. Always wear non-slip shoes. Avoid walking on wet, icy, or debris-covered areas. Be mindful of any skylights or fragile areas that may not support weight. If your flat roof has insulation directly beneath the membrane (common in some systems), it might feel soft or spongy; avoid excessive foot traffic on such areas. When accessing the roof, always use a sturdy ladder placed on stable ground and adhere to proper ladder safety guidelines.
Conclusion
A leaking flat roof around vents is a common but manageable problem that every homeowner with a flat roof might encounter. By understanding the common causes, performing thorough and regular inspections, and either undertaking careful DIY repairs or calling in experienced professionals when needed, you can effectively protect your home from the damaging effects of water. Remember, prompt action and consistent maintenance are key to ensuring a dry, durable, and long-lasting flat roof system for your property.


