What to Do When Floorboards Lifting After Water Spill
If you’ve noticed floorboards lifting after water spill, you’re not alone — this common household problem can range from a minor cosmetic issue to a structural concern. Acting quickly and correctly can often save you time and money, prevent mold growth, and restore your floors to a safe, attractive condition. This guide walks you through causes, quick emergency steps, how to dry and repair affected areas, and how to prevent future lifting.
Why floorboards lift after a water spill: causes and common patterns
Understanding why wood lifts or warps makes it easier to choose the right response. Typical causes include:
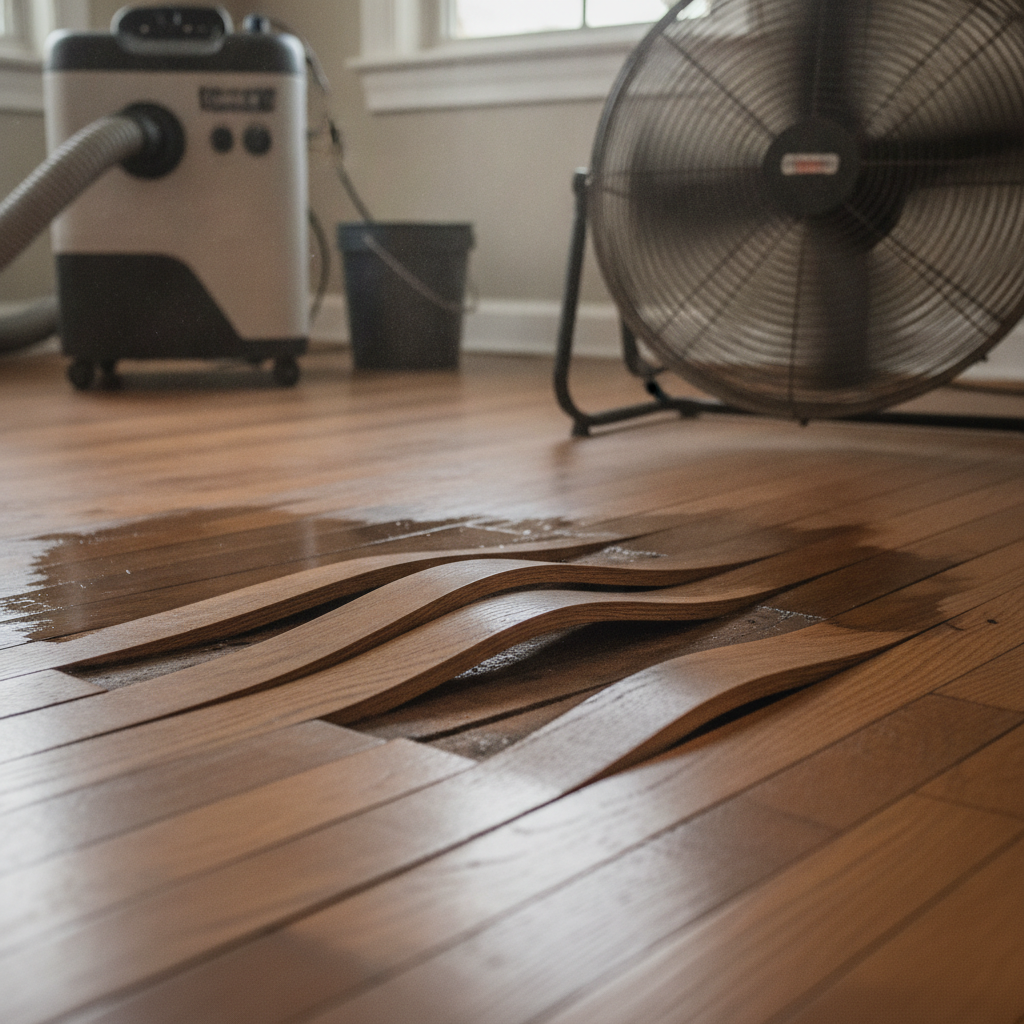
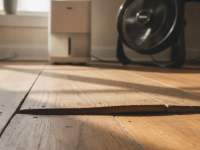
- Absorbed moisture: Wood expands as it absorbs water, leading to cupping (edges higher than center), crowning (center higher than edges after sanding), or buckling (boards lifting fully off the subfloor).
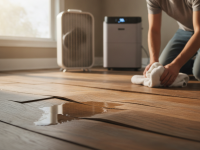
- Fast, concentrated spills: A large spill in one spot—under a sink, dishwasher leak, or a bathtub overflow—can saturate boards quickly and cause localized lifting.
- Poor acclimation or installation: If hardwood or engineered boards weren’t properly acclimated to indoor humidity before installation, they can be more vulnerable when exposed to water.
- Humidity and seasonal changes: High indoor humidity or poor home ventilation can keep boards swollen after a spill, preventing them from settling back.
- Subfloor damage or rotting: Persistent moisture can weaken or rot the subfloor, reducing its ability to hold nails or glue and allowing boards to lift.
How to tell how severe the problem is
Quick assessment helps you decide whether a DIY fix is feasible or a pro is needed.
- Minor lifting or slight cupping: Edges are slightly raised but boards still attached and stable. Often reversible with drying and humidity control.
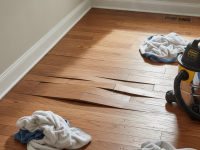
- Moderate lifting or warping: Boards are visibly distorted and may be loose from nails. Some sanding or partial replacement may be required.
- Severe buckling or widespread lifting: Boards are detached, buckled, or the subfloor is visibly damaged—professional repair or replacement is usually necessary.
- Smell or discoloration: Musty odor, dark stains, or soft spots indicate mold or rot—stop and consult a professional.
Immediate steps to take when you find lifting floorboards
Quick action reduces damage. Follow these steps immediately after discovering lifted floorboards:
- Stop the water source: Fix the leak, turn off the appliance, or stop the spill to prevent more moisture.
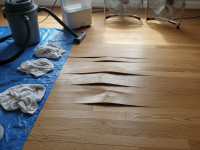
- Remove standing water: Use towels, a wet/dry vacuum, or mops to remove as much water as possible within the first few hours.
- Increase airflow: Open windows and doors if weather allows. Place box fans to blow across the floor to speed evaporation.
- Use dehumidifiers: Place one or more dehumidifiers in the room to reduce relative humidity and pull moisture from the wood and subfloor.
- Lift baseboards or trim if possible: Carefully remove baseboards to allow air to circulate under the edge of affected boards. Mark pieces for reinstallation.
- Protect unaffected areas: Move furniture away and cover unaffected floor nearby with plastic or drop cloths to avoid spreading moisture.
Drying methods: how to dry lifting floorboards safely
Drying must be thorough to avoid mold and further warping. Depending on severity, choose one or more of the following:
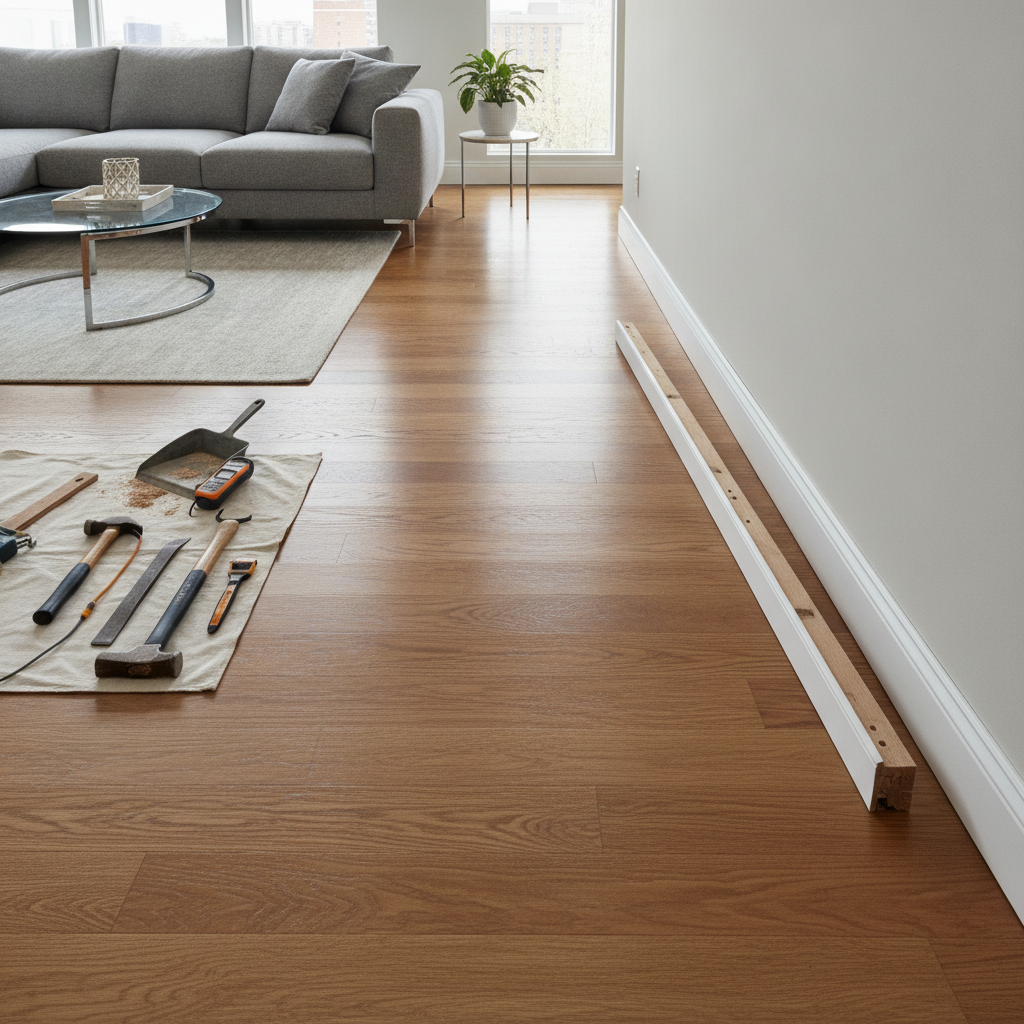
Short-term: fans and dehumidifiers
- Place high-velocity fans directed at the floor. Run continuously for 48–72 hours, checking progress often.
- Run a dehumidifier in the room and keep doors closed to concentrate drying. Aim to lower relative humidity under 50%.
Targeted drying: rent a floor-drying kit
For localized spills or moderate lifting, consider renting a specialized floor-drying system. These systems use a sealed tent and high-extraction air movers combined with dehumidification to draw moisture from between boards and the subfloor. They’re more effective than fans alone for concentrated moisture.
Partial board removal for severe cases
If boards remain lifted after 72 hours of active drying, you may need to remove some boards to let the subfloor dry. This is best done carefully to preserve materials for reinstallation. If you’re uncertain, contact a flooring professional.
When you can sand and repair vs. when to replace
Once dry, evaluate the floor for repair:
- Minor cupping (reversible): If boards are flat after thorough drying, sanding and refinishing can restore appearance.
- Localized damaged boards: Replace affected boards. Engineered wood and many hardwoods allow single-board replacement if you have spare planks or matching stock.
- Widespread buckling or subfloor rot: Replace the flooring and often the subfloor. This is common after prolonged exposure or slow leaks.
Repair steps for DIYers
- Confirm moisture content with a moisture meter — both floor surface and subfloor. Interior hardwood should be near 6–9% and relative humidity 30–50%.
- If dry, sand cupped boards to level and refinish. Avoid sanding if boards are too thin or damaged.
- For loose boards, re-secure with finishing nails or flooring adhesive per manufacturer instructions.
- Replace only moderately water-damaged boards. Carefully remove the damaged plank, prepare the groove and tongue of the replacement, and glue or nail it into place.
How different floor types react and what to do
The material of your floor affects both damage and repair strategy:
- Solid hardwood: Susceptible to buckling. Can usually be sanded and refinished if damage is not extreme. Severe buckling often requires board replacement and possibly subfloor repair.
- Engineered hardwood: Better resistance to moisture but still vulnerable. Top layer may be sanded once or twice depending on thickness; core may swell and require plank replacement.
- Laminate: Core often swells irreversibly. Replace damaged sections or the whole floor if swelling is widespread.
- Vinyl or luxury vinyl plank (LVP): Generally water-resistant. Lifted seams can often be re-adhered after drying; warped planks are usually replaced.
Costs and when insurance may help
Costs vary widely:
- Minor drying and sanding: $200–$1,000 depending on room size and refinishing.
- Board replacement (DIY): $5–$12 per square foot in materials; professional labor adds more.
- Full floor and subfloor replacement: $2,000–$10,000+ depending on square footage and materials.
Homeowner’s insurance may cover sudden accidental damage from a covered peril (like a burst pipe) but usually excludes damage from neglected leaks or routine wear. Document the damage with photos and receipts, then contact your insurer promptly.
Mold risk and health considerations
Mold can begin growing within 24–48 hours in damp wood, which is why rapid drying is essential. If you notice any of the following, stop DIY work and consult a remediation specialist:
- Musty odor that won’t dissipate
- Visible mold growth between boards or under flooring
- Health symptoms like persistent coughing or allergic reactions
Tools and supplies you may need
- Wet/dry vacuum
- High-velocity fans and box fans
- Dehumidifier (rental or purchase)
- Moisture meter (wood and subfloor readings)
- Flooring nails, adhesive, pry bar, hammer
- Replacement planks or matching materials
- Sander and refinishing supplies for hardwood restoration
Prevention: protect floors from future water damage
Prevention reduces stress and expense later. Consider these measures:
- Place mats at entryways and under washing machines and dishwashers.
- Install water sensors and automatic shutoff valves near appliances and under sinks.
- Maintain humidity control with HVAC, exhaust fans, and dehumidifiers.
- Inspect appliances, pipes, and roof areas regularly for leaks.
- Acclimate new flooring properly before installation and hire experienced installers who leave appropriate expansion gaps.
When to call a professional
Contact a flooring contractor or water-damage specialist when:
- Large areas are affected or the subfloor may be compromised.
- There’s visible mold or a persistent musty smell.
- Boards are buckled or the floor is uneven after drying attempts.
- You lack the tools, time, or confidence for repair.
A professional can perform a thorough moisture assessment, use industrial drying equipment, and recommend targeted repairs that minimize replacement cost.
Trusted resources
For additional, expert-backed guidance on water-damaged floors and step-by-step restoration tips, see this resource from HGTV: How to Fix Water-Damaged Hardwood Floors.
Frequently asked questions (FAQs)
Can floorboards go back to normal after a spill?
Yes, if the spill was caught and the boards thoroughly dried within 24–72 hours and there’s no subfloor damage or mold. Minor cupping often corrects itself after drying and humidity stabilization.
How long should I run fans and dehumidifiers?
Run fans and dehumidifiers continuously for at least 72 hours, then monitor moisture levels. Continue until the moisture content of the wood and subfloor reaches safe levels (typically 6–9% for hardwood) verified by a moisture meter.
Is it safe to sand water-damaged hardwood?
Only after the wood is completely dry and moisture content is stable. Sanding too soon can cause further damage and make existing contours worse. If the wood is too thin or damaged, replacement may be the best option.
Will my insurance cover water-damaged floors?
Insurance coverage depends on the cause. Sudden, accidental events like a burst pipe are more likely covered than gradual leaks due to lack of maintenance. Document the damage and contact your insurer for specific guidance.
How can I prevent lifting if my home has high humidity?
Control indoor humidity with air conditioning, dehumidifiers, and good ventilation. Maintain consistent indoor temperatures and use humidistats if needed to avoid seasonal swelling and shrinking.
Dealing with floorboards lifting after water spill is stressful, but timely action combined with the right drying and repair approach often leads to a good outcome. If you’re unsure at any step, a professional inspection can protect your home’s structural integrity and indoor air quality.
Want to explore home design and comfort tips that help prevent problems like this in the future? Take a look at this guide on How to Design A Comfortable Modern Living Space for more ideas and guidance.