Seeing floorboards lifting after water spill is alarming, but swift, informed action can often limit damage and restore the floor without a full replacement. This guide walks you through immediate steps, how to assess the severity, DIY fixes and professional repairs, prevention tips, and when to call an expert.
Why floorboards lift after water spill
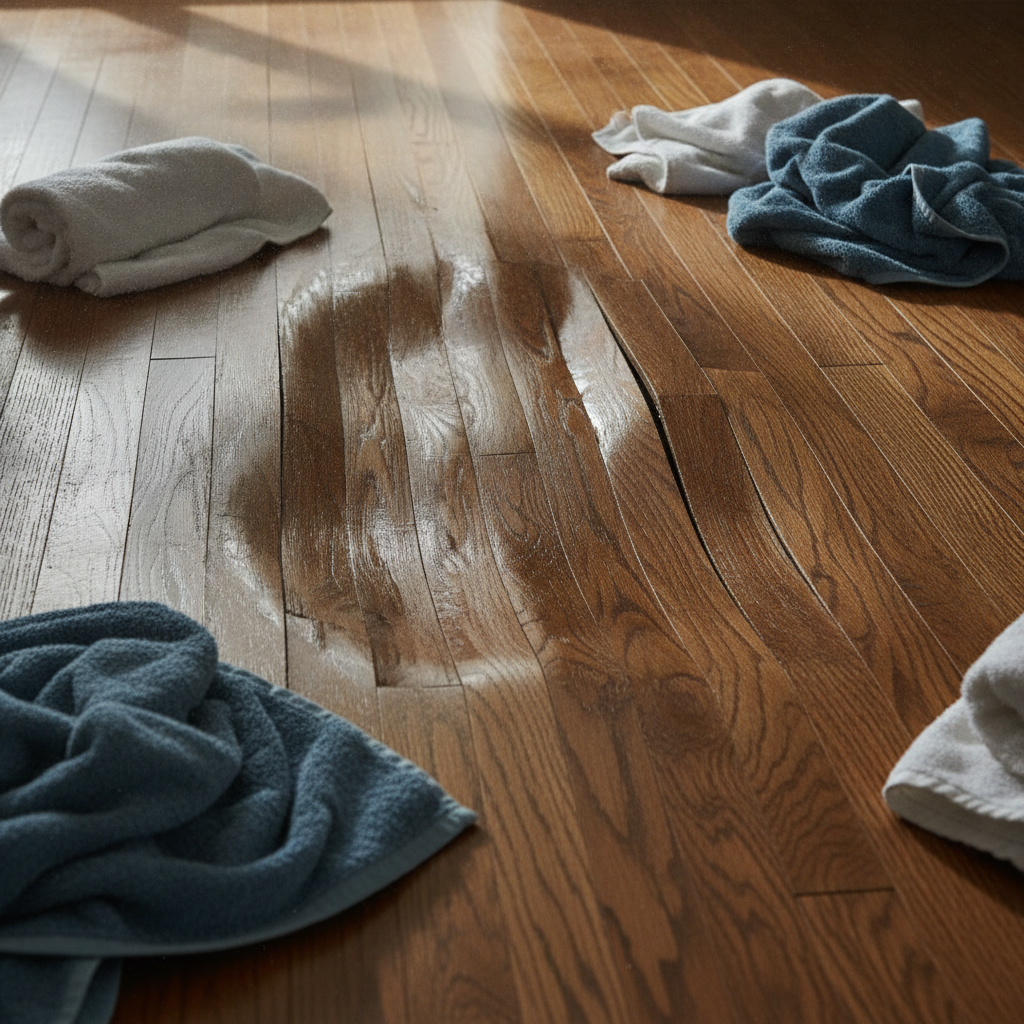
Wood is hygroscopic — it absorbs and releases moisture depending on the environment. When water contacts wood floorboards, it can cause the planks to swell, buckle, cup (edges higher than center), crown (center higher than edges), or lift entirely from the subfloor. The extent depends on:
- Amount and duration of water exposure (a quick spill vs. prolonged leak).
- Type of flooring (solid hardwood, engineered wood, laminate, vinyl).
- Installation method (nail-down, glue-down, floating).
- Subfloor and underlayment condition.
- Room ventilation, temperature, and humidity.
Immediate steps to take right after a spill
Fast action reduces the chance of permanent damage. If you notice floorboards lifting after water spill, follow these steps immediately:
- Stop the water source. Turn off fixtures or the main supply if necessary.
- Blot and remove surface water with towels, a mop, or a wet/dry vacuum. Work outward from the spill to prevent spreading water to dry areas.
- Move furniture, rugs, and items off the wet area to avoid staining and trapped moisture.
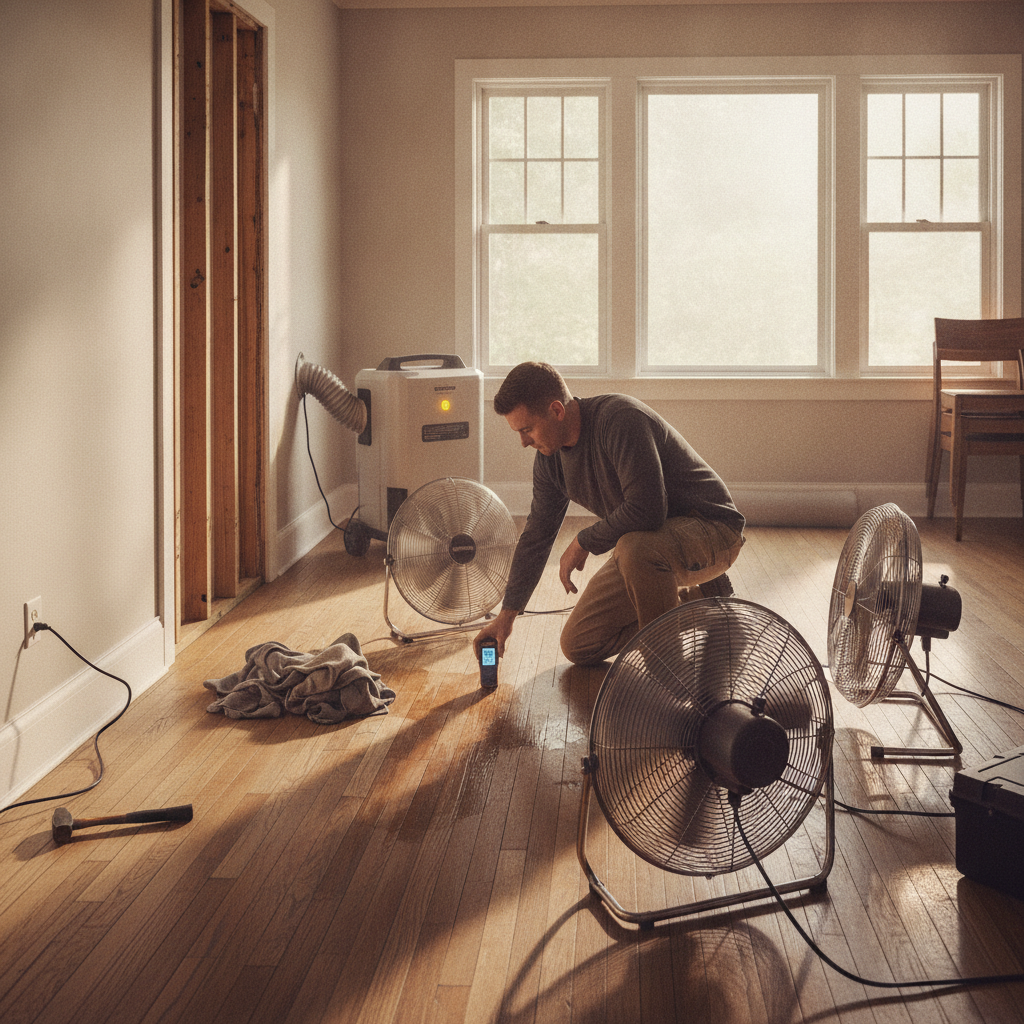
- Open windows and doors to increase airflow, and set fans to blow across the floor (not directly onto boards at a steep angle).
- Use a dehumidifier in the room to draw moisture from the air; this helps wood release absorbed water without rapid, uneven drying.
- Do not apply heat (like a hair dryer on high/close range) as rapid drying can cause cracking or further warping.
Assessing the damage
After initial drying, evaluate the affected area to determine repair options:
- Surface dampness: press a paper towel to the floor. If it remains wet, continue drying.
- Visible swelling or gaps between boards indicate dimensional movement from moisture.
- Loose, popping, or lifted boards may be cupped, buckled, or have lost adhesion to the subfloor.
- Check for discoloration (dark stains), which can signal water staining or early mold growth.
- Use a moisture meter (wood setting) to check flooring and subfloor moisture levels. For hardwood, safe moisture levels are typically 6–12% depending on species and climate; read manufacturer guidance for engineered floors.
Can lifted boards be saved? Factors to consider
Whether you can salvage the floor depends on:
- Type of flooring: engineered wood tolerates moisture better than solid hardwood; laminate and vinyl often delaminate when submerged.
- Duration of exposure: a short spill that’s dried quickly often means cosmetic issues only; standing water for hours or days is more serious.
- Extent of movement: minor cupping often resolves after proper drying; severe buckling usually requires replacement of affected planks.
- Subfloor condition: if plywood or OSB is swollen, you may need to replace the subfloor before reinstalling planks.
DIY repair options for minor lifting or cupping
If the swelling is modest and boards are structurally sound, consider these DIY fixes after thorough drying:
- Continue controlled drying with fans and dehumidifier until moisture readings return to normal.
- If boards have popped or separated but aren’t severely damaged, you may be able to refasten them. For nail-down floors, drive new finish nails into the tongues at an angle through a hidden spot, then countersink and fill holes.
- For floating floors, remove baseboards and carefully unclip the affected section to allow the panels to relax and dry; then reassemble after moisture levels normalize.
- Light sanding: When boards are dry and only slightly uneven, sanding and refinishing can restore a smooth surface. Only sand if moisture readings are stable and mold is not present.
- Spot replacement: remove a damaged plank and replace it with a new one. This requires matching species, color, and board profile.
- Weight and clamp method: in some situations, after drying, you can re-secure slightly lifted planks by gluing and clamping them flat until adhesive cures. This is delicate and works best with small areas.
When professional repair or replacement is necessary
Call a pro if you encounter any of the following:
- Large areas of buckling or many lifted boards.
- Persistent high moisture readings after drying attempts.
- Mold growth or a musty smell (potential health risk).
- Structural concerns with the subfloor or joists (soft spots, sagging).
- Floating floor that must be dismantled over a wide area or glued-down floor where adhesive failed extensively.
A flooring contractor or water-damage restoration company can assess subfloor integrity, perform controlled drying, remove and replace damaged sections, and refinish to match the existing floor.
Repair methods professionals use
Experienced technicians will typically:
- Perform thorough drying using commercial-grade dehumidifiers and air movers.
- Remove and replace damaged boards and any compromised subfloor.
- Inspect and treat for mold if detected.
- Sand and refinish adjacent areas to blend new wood with existing finish.
- Recoat or apply new finish to restore durability and appearance.
How long does recovery take?
Times vary:
- Light spills dried within a few hours: cosmetic fixes within a day or two.
- Moderate moisture requiring dehumidification: 48–72 hours to several days.
- Severe water damage with replacement and refinishing: one to several weeks, depending on subfloor work, drying time, and finish curing.
Estimated costs (approximate)
Costs depend on materials, labor, and extent of damage. Approximate ranges:
- Basic spot repair (one or two boards): $50–$200 per board depending on species and matching difficulty.
- Sanding and refinishing (per square foot): typically $3–$7 for basic jobs; complex or multi-coat finishes cost more.
- Full replacement (materials + labor): $8–$20+ per square foot depending on wood species and installation method.
- Water-damage restoration and mold remediation: from a few hundred to several thousand dollars for large or severe jobs.
Get at least two written estimates and ask about warranties on repairs.
Special considerations by flooring type
Solid hardwood
Solid planks are prone to swelling and shrinking. If small areas cup, controlled drying and sanding often fix it. If boards buckle or the subfloor is affected, replacement of boards or even sections may be needed.
Engineered hardwood
Engineered wood has a plywood or HDF core that is more dimensionally stable. Surface damage may be sanded (depending on veneer thickness), but delaminated boards usually require replacement.
Laminate
Laminate typically swells and delaminates when wet. If boards have puffed up, they often need to be replaced. Floating laminate can sometimes be lifted and replaced if damage is limited to a small area.
Vinyl plank
Luxury vinyl is water-resistant but not always waterproof at seams. If water reached under the planks and caused lifting, you may need to dry the subfloor and reapply adhesive or replace affected sections.
Preventing future lifts and water damage
Reducing the risk of floorboards lifting after water spill starts with prevention:
- Wipe up spills immediately and avoid letting water sit on the surface.
- Use mats at entrances to reduce moisture tracked inside.
- Maintain indoor humidity between 30–50% to minimize wood movement.
- Install water detectors in vulnerable areas (kitchens, bathrooms, near appliances).
- For bathrooms/kitchens, consider water-resistant flooring or proper threshold sealing.
- Regularly inspect plumbing, appliances, and under-sink areas for leaks.
For additional professional advice on protecting and repairing wood floors after water exposure, resources such as HGTV offer helpful articles on water-damaged hardwood floors: HGTV’s guide to fixing water-damaged hardwood floors.
Tools and materials you may need
- Wet/dry vacuum
- Absorbent towels and mops
- Box fans and air movers
- Dehumidifier (rental or purchase)
- Moisture meter for wood and subfloor
- Finish nails or flooring adhesive
- Clamps, pry bar, circular saw or multi-tool for board removal
- Sanding tools and finishing products if refinishing
Health and safety notes
Mold can grow in damp wood within 24–48 hours. If you see visible mold or smell mustiness after water exposure, consider hiring a professional for mold remediation. Wear protective gloves and a mask when handling potentially moldy materials. Avoid sanding or disturbing moldy wood without appropriate controls, as this can spread spores.
Real-life troubleshooting scenarios
Scenario 1: Small kitchen spill, boards slightly cupped
Blot and dry immediately with towels, set fans and a dehumidifier, monitor moisture levels for 48 hours. If cupping persists but moisture normal, consider light sanding and refinishing or let the floor acclimate for a week before deciding.
Scenario 2: Washing machine leak under floating floor
Turn off water and electricity to appliances, remove planks near the leak to allow drying of subfloor, use commercial air movers and dehumidifier. Replace insulating underlayment if it stayed wet. If multiple planks delaminated or subfloor is soft, plan for replacement.
Scenario 3: Long-standing leak with visible staining and soft subfloor
Call a water-damage restoration specialist and a flooring contractor. The subfloor likely needs replacement; drying alone won’t solve structural issues. Address the source of the leak before repairs.
How to choose a qualified contractor
When damage goes beyond DIY, look for contractors who:
- Are licensed and insured in your state.
- Provide written estimates and fixed-price options where possible.
- Have experience with your specific flooring type.
- Offer references and photos of past projects.
- Coordinate with water-damage restoration firms when necessary.
Cost-saving tips
- Address spills quickly to avoid larger repairs.
- Handle small repairs yourself if confident and the damage is limited.
- Shop for contractors’ estimates and compare warranties.
- Consider blending new boards in less-trafficked areas if perfect match is costly.
FAQs
Q: How long should I dry the floor before attempting repairs?
A: Drying typically takes 48–72 hours with fans and a dehumidifier for moderate spills, but severe or deep moisture can take a week or more. Confirm with a moisture meter — only repair when readings are stable and at acceptable levels for your flooring type.
Q: Will sanding fix water-damaged floorboards?
A: Sanding can correct minor cupping and surface issues after the boards are completely dry. It won’t repair boards that are delaminated, severely buckled, or structurally compromised.
Q: Are engineered floors immune to lifting?
A: No. Engineered floors are more dimensionally stable than solid wood but can still lift, delaminate, or warp when exposed to excessive moisture, especially if the core swells or the adhesive fails.
Q: Can I prevent lifted boards in humid climates?
A: Maintain consistent indoor humidity (30–50%), allow floors to acclimate before installation, leave specified expansion gaps at walls, and use appropriate installation methods for humid conditions.
Q: Is it safe to walk on lifted floorboards?
A: Light cupping is usually safe to walk on, but severely buckled or loose boards can be a tripping hazard and may cause further damage. Block off the area if the surface is uneven or unstable until repaired.
Q: How can I tell if mold is present under the floor?
A: Signs include a persistent musty odor, visible discoloration on subfloor or joists, respiratory irritation, or black/green fuzzy growth. If suspected, have a professional inspect and, if necessary, remediate.
Final checklist after a water spill
- Stop the source and remove surface water right away.
- Increase airflow and use a dehumidifier; monitor moisture readings.
- Remove furniture and dry the subfloor if possible.
- Assess whether DIY fixes are reasonable or if a professional is needed.
- Address root causes to prevent recurrence (plumbing, appliances, thresholds).
Floorboards lifting after water spill can be stressful, but many incidents are salvageable with prompt, measured action. For larger or complex jobs, a flooring professional can guide you through safe drying, repair, and refinishing to restore both appearance and structural integrity.
Want more guidance on designing resilient, comfortable interiors while protecting surfaces like wood floors? Explore this resource: How to Design A Comfortable Modern Living Space.