Understanding the Anatomy of Your Outdoor Faucet
Before diving into repairs, it’s helpful to understand the basic components of your outdoor faucet, also commonly known as a hose bibb or spigot. While designs can vary, especially between standard and frost-free models, the key connection points remain similar:
- Inlet Connection: This is where the faucet connects to your home’s main water supply pipe, typically a threaded joint. Leaks here are often the most concerning as they can affect interior walls.
- Spout Connection: The main outlet where water exits. While less common for leaks at the connection itself, issues here can sometimes be confused with inlet leaks.
- Hose Connection (Outlet): The threaded end where you attach a garden hose. Leaks here are usually isolated to the hose connection itself and are often easier to fix.
- Valve Stem: The internal mechanism that controls water flow, operated by the handle.
- Washers and O-rings: Crucial rubber or silicone components that create watertight seals at various points, including the valve stem and connection points.
- Packing Nut/Gland Nut: Compresses the packing material around the valve stem to prevent leaks when the faucet is open.
For frost-free faucets, there’s an additional long stem that extends into your heated home, with the actual shut-off valve located inside. This design helps prevent freezing, but leaks at the external connection points can still occur.

Why Is Your Outdoor Faucet Leaking at the Connection? Common Causes
Pinpointing the exact cause of an outdoor faucet leaking at the connection is the first step toward a successful repair. Several factors can contribute to this common plumbing problem:
1. Loose Connection (Threaded Joint)
This is often the simplest culprit. Over time, vibrations, temperature fluctuations, or even physical stress (like pulling on an attached hose) can cause the threaded connection between the faucet and the water supply pipe to loosen. A slightly loose joint allows water to seep through, especially when under pressure.
2. Worn-Out Washer or O-Ring
Inside most faucets, rubber washers and O-rings create tight seals at various points. These components are designed to withstand constant water pressure and friction, but they aren’t immortal. Over years of use, exposure to chlorine, minerals, and extreme temperatures, these seals can harden, crack, or degrade. When a washer or O-ring at a connection point fails, it loses its ability to create a watertight seal, resulting in a leak.
3. Damaged or Corroded Threads
The threads on both the faucet and the supply pipe are critical for a secure connection. If these threads become stripped, cross-threaded during installation, or corroded due to mineral buildup and age, they can no longer form a tight seal. Even if the connection feels tight, damaged threads will allow water to escape.
4. Freezing Temperatures and Freeze Damage
One of the most destructive causes of outdoor faucet leaks, especially at connection points, is freeze damage. If water is left inside the faucet or the supply pipe leading to it during freezing weather, the expanding ice can exert immense pressure, causing pipes or the faucet body to crack. These cracks often appear at weak points, such as soldered joints or threaded connections. A frost-free faucet is designed to prevent this by locating the shut-off valve inside the heated portion of your home, but if installed incorrectly or if a hose is left attached during winter, it can still be vulnerable.
For more detailed information on preventing frozen pipes and potential leaks during winter, resources like Good Housekeeping offer valuable advice on safeguarding your home’s plumbing system.
5. Mineral Buildup and Corrosion
Hard water, rich in minerals like calcium and magnesium, can lead to mineral buildup (scale) within pipes and around connection points. This buildup can interfere with the proper seating of washers and threads, leading to leaks. Similarly, corrosion, especially with older galvanized pipes or dissimilar metals in contact, can weaken the metal, leading to pinhole leaks or compromised thread integrity.
6. Improper Installation
Sometimes, the leak stems from the initial installation. If the faucet wasn’t tightened correctly, if thread sealant wasn’t used, or if the wrong type of sealant was applied, a leak can develop shortly after installation or years down the line. Cross-threading during installation is another common error that can cause immediate or delayed leaks.
7. Faulty Hose Bibb Itself
While less common for leaks specifically at the connection *to the house*, sometimes the faucet body itself has a manufacturing defect or develops an internal crack not related to freezing. If you’ve ruled out all external connection issues, the faucet itself might be the problem.
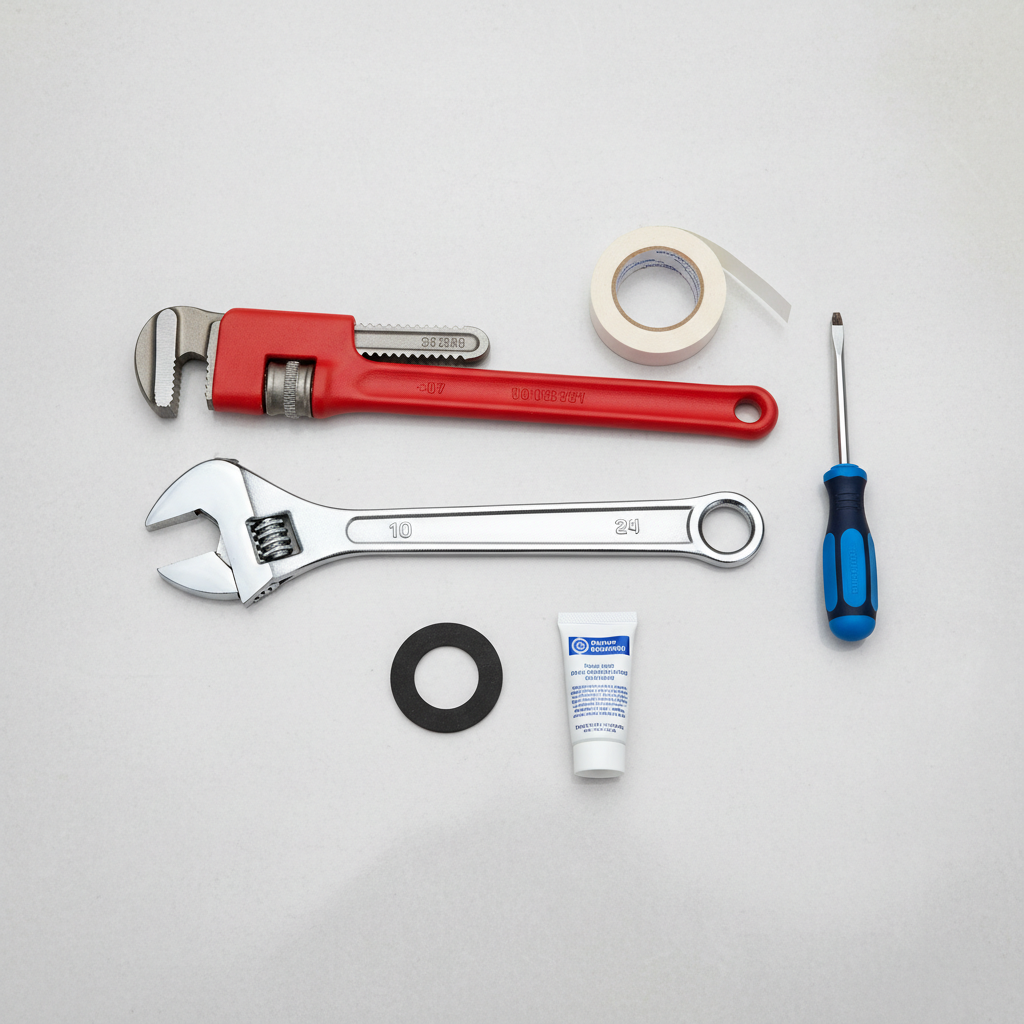
Tools and Materials You’ll Need
Before you begin any repairs, gather the necessary tools and materials. Having everything on hand will make the process smoother and more efficient:
- Adjustable wrench or pipe wrench
- Screwdrivers (Phillips and flathead)
- Utility knife or small pry tool
- New rubber washers or O-rings (match the size of the old ones)
- Plumber’s tape (PTFE tape)
- Pipe joint compound (pipe dope) – optional, but recommended for threaded connections
- Wire brush (for cleaning threads)
- Rag or old towels
- Bucket or small container
- Safety goggles
- Work gloves
- Replacement hose bibb (if necessary)
Step-by-Step Guide to Diagnosing and Fixing a Leak at the Faucet Connection
Follow these steps carefully to identify and resolve the leak at your outdoor faucet’s connection:
Step 1: Safety First – Turn Off the Water Supply
This is the most critical first step. Locate your home’s main water shut-off valve and turn it off. This will prevent any uncontrolled water flow during your repair. If your outdoor faucet has a dedicated shut-off valve (usually inside your basement or crawl space), you can turn off just that specific line.
- Open the outdoor faucet to drain any remaining water from the line after shutting off the supply.
- Check other indoor faucets to confirm the water supply is indeed off.
Step 2: Initial Inspection – Locate the Exact Leak Point
With the water off and the line drained, carefully inspect the outdoor faucet. Look for:
- Water stains or mineral deposits around the connection point.
- The exact spot where water was dripping or spraying when the water was on.
- Any visible cracks on the faucet body or pipes.
Often, a leak at the connection refers to the joint where the hose bibb meets the wall pipe. However, also check the connection where your garden hose attaches, if it’s currently connected.
Step 3: Tightening the Connection – The Simplest Fix
If the leak is at the threaded connection between the faucet and the supply pipe coming out of the wall, the simplest fix is to try tightening it. Use an adjustable wrench to gently turn the faucet clockwise. Be careful not to overtighten, as this can strip threads or crack the faucet body or pipe. A quarter to a half turn is usually sufficient. Turn the water back on and check for leaks. If the leak stops, you’re done!
If you’re tightening a connection that has packing material (often older faucets with a packing nut around the stem), try tightening that nut slightly as well. This is usually a smaller hex nut directly below the handle.
Step 4: Replacing a Washer or O-Ring
If tightening didn’t work, a worn-out washer or O-ring is likely the culprit. This repair typically applies to internal components, but sometimes an O-ring is used at the exterior connection point.
For internal washers (often responsible for drips from the spout, but related to the faucet’s integrity):
- Remove the handle screw and pull off the handle.
- Loosen and remove the packing nut (or gland nut) with your wrench.
- Carefully pull out the valve stem assembly. You might need to twist it slightly.
- Inspect the rubber washer at the end of the stem (the seat washer) and any O-rings on the stem itself. Use a screwdriver or utility knife to remove old, hardened washers.
- Replace with new washers and O-rings of the exact same size and type. Lubricate O-rings with silicone grease if available.
- Reassemble the faucet in reverse order, ensuring all parts are secure.
- Turn the water supply back on and check for leaks.
If the leak is specifically at the threaded connection to the wall, and not internal to the faucet, then the issue is more likely damaged threads or improper sealing, which we’ll cover next.
Step 5: Addressing Damaged Threads and Sealing the Connection
If the leak is at the threaded connection to the house and a simple tightening didn’t work, it’s time to re-seal or address damaged threads. This involves detaching the faucet from the pipe.
- Detaching the Faucet: With the water supply off, use two wrenches. One wrench holds the pipe coming out of the wall steady (to prevent twisting and damaging internal plumbing), while the other turns the faucet counter-clockwise to loosen and remove it.
- Inspect Threads: Carefully examine the threads on both the faucet and the pipe extending from the wall.
- Are they clean? Use a wire brush to remove any rust, mineral buildup, or old sealant.
- Are they damaged? Look for flattened, stripped, or cross-threaded areas. If the threads on the existing faucet are severely damaged, you’ll need to replace the entire faucet. If the threads on the *wall pipe* are damaged, this becomes a more complex repair requiring a plumber, as it involves soldering or more significant pipe work.
- Apply Thread Sealant: Assuming the threads are in good condition, apply plumber’s tape (PTFE tape) or pipe joint compound to the threads of the pipe coming out of the wall.
- Plumber’s Tape: Wrap the tape clockwise around the threads 3-5 times. Ensure it lays flat and covers all threads.
- Pipe Joint Compound: Apply a thin, even layer of compound over all the threads.
You can use both for an extra secure seal.
- Reattach the Faucet: Carefully align the faucet with the pipe threads and hand-tighten it clockwise. Be very careful not to cross-thread it. Once hand-tight, use your wrenches (one to hold the pipe, one to tighten the faucet) to tighten it securely. Again, avoid overtightening. The goal is snug, not wrench-breaking tight.
- Test for Leaks: Slowly turn the main water supply back on. Open the outdoor faucet slowly to allow air to escape. Check all connection points for any signs of dripping or spraying.
Step 6: Inspecting for Freeze Damage
If you suspect freeze damage (e.g., if the leak appeared after a cold snap, or if water sprays from an unusual spot on the faucet body), tightening and sealing may not be enough. Freeze damage often causes cracks in the faucet body itself or the pipes within the wall. These types of leaks are often more severe:
- Visible Cracks: If you see a crack on the faucet body, it needs to be replaced.
- Hidden Leaks: If water is leaking *inside* your wall, you might notice damp spots on an interior wall or ceiling below the faucet. This is a serious issue that requires immediate attention.
In cases of confirmed or suspected freeze damage to the faucet body or internal piping, replacement of the entire hose bibb is necessary, and potentially professional plumbing assistance if the damage extends into the wall.
Step 7: When to Replace the Entire Faucet
You should consider replacing the entire outdoor faucet if:
- The faucet body itself is cracked or severely corroded.
- The threads on the faucet are stripped beyond repair.
- The internal valve mechanism is faulty and cannot be repaired with new washers/O-rings.
- It’s an older faucet that is constantly problematic, and you want to upgrade to a frost-free model.
- You suspect damage to the pipe *inside* the wall, which would necessitate removal of the old faucet to access.
Replacing an outdoor faucet is a straightforward task for someone with basic plumbing knowledge, but if you’re uncomfortable with pipe work or dealing with soldering (for copper pipes), calling a professional is wise.
Preventive Measures to Avoid Future Leaks
Once you’ve fixed your outdoor faucet, taking proactive steps can help prevent future leaks and prolong its lifespan:
1. Winterizing Your Outdoor Faucet
This is arguably the most crucial step for homeowners in colder climates. Properly winterizing your outdoor faucet can prevent costly freeze damage.
- Disconnect Hoses: Always disconnect all hoses from outdoor faucets before the first freeze. Water trapped in a hose can freeze and expand backward into the faucet and pipe, even with frost-free models.
- Shut Off Interior Valve: If your outdoor faucet has a dedicated shut-off valve inside your home (e.g., in the basement or crawl space), turn it off.
- Drain the Line: After turning off the interior valve, open the outdoor faucet to drain any remaining water from the pipe. Leave it open until spring.
- Insulate: For standard hose bibbs, consider adding an insulated faucet cover available at most hardware stores.
2. Regular Inspection
Make it a habit to periodically inspect your outdoor faucets. Look for drips, corrosion, or any signs of wear and tear, especially before and after winter. Early detection can prevent minor issues from becoming major problems.
3. Proper Installation Techniques
If installing a new faucet, or having one installed, ensure proper techniques are followed. This includes using plumber’s tape or pipe joint compound on threaded connections and ensuring the faucet is securely, but not overtly, tightened.
4. Using Correct Hose Fittings
Always use hoses and attachments with compatible fittings. Forcing incompatible threads can damage both the hose and the faucet, leading to leaks. Avoid hanging heavy objects on your faucet, and don’t yank on an attached hose, as this can strain the connection to the wall.
When to Call a Professional Plumber
While many outdoor faucet leaks can be DIY fixes, there are situations where calling a licensed plumber is the best course of action:
- Extensive Freeze Damage: If you suspect a burst pipe inside your wall, or significant damage to your home’s main water line, a plumber has the tools and expertise to safely diagnose and repair it.
- Damaged Wall Pipe Threads: If the threads on the pipe coming out of your wall are damaged, this requires specialized tools and expertise to repair or replace, which is typically beyond the scope of a DIY fix.
- Lack of Confidence or Tools: If you’re uncomfortable with any step of the repair process, or lack the necessary tools, it’s safer to call a professional.
- Persistent Leaks: If you’ve tried all the common fixes and the outdoor faucet leaking at the connection persists, there might be a more complex underlying issue.
- Hidden Leaks: Any sign of water damage inside your home (damp drywall, unexplained puddles) related to the outdoor faucet demands professional attention immediately to prevent structural damage and mold growth.
Frequently Asked Questions About Outdoor Faucet Leaks
Q1: Can a leaking outdoor faucet increase my water bill significantly?
A: Absolutely. Even a slow drip can waste hundreds of gallons of water over a month, leading to a noticeable increase in your water bill. A constant stream or spray will waste exponentially more, costing you significant money and resources.
Q2: Is plumber’s tape or pipe dope better for sealing threads?
A: Both plumber’s tape (PTFE tape) and pipe joint compound (pipe dope) are effective sealants for threaded connections. Plumber’s tape lubricates threads and helps create a tight seal, while pipe dope fills in microscopic gaps. Many plumbers use both together for an extra secure seal. Ensure you use tape correctly by wrapping it clockwise.
Q3: How do I know if my outdoor faucet is frost-free?
A: Frost-free faucets typically extend several inches into the wall, with the actual shut-off valve located inside your heated home. They often have a slightly longer body where they exit the wall compared to standard hose bibbs. The handle is usually parallel to the wall, and they might have a vacuum breaker on the spout. If you’re unsure, consulting a home inspector or plumber can confirm its type and whether it was installed correctly.
Q4: My outdoor faucet leaks only when the hose is attached. What does this mean?
A: If your outdoor faucet leaks only when a hose is attached, the problem is most likely at the connection between the hose and the faucet. This could be due to a missing or worn-out rubber washer inside the hose fitting, damaged threads on the hose connector, or an improperly tightened hose. Replace the hose washer first, then ensure the hose is securely but not overtightened onto the faucet.
Conclusion
An outdoor faucet leaking at the connection is a common household issue that, with the right approach, is often a manageable DIY repair. By understanding the potential causes, gathering the appropriate tools, and following a methodical step-by-step process, you can effectively diagnose and fix most leaks. Remember to prioritize safety by always shutting off the water supply, and don’t hesitate to call a professional plumber if the problem is beyond your comfort level or expertise. Regular maintenance and proper winterization are your best defenses against future leaks, ensuring your outdoor water supply remains reliable and efficient for years to come.


