A clogged faucet aerator can significantly reduce water flow, causing frustrating drips or weak streams in your sink. Whether in your kitchen or bathroom, a slow faucet often signals buildup inside the aerator, a small but essential component that mixes air with water to reduce splashing and save water. In this comprehensive guide, we’ll explore how to easily identify and fix a clogged faucet aerator to restore optimal water performance and improve your home’s water efficiency.
What Is a Faucet Aerator and Why Does It Get Clogged?
A faucet aerator is the small mesh screen attached to the tip of your faucet’s spout. Its primary function is to introduce air into the water stream, creating a consistent, splash-free flow while conserving water. However, over time, mineral deposits, debris, and sediment from your water supply can accumulate inside the aerator, resulting in clogging.
- Common Causes of Clogging: Hard water minerals like calcium and lime, rust particles, dirt, and residue from plumbing work.
- Signs of a Clogged Aerator: Reduced water pressure, uneven water spray, sputtering, or water trickling instead of flowing freely.
Tools Needed to Clean or Replace a Faucet Aerator
- Adjustable wrench or pliers (preferably with cloth to protect finish)
- Small bowl or container
- Old toothbrush or small cleaning brush
- White vinegar or a commercial descaling solution
- Needle or toothpick (for stubborn debris)
- Replacement aerator (optional, in case damage is found)
Step-by-Step Guide to Cleaning a Clogged Faucet Aerator
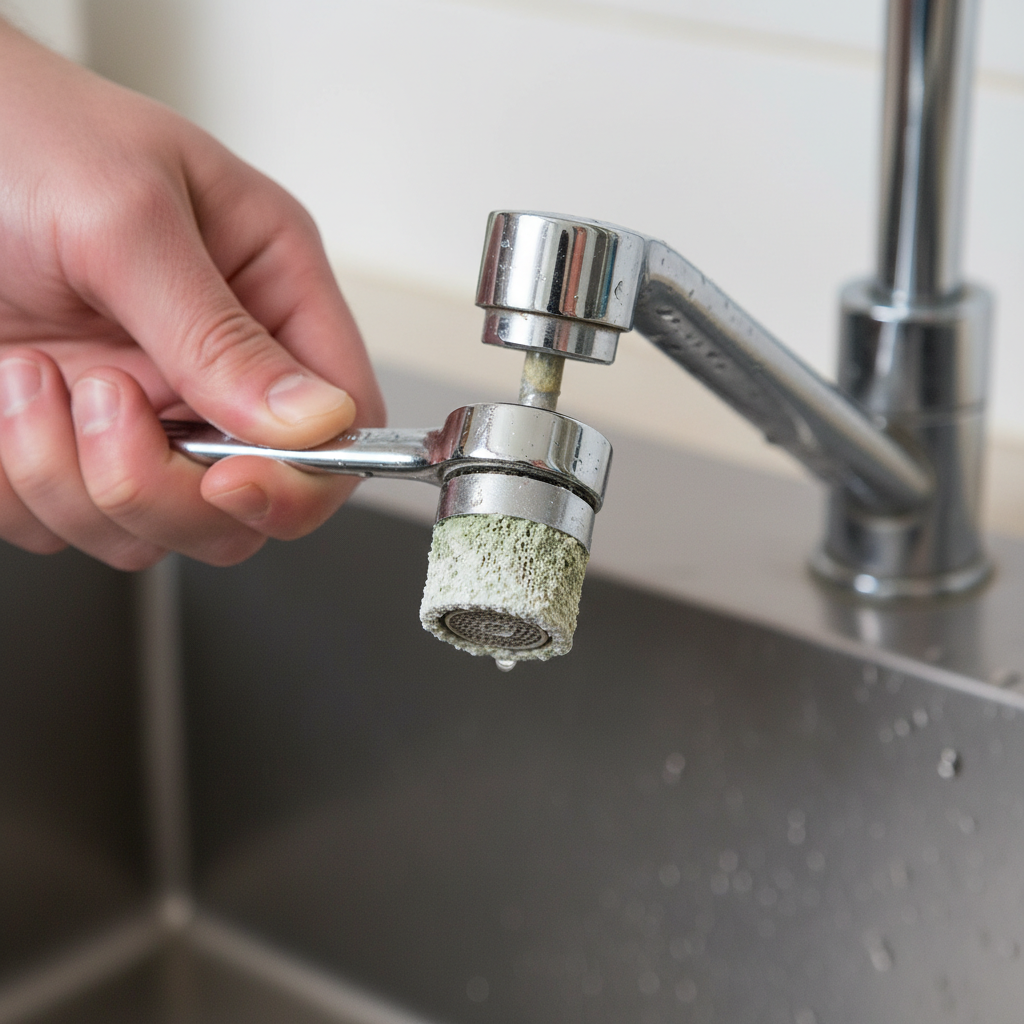
Step 1: Remove the Aerator
Begin by turning off the faucet and carefully unscrewing the aerator from the tip of the faucet. If it’s tight, use an adjustable wrench wrapped with a soft cloth to avoid scratching the finish. Place the aerator parts into a bowl to avoid losing any small pieces.
Step 2: Disassemble the Aerator
Most aerators come apart into a few components: the outer casing, the screen, a rubber washer, and sometimes flow restrictors. Carefully separate these parts and inspect for damage or excessive buildup.
Step 3: Soak in Vinegar
Place the aerator pieces into a bowl filled with white vinegar and let them soak for 30 minutes to an hour. Vinegar effectively dissolves mineral deposits and scale. For intense buildup, a commercial descaling solution could be used following product instructions.
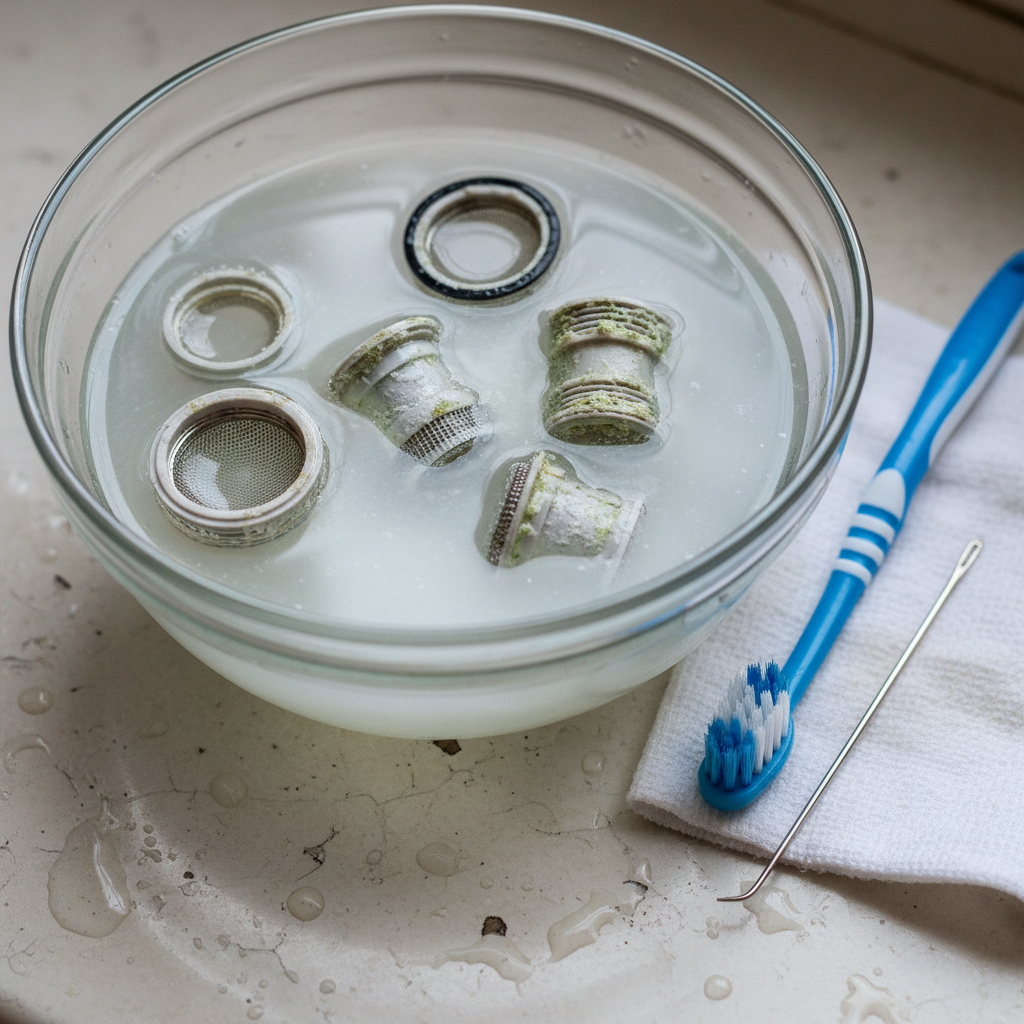
Step 4: Scrub and Clear Debris
After soaking, use an old toothbrush or soft brush to scrub away loosened deposits. Use a needle or toothpick to gently remove any remaining particles lodged in the mesh screen or tiny holes.
Step 5: Rinse and Reassemble
Rinse all aerator parts thoroughly with clean water to remove vinegar and debris. Reassemble the aerator components carefully, ensuring the washer sits properly to prevent leaks.
Step 6: Reinstall the Aerator
Screw the aerator back onto the faucet tip by hand to avoid cross-threading. Use the wrench with cloth to tighten snugly without overtightening, which can damage threads.
When to Replace Your Faucet Aerator
If after cleaning the water flow does not improve or you notice cracks, worn washers, or damaged mesh screens, it’s time to replace the aerator. Replacement aerators are inexpensive and available at most hardware stores or online. Choose one that matches the size and style of your faucet.
Bonus Tips to Prevent Future Clogs
- Regularly clean the aerator every 3 to 6 months, especially in hard water areas.
- Install a water softener if mineral buildup is persistent.
- Consider using faucet filters to reduce sediment entering your plumbing.
FAQs About Faucet Aerators
Q1: How do I know if the aerator is causing low water pressure?
If only one faucet has low pressure while others in the home perform normally, a clogged aerator is likely the cause. Removing and checking the aerator usually confirms this.
Q2: Can I clean the aerator without removing it?
While some debris may be flushed out by running water, thorough cleaning requires removal to access and soak the parts properly.
Q3: How do I choose the right aerator for replacement?
Check the size and threading of your current aerator. Common sizes include standard male and female threads. Replace with an aerator that matches to ensure proper fit and function.
Q4: Is it safe to use vinegar to clean all faucet aerators?
Yes, white vinegar is safe for most metals and plastic aerator parts but avoid prolonged soaking of any rubber washers to prevent deterioration.
Q5: How much water can a clogged aerator waste?
A clogged aerator may cause uneven water flow, leading you to run the tap longer or increase pressure, which can waste water over time. Keeping aerators clean helps maintain efficiency.
Conclusion
A clogged faucet aerator is a common and easily fixable household issue. Regular maintenance not only restores your water flow but also contributes to water conservation and prolongs faucet life. By following these simple steps to clean or replace your aerator, you can ensure your faucets perform optimally and keep your home running smoothly.
For additional maintenance tips and ensuring your faucets stay in top shape, reputable sources like Better Homes & Gardens offer excellent expert advice.


