Why Your Ceiling Fan Isn’t Turning On: Common Culprits
Understanding the potential reasons why your ceiling fan has stopped working is the first step toward a solution. From simple power disruptions to more complex internal failures, identifying the source of the problem will guide your repair efforts.
Power Supply Issues
The most straightforward reason a ceiling fan might not turn on often relates to its power supply. Don’t overlook these basic checks.
- Circuit Breaker: Your home’s electrical system is protected by circuit breakers. If the circuit connected to your ceiling fan is tripped, it will cut off power to the fan. This can happen due to an overload or a short circuit.
- Wall Switch: The wall switch controls the flow of electricity to your fan. A faulty switch, loose wiring within the switch, or even a simple misunderstanding of a multi-gang switch (one controlling the light, another the fan) can be the cause.
- Loose Wiring at the Junction Box: Over time, vibrations or improper initial installation can cause wires in the ceiling junction box to loosen, disrupting the electrical connection.
Remote Control or Pull Chain Malfunctions
Many modern ceiling fans rely on remote controls for operation, while older models and some new ones still use traditional pull chains. These components can fail independently of the fan’s motor.
- Remote Control Batteries/Settings: Dead batteries, incorrect dip switch settings, or a loss of pairing between the remote and the fan’s receiver unit can prevent the fan from responding.
- Receiver Unit: The receiver unit, typically housed within the fan’s canopy, translates signals from the remote to the fan. A faulty receiver can prevent the motor from getting power or commands.
- Pull Chain Mechanism: If your fan uses a pull chain, the internal mechanism can wear out, break, or become stuck, preventing it from completing the electrical circuit necessary to turn the fan on or change speeds.
Motor or Internal Component Problems
Sometimes, the issue lies within the fan itself, specifically its electrical components or the motor.
- Capacitor Failure: The capacitor is a critical component that provides the initial electrical boost to start the fan motor and maintain its speed. A failed capacitor is a very common reason for a fan that hums but doesn’t spin, or one that refuses to start at all.
- Motor Overheating: Although less common with residential fans, continuous heavy use or poor ventilation can cause the motor to overheat, triggering an internal thermal cut-off switch that prevents it from turning on until it cools down.
- Bearing Issues: Worn-out bearings can cause the motor to seize or create significant resistance, preventing the blades from turning freely. This might result in a humming sound without movement.
Wiring and Connections
Faulty wiring can manifest in various ways, from a complete lack of power to intermittent operation.
- Loose Wire Nuts: Connections secured by wire nuts can become loose, leading to an incomplete circuit.
- Improper Installation: If the fan was not installed correctly, wiring mistakes could prevent it from functioning from day one, or lead to problems down the line.
- Ground Wire Issues: While not directly affecting power, a faulty ground wire can pose a safety risk and, in rare cases, prevent proper operation if other safeguards are triggered.
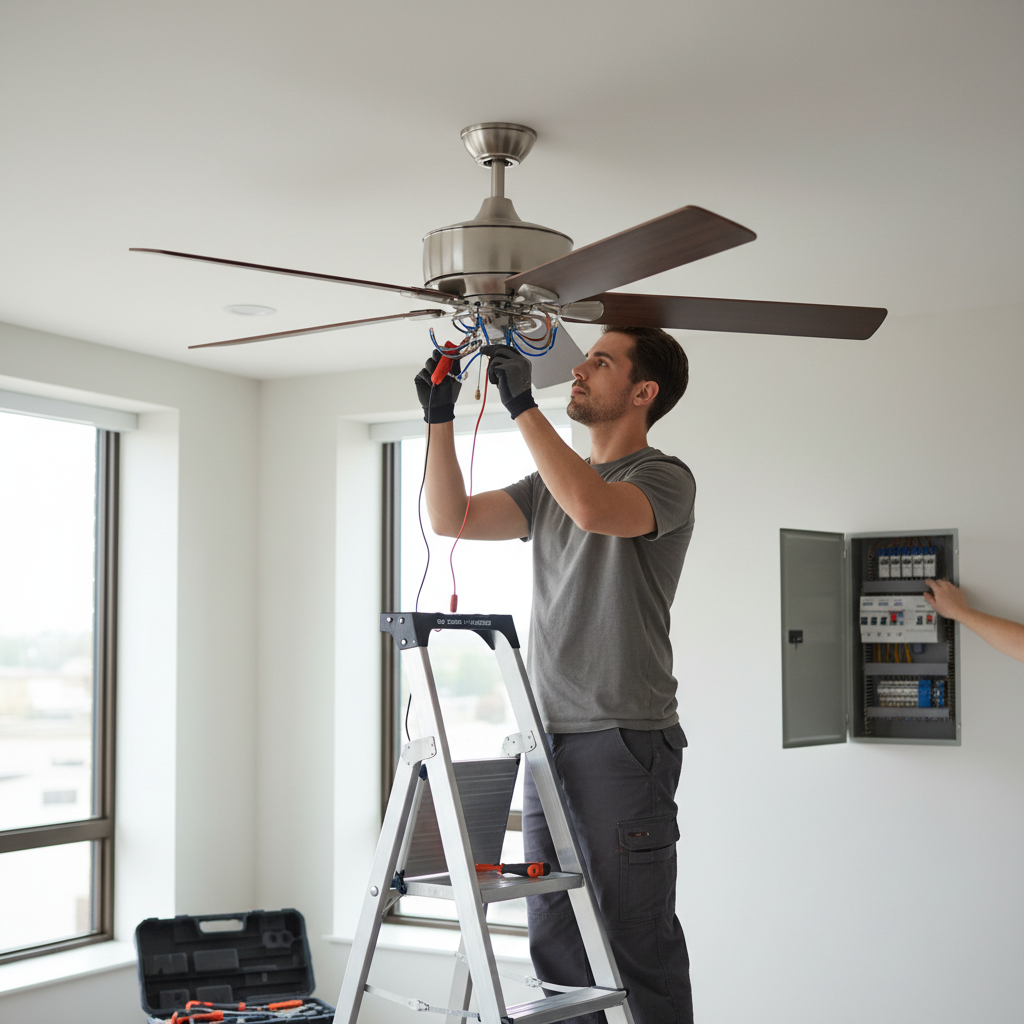
Safety First: Before You Start Troubleshooting
Working with electricity can be dangerous. Always prioritize your safety before attempting any repairs or inspections on your ceiling fan. Failing to do so could result in electric shock, injury, or damage to your home’s electrical system.
- Turn Off Power at the Breaker: This is the most crucial step. Locate your home’s main electrical panel and switch off the circuit breaker that controls the ceiling fan. If unsure which breaker it is, switch off the main breaker to cut power to your entire home.
- Use a Voltage Tester: After turning off the breaker, use a non-contact voltage tester to confirm that there is no power reaching the fan at the wall switch and in the junction box.
- Gather the Right Tools: You’ll likely need a screwdriver set (Phillips and flathead), a voltage tester, pliers, and possibly a ladder.
- Work with a Partner: If you’re on a ladder, having someone spot you and hand you tools can enhance safety.
- Call a Professional if Unsure: If you’re uncomfortable at any point with electrical work, do not hesitate to call a qualified electrician. For more comprehensive guidelines on electrical safety around the home, consider resources like HGTV’s electrical safety tips.
Step-by-Step Troubleshooting Guide for a Ceiling Fan Not Turning On
Now that you understand the potential issues and have taken safety precautions, let’s dive into the diagnostic steps to identify and fix why your ceiling fan isn’t turning on.
Step 1: Check the Power Source
Begin with the simplest checks, as these are often the quickest fixes.
- Reset the Circuit Breaker: Go to your electrical panel. Look for a breaker that is “tripped” (often halfway between ON and OFF, or fully OFF). Flip it completely to the OFF position, wait a few seconds, then flip it firmly back to the ON position. If it immediately trips again, there’s likely a short circuit or overload that requires professional attention.
- Inspect the Wall Switch:
- With the power off at the breaker, remove the cover plate from the wall switch.
- Carefully pull the switch out of the electrical box.
- Examine the wires connected to the switch. Look for any loose connections, frayed wires, or burn marks.
- Use your voltage tester to confirm power is reaching the switch (when the breaker is ON, *after* you’ve safely disconnected wires if you needed to pull the switch far out, and *before* you test the fan). Then, test the output side of the switch when it’s in the ON position to ensure it’s allowing power to pass through.
- If the switch appears damaged or doesn’t conduct power, it may need to be replaced.
Step 2: Examine the Remote Control and Receiver
If your fan operates via a remote, this is a common point of failure.
- Replace Remote Batteries: This seems obvious, but it’s often overlooked. Even if the remote’s light flashes, weak batteries might not send a strong enough signal.
- Check Dip Switches: Many older remotes and receivers use “dip switches” (small plastic switches inside the remote and the receiver) to establish communication. Ensure the pattern of these switches matches on both the remote and the receiver. If they don’t match, the remote won’t communicate with the fan.
- Re-Pair the Remote (if applicable): Newer, smart-enabled fans or those without dip switches might require a pairing procedure. Consult your fan’s manual for specific instructions, which often involve turning the power off and on at the breaker for a set duration while pressing a button on the remote.
- Inspect the Receiver Unit: With the power off at the breaker, remove the fan’s canopy (the decorative cover against the ceiling). Locate the receiver unit, typically a small box with several wires connected to it. Check its connections for looseness or signs of burning. A faulty receiver will prevent any signals from reaching the fan motor. Replacing the receiver is often a DIY task if you’re comfortable with basic wiring, but ensure you get a compatible model.
Step 3: Inspect the Pull Chain Switch
For fans with pull chains, the internal mechanism can fail.
- Jiggle and Listen: With the power on (but standing clear of the blades), gently pull the chain a few times. Listen for a distinct “click” with each pull. If it feels loose, doesn’t click, or pulls out entirely, the switch is likely broken.
- Lubricate (Caution): If the chain feels stiff but still clicks, a tiny drop of electrical contact cleaner or lubricant might help, but avoid over-lubricating.
- Replace the Switch: With the power off at the breaker, remove the fan’s light kit or switch housing. Disconnect the old pull chain switch and replace it with a new, compatible one. These switches are relatively inexpensive and widely available.
Step 4: Check Wiring Connections
Loose wires are a common cause of intermittent or complete failure.
- Turn Off Power: Absolutely critical.
- Remove Canopy: Carefully lower the fan’s canopy from the ceiling bracket.
- Inspect Wire Nuts: Check all wire connections secured by wire nuts. Gently tug on each wire to ensure it’s firmly seated in its nut. If any feel loose, unscrew the nut, twist the wires together securely, and re-fasten the nut, ensuring no bare copper is exposed.
- Check for Burn Marks or Fraying: Look for any signs of heat damage, melted insulation, or exposed copper wires. These indicate a more serious electrical issue that may require an electrician.
- Ground Wire: Ensure the bare copper or green wire is securely connected to the grounding screw on the mounting bracket and the fan.
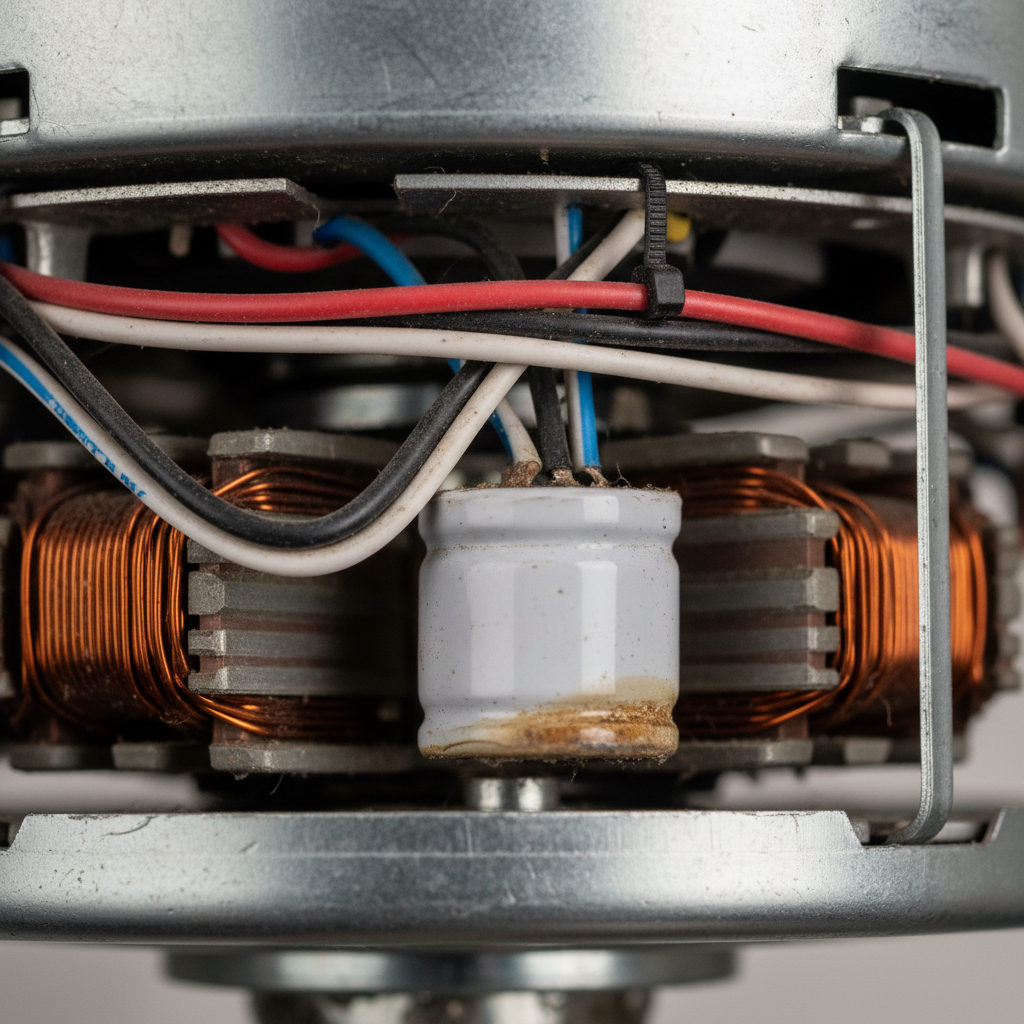
Step 5: Test the Capacitor
If your fan hums but doesn’t spin, or only spins very slowly, the capacitor is a prime suspect.
- Locate the Capacitor: With the power off and the canopy removed, the capacitor is usually a small black box (or several smaller boxes) with multiple wires, typically tucked into the fan’s housing.
- Visual Inspection: Look for any signs of damage – bulging sides, leaking fluid, or burn marks. These are clear indicators of failure.
- Replacement: If the capacitor is visually damaged or if other troubleshooting steps have failed, replacing it is often the next logical step. Note the specific values (e.g., microfarads – uF) and voltage ratings on the old capacitor to purchase an identical replacement. This involves carefully disconnecting and reconnecting several wires. If you’re not confident in your ability to match and replace the wires correctly, it’s best to consult a professional.
Step 6: Address Motor Issues
If the above steps haven’t worked, the problem might be with the motor itself, though this is less common than capacitor failure.
- Fan Blades Free Movement: With the power off, gently try to spin the fan blades by hand. Do they move freely and smoothly? If there’s significant resistance, grinding, or they feel seized, the motor’s bearings might be failing.
- Lubrication: Some older fans have oil ports near the motor housing. A few drops of non-detergent 20-weight motor oil (like that used for sewing machines) can sometimes revive a stiff motor. Check your fan’s manual first.
- Motor Overheating Protection: If the fan previously stopped working after prolonged use, it might have an internal thermal cut-off. Let the fan rest for several hours to cool down completely before re-testing.
- Beyond DIY: If the motor bearings are truly seized or the motor itself has failed, replacing the entire fan is usually more cost-effective and practical than attempting a motor repair.
Step 7: Consider Light Kit Functionality (Diagnostic)
The functionality of your fan’s light kit can offer crucial clues.
- Light Works, Fan Doesn’t: If the light comes on but the fan blades remain still, this usually indicates that power is reaching the fan unit. The problem is then likely confined to the fan motor, capacitor, pull chain switch, or the fan’s receiver unit (if separate controls are used for light and fan). This eliminates broader power supply issues like the circuit breaker or wall switch as the primary cause.
- Neither Light Nor Fan Works: This suggests a more widespread power issue, such as a tripped circuit breaker, a faulty wall switch, or loose wiring at the junction box providing power to the entire fan unit.
When to Call a Professional Electrician
While many ceiling fan issues can be resolved with DIY troubleshooting, there are times when calling a professional electrician is the safest and most sensible option.
- Uncomfortable with Electrical Work: If you’re not confident in your ability to safely handle electrical wiring, it’s always best to hire a professional. Electrical work carries inherent risks.
- Persistent Issues After Basic Troubleshooting: If you’ve gone through all the steps above and your ceiling fan still isn’t turning on, there might be a more complex electrical issue, such as internal wiring problems you can’t see, or issues with your home’s circuit.
- Flickering Lights or Sparks: Any signs of arcing, flickering lights, burning smells, or visible damage to wires require immediate professional attention. These indicate serious electrical faults.
- New Installation Problems: If your ceiling fan has never worked since it was installed, or stopped working very shortly after, it could be due to incorrect installation or a defective unit. An electrician can diagnose installation errors.
- No Power Anywhere: If multiple outlets or lights on the same circuit are also not working, the problem is bigger than just the fan and needs professional assessment.
Preventing Future Ceiling Fan Problems
Once you’ve got your ceiling fan spinning again, a little preventative maintenance can help keep it working smoothly for years to come.
- Regular Cleaning: Dust and dirt can accumulate on fan blades and within the motor housing, leading to imbalance and potential overheating. Wipe down the blades regularly and use compressed air to clean out the motor vents periodically.
- Annual Checks: Once a year, remove the canopy (with the power off!) and gently check all wire connections to ensure they are secure. Tighten any loose screws on the mounting bracket or motor housing.
- Proper Installation: Ensure your ceiling fan is installed correctly, securely mounted to an appropriate fan-rated electrical box, and all wiring connections are tight and insulated. Proper installation from the start significantly reduces future problems, including issues with a ceiling fan wobbling.
- Quality Components: When replacing parts like capacitors or switches, opt for high-quality components that meet or exceed the original specifications to ensure longevity and reliable performance.
- Avoid Overuse: While fans are designed for continuous use, giving them a break, especially during cooler periods, can extend their lifespan.
Frequently Asked Questions (FAQs)
Why does my ceiling fan light work but the fan doesn’t turn on?
If the light works, it confirms that power is reaching the fan assembly. The problem is most likely with the fan motor itself, the fan’s pull chain switch, the capacitor (a common culprit if the fan hums but doesn’t spin), or the fan’s specific receiver unit for the motor (if you have separate remote controls for light and fan functions).
Can a bad capacitor really stop a ceiling fan from turning on?
Yes, absolutely. A faulty capacitor is one of the most common reasons a ceiling fan stops working, especially if it hums or spins very slowly without assistance. The capacitor provides the necessary electrical charge to start the motor and maintain its speed. Without it, the motor won’t get the initial push it needs.
How do I reset my ceiling fan remote control?
The reset procedure varies by manufacturer and model. For many older fans with dip switches, you simply need to ensure the dip switch settings inside the remote match those inside the fan’s receiver unit. For newer models, it often involves turning the power to the fan off at the breaker for 30 seconds to a minute, then restoring power and, within a short timeframe (e.g., 30 seconds), pressing and holding a specific button (often “Light” or “Fan Speed”) on the remote until the fan light blinks or the fan responds. Always consult your fan’s user manual for precise instructions.
Is it dangerous to try and fix a ceiling fan myself?
Any electrical work carries inherent risks, including electric shock. However, simple troubleshooting steps like checking the circuit breaker, changing remote batteries, or inspecting visible wiring (after turning off the power at the breaker) are generally safe for a handy homeowner. More complex tasks like replacing a capacitor or dealing with internal wiring should only be attempted if you are confident in your electrical knowledge and always prioritize safety by disconnecting power. If in doubt, call a qualified electrician.
How much does it cost to repair a ceiling fan?
The cost varies significantly depending on the problem and whether you DIY or hire a professional. Replacing a capacitor or pull chain switch yourself might cost $10-$30 for the part. Hiring an electrician could range from $75-$200 or more for a service call, plus the cost of parts. If the motor is completely dead, replacing the entire fan (costing anywhere from $75 to several hundred dollars, plus installation) is often more economical than attempting a complex motor repair.
A non-functional ceiling fan can be a minor annoyance or a major comfort issue, but it doesn’t have to be a mystery. By systematically checking the power supply, remote, switches, and internal components, you can often diagnose and fix the problem yourself. Remember to always put safety first, and don’t hesitate to call a professional if you encounter anything beyond your comfort level. With these tips, you’ll have your ceiling fan back to silently circulating air, bringing comfort back to your home in no time.


