Identifying the Source of the Leak
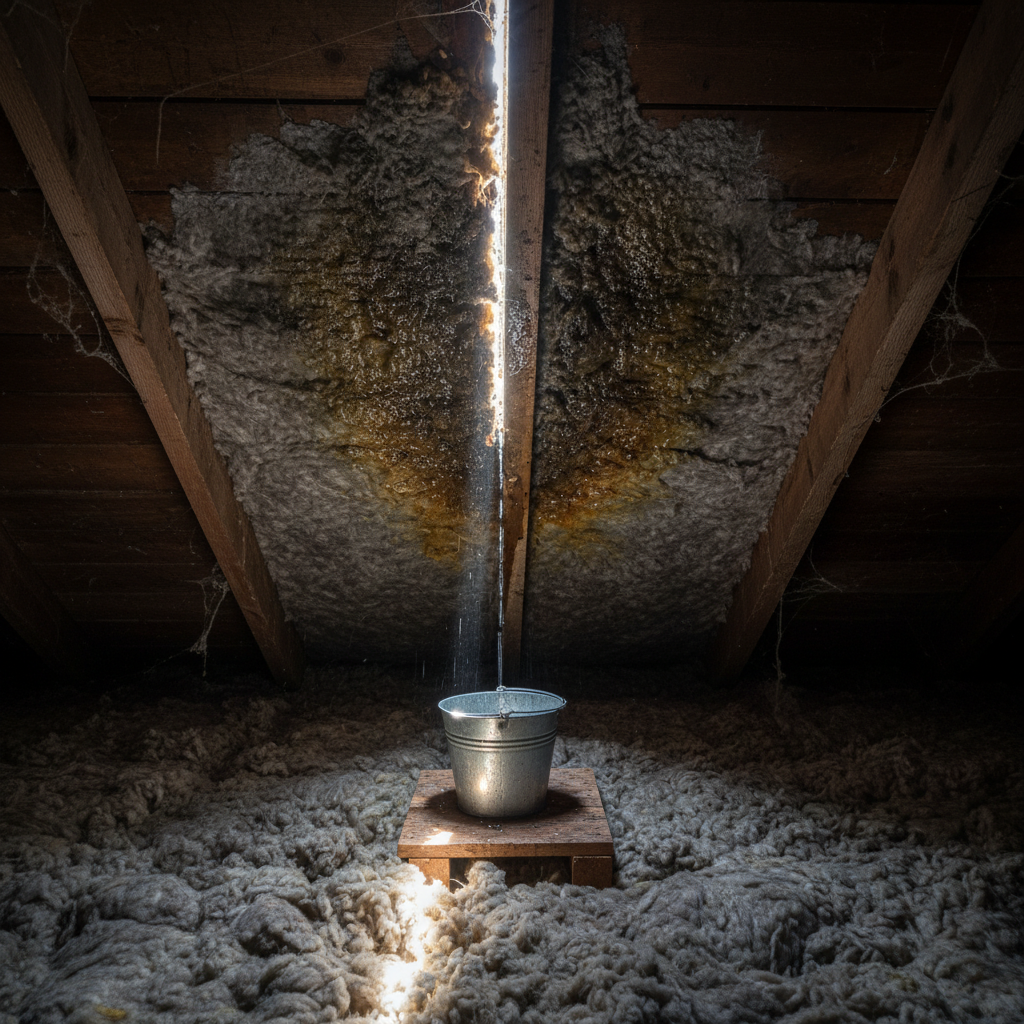
Before any remediation can begin, the absolute first step is to pinpoint the exact source of the water infiltration. The attic can be a tricky place to diagnose leaks because water often travels along rafters and joists, appearing in a spot far from its actual entry point. A thorough investigation is crucial.
Roof Leaks
The roof is the most common culprit for attic water damage. Various issues can compromise its integrity:
- Damaged or Missing Shingles: High winds, storms, or simple wear and tear can lift, crack, or dislodge shingles, creating direct pathways for water.
- Compromised Flashing: Flashing – the metal strips installed around chimneys, skylights, vents, and valleys – is designed to create a watertight seal. If it’s bent, rusted, or improperly installed, water can seep underneath.
- Vents and Skylights: These penetrations in the roof are prime suspects. Cracks in the vent housing, deteriorated seals around skylights, or even poorly installed flashing can allow water to enter.
- Chimney Issues: Cracks in the chimney mortar, damaged chimney caps, or faulty flashing where the chimney meets the roof can all be sources of leaks.
- Ice Dams: In colder climates, ice dams form when melting snow refreezes at the eaves, preventing subsequent meltwater from draining. This water then backs up under shingles and into the attic.
- Gutters and Downspouts: Clogged or damaged gutters can cause water to overflow and pool against the fascia board, potentially finding its way into the attic.
Plumbing Leaks
While less common than roof leaks, plumbing issues within the attic space can also lead to significant water damage:
- Pipes and Fittings: Supply lines, drainpipes, or even small leaks at pipe joints can drip continuously, saturating insulation over time. Freezing temperatures can also cause pipes to burst.
- Water Heater: If your water heater is located in the attic, a leak from the tank, pressure relief valve, or connections can cause widespread damage.
- HVAC Condensation Lines: Air conditioning units generate condensation, which is typically drained away. If the drain pan overflows or the condensate line becomes clogged, water can spill into the attic.
Condensation Issues
Sometimes, what appears to be a leak is actually a severe condensation problem, though it can mimic a leak and still cause your attic insulation to get soaked.
- Poor Ventilation: Inadequate attic ventilation traps warm, moist air. When this air comes into contact with cold surfaces (like the underside of the roof deck), it condenses into water droplets, mimicking a leak.
- Air Leaks from Living Spaces: Warm, humid air from bathrooms, kitchens, or laundry rooms can rise into the attic through unsealed penetrations (e.g., around light fixtures, exhaust fan ducts, plumbing stacks). This moist air then condenses.
Other Potential Culprits
- Exterior Wall Leaks: In rare cases, water seeping through exterior walls, particularly around windows or poorly sealed siding, can migrate upwards and into the attic structure.
When investigating, look for water stains, active drips, and discoloration on rafters, sheathing, and insulation. Tracing these marks can often lead you directly to the source.
The Immediate Dangers of Soaked Insulation
A leak in the attic is not just about wet insulation; it sets off a chain reaction of potential problems that can severely impact your home and health. Understanding these dangers underscores the urgency of addressing the issue head-on.
Mold and Mildew Growth
Perhaps the most insidious danger of wet insulation is the rapid proliferation of mold and mildew. Mold spores are ubiquitous and only need moisture, an organic food source (like wood or paper backing on insulation), and a suitable temperature to thrive. Within 24-48 hours of becoming wet, insulation can begin to harbor mold colonies. Mold not only degrades building materials but also poses significant health risks, including respiratory problems, allergies, and other illnesses. The musty odor associated with mold can also permeate your entire home. For more information on dealing with mold safely, consult resources like Good Housekeeping’s guide on how to get rid of mold.
Decreased Insulation Efficiency
Insulation works by trapping air, creating a barrier against heat transfer. When insulation gets wet, its ability to trap air is severely compromised. Water fills the air pockets, drastically reducing its R-value (a measure of thermal resistance). This means your attic, no longer effectively insulated, will allow heat to escape in winter and enter in summer, leading to:
- Significantly higher energy bills.
- Uncomfortable indoor temperatures and drafts.
- Increased strain on your HVAC system.
Structural Damage
Constant moisture exposure can wreak havoc on your home’s wooden structure. Rafters, joists, and roof decking can absorb water, leading to:
- Rot and Decay: Wood exposed to prolonged moisture can soften, decay, and lose its structural integrity, potentially leading to sagging ceilings or even roof collapse in extreme cases.
- Warping and Sagging: Plywood and drywall ceilings below the attic can warp, discolor, or sag due to water saturation.
- Compromised Fascia and Soffit: Water dripping from the eaves can damage these exterior components, leading to further decay and allowing pests to enter.
Electrical Hazards
Attics often house electrical wiring for lighting, fans, and other circuits. Water and electricity are a dangerous combination. A leak can:
- Cause short circuits, potentially leading to power outages.
- Increase the risk of electrical fires.
- Create hazardous conditions for anyone entering the attic.
Pest Infestation
Damp, dark, and secluded areas like a wet attic are attractive to various pests. Rodents, insects (termites, carpenter ants, silverfish), and even some wildlife are drawn to moisture and the softened wood it creates. These pests can cause further damage to your home and introduce their own set of health concerns.
Given these serious risks, treating any sign of water-damaged insulation as an emergency is critical for the long-term health and safety of your home.
Steps to Take When You Discover Soaked Attic Insulation
Finding your attic insulation soaked from a leak can be overwhelming, but taking immediate, systematic steps can mitigate damage and ensure safety.
Safety First
Before you even think about touching anything, prioritize your safety:
- Turn Off Electricity: If there’s any chance water is near electrical wiring or light fixtures, immediately turn off the power to the affected area at your main electrical panel.
- Wear Protective Gear: When entering the attic, always wear appropriate safety equipment. This includes a sturdy mask or respirator to protect against mold spores and dust, gloves, long sleeves, and safety glasses. Attic environments can be dusty, contain allergens, and potentially harmful contaminants.
- Mind Your Footing: Always walk on joists or designated attic walkways. Never step directly on ceiling drywall, as you could fall through. Use a sturdy ladder for access.
Stop the Water Source
This is the most critical immediate action. You cannot begin effective remediation until the leak is no longer active.
- Temporary Fixes: If it’s a roof leak and weather permits, you might be able to temporarily cover the external leak area with a tarp or plastic sheeting. For plumbing leaks, turn off the water supply to the affected pipe or the main water shut-off valve for your entire home if necessary.
- Professional Help: If you cannot safely or effectively stop the leak yourself, call a qualified professional (roofer, plumber) immediately.
Isolate the Affected Area
Once the water source is stopped, prevent further damage:
- Contain Drips: Place buckets, tarps, or plastic sheeting under active drips to collect water and protect ceilings below.
- Ventilate: If safe to do so, open attic vents or windows (if applicable) to promote air circulation and begin the drying process.
Document the Damage
For potential insurance claims, thorough documentation is essential:
- Photographs and Videos: Take clear pictures and videos of the leak source (if found), the wet insulation, water stains on wood, and any damage to ceilings below. Capture different angles and close-ups.
- Notes: Keep a detailed record of when the leak was discovered, when the water was stopped, and all actions taken.
Remove Standing Water
Any pooled water should be removed as quickly as possible. Use buckets, a wet/dry vacuum, or sponges to soak up standing water from the attic floor, joists, and any accessible surfaces. This step helps prevent further saturation and inhibits mold growth.
Remediation: Drying and Replacing Soaked Insulation
Once the leak is stopped and initial safety measures are in place, the real work of remediation begins. This process is crucial for preventing long-term issues like mold and structural decay.
Can Wet Insulation Be Saved?
The answer largely depends on the type of insulation, the extent of saturation, and how long it has been wet.
- Fiberglass Batts or Blown-In: If lightly damp for a short period (a few hours), fiberglass might dry out, especially if good ventilation is applied. However, if heavily saturated or wet for more than 24-48 hours, it’s generally recommended to remove and replace it. Wet fiberglass becomes compressed, losing its R-value, and can become a breeding ground for mold if not dried perfectly and quickly.
- Cellulose Insulation: Made from recycled paper, cellulose insulation is highly absorbent and compacts significantly when wet, losing all insulating properties. It’s also very susceptible to mold growth and becomes a dense, heavy mass. Cellulose that has been soaked must always be removed and replaced.
- Mineral Wool (Rock Wool/Slag Wool): Similar to fiberglass in its properties, mineral wool is less prone to mold growth due to its inorganic nature but still loses R-value when wet and can harbor mold on dust and debris. If significantly wet, replacement is often the safest bet.
- Spray Foam Insulation: Closed-cell spray foam is highly water-resistant and generally not affected by leaks. Open-cell spray foam, however, can absorb water and should be assessed by a professional. In most cases, if only a small area of closed-cell foam is affected, it can be dried and reused.
For most conventional attic insulations (fiberglass and cellulose), if it has been soaked and/or wet for more than 24-48 hours, especially if mold is suspected or visible, replacement is the safest and most effective option to ensure your attic is mold-free and properly insulated.
The Removal Process
Removing wet, potentially mold-infested insulation requires caution:
- Protective Gear: Double down on your protective gear – a full-face respirator, gloves, Tyvek suit, and eye protection are highly recommended.
- Containment: Seal off the attic access with plastic sheeting and tape to prevent spores and debris from spreading into your living space.
- Tools: Use large, heavy-duty contractor bags for disposal. A utility knife for cutting batts and a wet/dry vacuum can be helpful for loose insulation.
- Disposal: Carefully bag all wet insulation, sealing the bags before transporting them out of the attic. Dispose of it according to local regulations for construction debris.
Drying Out the Attic Structure
Once the wet insulation is removed, the underlying wood structure (rafters, joists, roof sheathing) must be thoroughly dried. This is a critical step to prevent rot and mold growth:
- Ventilation: Maximize airflow. Open attic vents (gable, soffit, ridge) and windows if present.
- Fans and Dehumidifiers: Place powerful fans to circulate air and industrial-grade dehumidifiers to extract moisture from the air and wood. This process can take several days or even weeks, depending on the severity of the saturation and ambient humidity.
- Moisture Meter: Use a moisture meter to check the moisture content of the wood. It should return to normal levels (typically below 15-18%) before any new insulation is installed.
Mold Remediation (if present)
If mold is visible on the wood surfaces after drying, it must be removed. For small areas (less than 10 square feet), you might be able to clean it yourself with a stiff brush, water, and a non-ammonia detergent or a specialized mold cleaner. Always wear full protective gear. For larger mold infestations or if you’re unsure, it’s highly recommended to hire a professional mold remediation company. They have the expertise and equipment to safely remove mold and prevent its return.
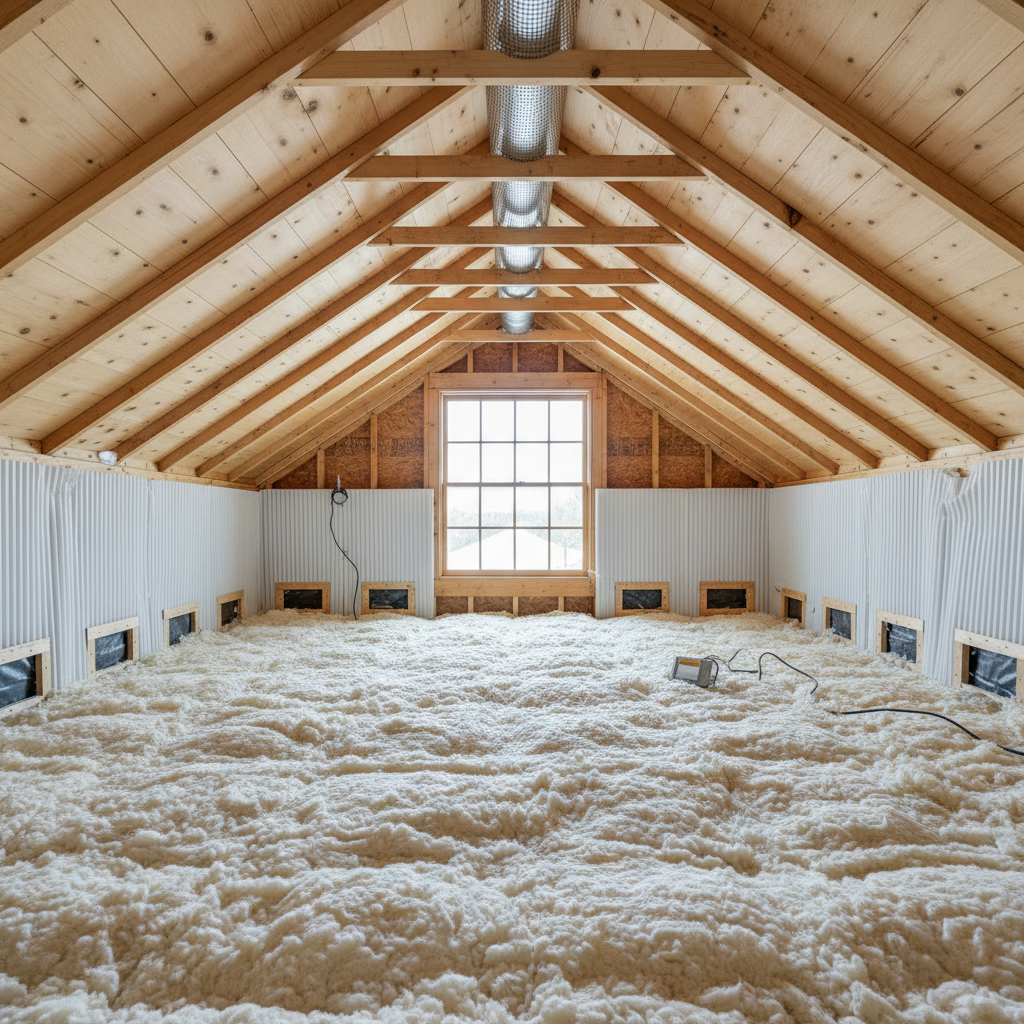
Re-insulating Your Attic
Once the attic structure is completely dry and mold-free, you can proceed with re-insulating. This is an opportunity to improve your home’s energy efficiency.
- Choose the Right Insulation: Consider your climate zone’s recommended R-value. Common options include fiberglass batts, blown-in fiberglass, or blown-in cellulose. Spray foam might also be an option for superior sealing and insulation.
- Seal Air Leaks: Before installing new insulation, seal all air leaks between the attic and living space. Use caulk for small gaps and expanding foam for larger openings around pipes, wires, and ductwork. This step is crucial for preventing future condensation and maximizing insulation effectiveness.
- Proper Ventilation: Ensure your attic has adequate ventilation (soffit and ridge vents are ideal) to allow moisture and hot air to escape, preventing future condensation issues.
- Professional Installation: If you’re not comfortable with DIY installation, hiring a professional insulation contractor ensures proper R-value, air sealing, and ventilation for optimal performance.
Preventing Future Attic Leaks and Water Damage
The best way to deal with a soaked attic is to prevent it from happening in the first place. Proactive maintenance and smart home design choices can significantly reduce your risk.
Regular Roof Inspections and Maintenance
Your roof is your home’s primary defense against water. Regular inspections are non-negotiable:
- Annual Checks: Inspect your roof annually, preferably in spring and fall. Look for damaged, missing, or curling shingles.
- Flashing and Sealants: Check the integrity of flashing around chimneys, vents, and skylights. Ensure sealants are not cracked or deteriorated.
- Gutters and Downspouts: Keep gutters clean and free of debris to ensure proper drainage. Make sure downspouts direct water away from the foundation.
- Trim Overhanging Branches: Trees overhanging your roof can drop leaves and debris, clog gutters, and pose a risk of damage during storms.
Proper Attic Ventilation
Good ventilation is key to preventing condensation and maintaining a healthy attic environment:
- Soffit and Ridge Vents: Ensure adequate intake (soffit vents) and exhaust (ridge vents) ventilation. This creates continuous airflow, moving hot, moist air out of the attic.
- Clear Airflow: Make sure insulation isn’t blocking soffit vents. Install baffles if necessary to maintain a clear path for air.
- Adequate Sizing: Consult local building codes or an HVAC professional to ensure your attic has enough ventilation for its size.
Sealing Air Leaks from Living Spaces
Preventing warm, moist air from migrating into the cold attic is crucial for stopping condensation:
- Caulk and Foam: Seal all penetrations between your living space and the attic. This includes around light fixtures, electrical boxes, plumbing stacks, exhaust fan ducts, and dropped ceilings.
- Weatherstrip Attic Hatch: Ensure your attic access hatch is properly insulated and weatherstripped to prevent air leakage.
Insulating and Sealing Pipes in Unheated Attics
If you have plumbing in your attic, protect it from freezing:
- Pipe Insulation: Wrap all exposed pipes with foam pipe insulation.
- Heat Tape: In extremely cold climates, consider installing heat tape on pipes most vulnerable to freezing.
- Seal Penetrations: Seal any holes around pipes where they pass through walls or floors to prevent drafts.
Maintaining Plumbing and HVAC Systems
Regular maintenance of these systems can prevent unexpected leaks:
- Check for Leaks: Periodically inspect all accessible plumbing pipes and fittings in the attic for any signs of drips or moisture.
- HVAC Condensate Drains: Ensure condensate drains are clear and free-flowing. Pour a cup of distilled vinegar down the line occasionally to prevent algae buildup.
- Water Heater Inspection: If in the attic, regularly inspect your water heater for corrosion, leaks, or issues with the pressure relief valve.
By implementing these preventive measures, you significantly reduce the likelihood of ever having to deal with soaked attic insulation again, ensuring a safer, more energy-efficient home.
When to Call a Professional
While some steps can be taken by an experienced DIYer, there are many situations where calling a professional is not just advisable, but necessary. Knowing when to seek expert help can save you time, money, and prevent further damage.
- Active Roof Leak: If you cannot safely identify and stop an active roof leak, a professional roofer is essential. They have the tools and expertise to properly diagnose and repair complex roof issues.
- Extensive Water Damage: If the leak has affected a large area of your attic, saturated insulation throughout, or caused visible structural damage to rafters or joists, a general contractor or water damage restoration specialist should be called.
- Large Mold Infestation: If mold covers an area larger than 10 square feet, or if you suspect toxic mold, a professional mold remediation company is crucial. They have the specialized equipment and protocols to safely remove mold and prevent cross-contamination.
- Unidentified Leak Source: If you’ve tried to find the source of the leak but can’t pinpoint it, professionals (roofers, plumbers, home inspectors) have diagnostic tools and experience to locate hidden issues.
- Electrical Concerns: If water has come into contact with electrical wiring, call a licensed electrician immediately. This is a severe safety hazard.
- Complex Insulation Replacement: If your attic requires specialized insulation (e.g., spray foam) or if the removal and installation process seems overwhelming, an insulation contractor can ensure the job is done correctly and efficiently.
- Health Concerns: If anyone in your household experiences unexplained health issues (respiratory problems, allergies) that coincide with the attic leak, it’s wise to consult with doctors and mold remediation experts.
Don’t hesitate to call for professional assistance. Their expertise can ensure your home is restored safely and effectively.
Frequently Asked Questions (FAQs)
Q: How long does it take for mold to grow in wet insulation?
A: Mold can begin to grow on wet insulation and surrounding materials within 24 to 48 hours under ideal conditions (sufficient moisture, organic food source, appropriate temperature).
Q: Is it safe to be in an attic with wet insulation?
A: It can be unsafe. Aside from the risk of falling through weakened ceilings, wet insulation creates an environment for mold, which can release spores into the air. If there’s standing water, there’s also an electrical shock hazard. Always wear protective gear (respirator, gloves) and ensure electricity is off if you must enter.
Q: Will homeowners insurance cover attic leak damage?
A: Typically, homeowners insurance covers sudden and accidental water damage (e.g., a burst pipe or sudden roof damage from a storm). However, damage from long-term neglect, such as a slow leak that caused extensive mold over months, may not be covered. Always review your policy and contact your insurance provider as soon as you discover the damage.
Q: What’s the best insulation to prevent future water damage?
A: While no insulation is entirely impervious to water damage from a prolonged leak, closed-cell spray foam insulation offers superior resistance because it does not absorb water readily and also acts as an air barrier, preventing condensation. However, proper roof maintenance and attic ventilation are the most critical factors in preventing water damage, regardless of insulation type.
Q: Can I dry out cellulose insulation?
A: No, cellulose insulation that has been soaked cannot be effectively dried out and reused. It compresses, loses its insulating value, and is highly susceptible to mold growth. It must be removed and replaced.
Conclusion
Finding your attic insulation soaked from a leak is a serious issue that demands immediate attention. From the moment of discovery, your actions determine the extent of damage and the cost of remediation. By systematically identifying the leak source, understanding the dangers of compromised insulation, taking prompt safety measures, and thoroughly drying and replacing damaged materials, you can safeguard your home against further deterioration.
Moreover, adopting a proactive approach to home maintenance – regular roof inspections, ensuring proper attic ventilation, and sealing air leaks – is your best defense against future water woes. While DIY efforts can address minor issues, don’t hesitate to call on professionals for complex problems, especially those involving extensive water damage, mold, or structural concerns. Protecting your attic means protecting your entire home, ensuring it remains a safe, healthy, and energy-efficient haven for years to come.


