Ever walked into a photo studio and wished you could instantly transport your subjects to a lush, vibrant outdoor scene, no matter the weather outside? What if we told you there’s a secret weapon that allows you to do just that, offering endless creative possibilities and a refreshingly natural aesthetic? We’re talking about artificial grass, and it’s quickly becoming a game-changer for photographers and content creators alike.
Gone are the days when fake grass looked, well, fake. Modern advancements in artificial turf technology have given us incredibly realistic and versatile options that can mimic everything from a manicured lawn to a wild meadow. This makes them perfect for crafting unique and engaging photo studio backgrounds. If you’re looking to add a touch of green, texture, and unexpected charm to your shoots, then diving into these artificial grass styling tips for photo studio backgrounds is exactly what you need.
In this comprehensive guide, we’ll explore everything from choosing the right type of artificial grass to advanced styling techniques that will elevate your photography. Get ready to transform your studio into a dynamic, green haven where creativity knows no bounds!
Why Artificial Grass is a Game-Changer for Photo Studios
Before we dive into the nitty-gritty of styling, let’s quickly touch upon why artificial grass is such a fantastic addition to any photography studio. It’s more than just a pretty prop; it’s a strategic investment that brings a host of benefits:
- Unmatched Versatility: Want a spring picnic scene in December? A lush garden for product shots? Or a minimalist green texture for a portrait? Artificial grass can adapt to countless themes and concepts.
- Year-Round Greenery: Unlike real grass, which requires sunlight, water, and constant care, artificial turf stays vibrant and green 365 days a year, regardless of the season or climate.
- Low Maintenance: No mowing, no watering, no pesticides, and certainly no muddy footprints in your studio! A quick vacuum or brush is usually all it takes to keep it looking pristine.
- Durability: Designed to withstand foot traffic and varying weather conditions outdoors, artificial grass is incredibly robust, making it perfect for repeated use in a busy studio environment.
- Cost-Effective: While there’s an initial investment, the long-term savings on maintenance, replacement, and the sheer number of looks you can achieve make it a highly economical choice compared to constantly sourcing fresh botanicals or building elaborate sets.
- Consistency: You can achieve a consistent look across multiple shoots without worrying about wilting plants or inconsistent lighting affecting the natural elements.
Choosing the Right Artificial Grass for Your Studio
Just like picking the right lens, selecting the appropriate artificial grass is crucial for achieving your desired photographic outcome. Not all fake grass is created equal, and understanding the differences will help you make an informed decision.
Pile Height and Density: The Foundation of Your Look
- Short Pile (0.5 to 1 inch): Ideal for product photography, where you want a clean, minimalist backdrop that provides texture without overwhelming the product. It gives a neat, manicured lawn appearance.
- Medium Pile (1 to 1.5 inches): This is often the most versatile option. It works well for portraits, pet photography, and creating a natural, slightly unkempt garden feel. It offers good texture and depth.
- Long Pile (1.5 inches and up): Perfect for creating a wilder, meadow-like look or when you want the grass to be a prominent textural element. Great for fashion, editorial, or whimsical shoots where drama and texture are key.
Density refers to how many individual blades of grass are packed together. A higher density generally means a fuller, more luxurious look, which can be fantastic for premium aesthetics, but also tends to be heavier.
Shade of Green: Setting the Mood
Artificial grass comes in a surprising array of greens. Consider the overall mood and aesthetic of your brand or your typical client base:
- Bright, Vibrant Green: Evokes a fresh, spring, or summer feel. Great for cheerful, energetic shoots, children’s photography, or promoting outdoor products.
- Natural, Multi-Tonal Green: Often blends different shades of green, brown, and even hints of yellow to mimic real grass more closely. This is excellent for achieving a realistic, earthy look.
- Darker, Deeper Green: Can provide a more sophisticated, elegant, or moody backdrop. Works well for luxurious products, dramatic portraits, or creating a lush, mature garden atmosphere.
Rolls vs. Mats: Portability and Coverage
- Artificial Grass Rolls: If you have a dedicated studio space and want to cover a large area or even a wall, large rolls are excellent. They offer seamless coverage and can be cut to fit specific dimensions.
- Artificial Grass Mats/Tiles: More portable and versatile for smaller setups. They are easy to move, store, and combine to create different sizes. Great for product photography or creating specific “patches” of green.
Mastering Artificial Grass Styling Tips for Photo Studio Backgrounds
Now that you’ve got your artificial grass, let’s unleash its full potential! These artificial grass styling tips for photo studio backgrounds will help you create stunning, memorable images.
1. Layering for Depth and Dimension
A flat sheet of artificial grass can be nice, but layering takes it to another level. Think about building depth in your scene:
- Elevate Sections: Place some grass on risers or low platforms to create varying heights, mimicking natural terrain.
- Combine with Other Textures: Lay a smaller patch of grass on top of a wooden floor, a concrete slab, or even a plush rug. The contrast in textures adds visual interest.
- Backdrop Integration: Extend the grass from the floor up onto a seamless backdrop paper or fabric. Use clips or tape to secure it. This creates an immersive, wrap-around green environment. For more ideas on creating engaging spaces, consider resources like Better Homes & Gardens which often feature creative ways to blend natural and artificial elements in outdoor living.
2. Utilizing Lighting to Enhance the Green
Lighting is paramount in photography, and it can dramatically alter the perception of your artificial grass backdrop.
- Natural Light: If your studio has large windows, position your setup to utilize soft, diffused natural light. This often makes artificial grass look more realistic.
- Studio Strobes/Continuous Lighting:
- Front Lighting: Can flatten the texture. Use it carefully.
- Backlighting/Rim Lighting: Positions a light source behind the grass (and your subject). This makes the individual blades of grass glow, highlighting their texture and creating a beautiful halo effect.
- Side Lighting: Emphasizes texture and creates shadows, adding depth.
- Gels: Experiment with green or even blue gels to enhance the natural tones of the grass or create a magical, otherworldly glow.
3. Incorporating Props and Accessories
Props are your best friends when styling with artificial grass. They help tell a story and add context.
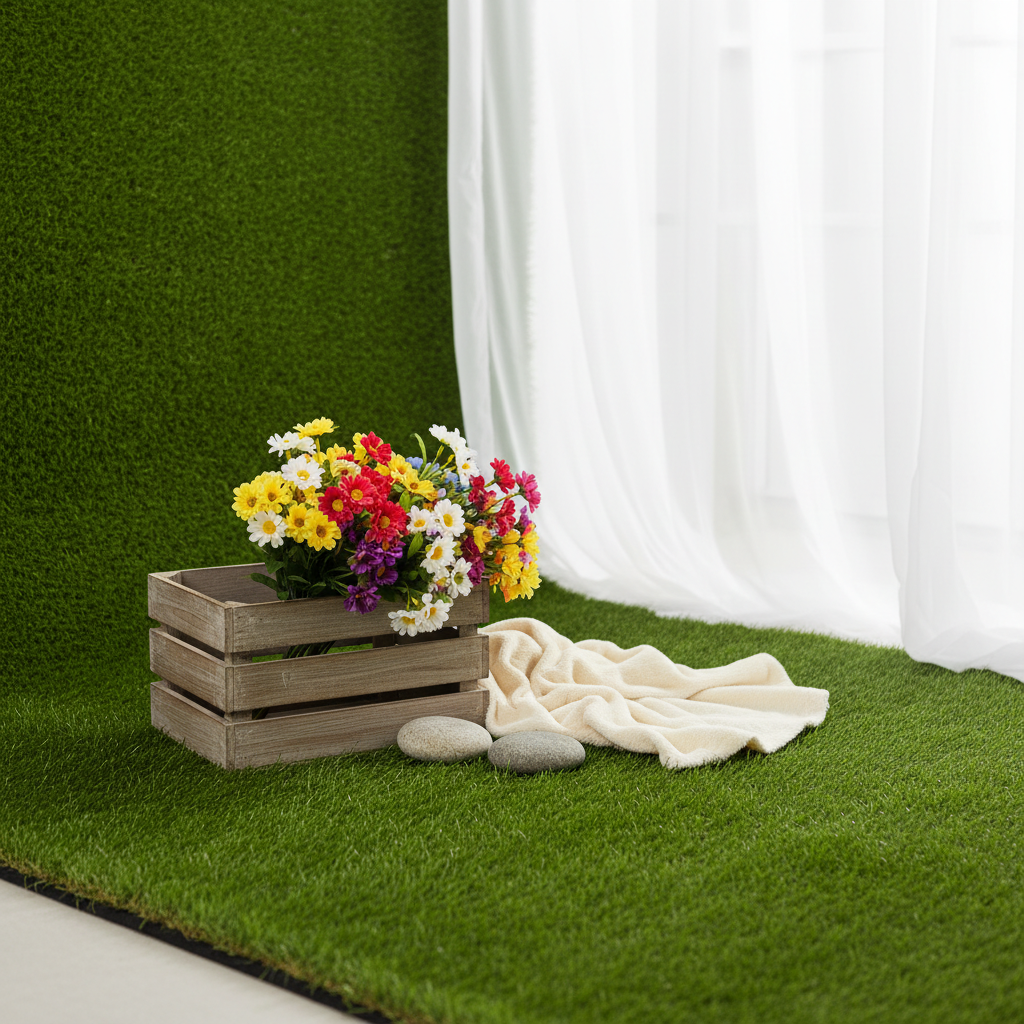
- Natural Elements: Think real flowers (fresh or dried), branches, logs, pebbles, or large decorative rocks. These organic additions significantly enhance the authenticity.
- Furniture: A rustic wooden crate, a vintage chair, a small table, or even a cozy blanket can transform the scene.
- Thematic Props:
- Picnic Scene: Baskets, checkered blankets, faux food, lemonade pitcher.
- Garden Party: String lights, paper lanterns, cushions, elegant dinnerware.
- Whimsical Fairyland: Faux mushrooms, fairy lights, delicate fabrics, moss.
- Urban Jungle: Potted plants (real or faux), metal accents, minimalist furniture.
- Product-Specific Props: For product photography, choose props that complement and highlight the item being shot without distracting from it.
4. Creating Seasonal and Themed Setups
Artificial grass is your blank canvas for seasonal magic:
- Spring/Summer: Add vibrant flowers (daisies, sunflowers), butterflies, gardening tools, or fresh fruit.
- Autumn: Scatter faux autumn leaves, small pumpkins, gourds, pinecones, and warm-toned blankets.
- Winter Wonderland: Sprinkle artificial snow (flocking powder works wonders!), add frosted branches, mini Christmas trees, and white or silver accents.
- Themed Events:
- Baby’s First Birthday: Balloons, smash cake, tiny shoes.
- Pet Portraits: Toys, pet beds, colorful collars.
- Fashion Editorial: Architectural elements, bold props, contrasting colors.
5. Varying Angles and Perspectives
Don’t just shoot straight on! The versatility of artificial grass allows for dynamic compositions.
- Low Angle: Shoot from very low to emphasize the height of the grass and make subjects appear larger than life.
- High Angle/Bird’s Eye View: Perfect for showing off intricate product arrangements or for flat-lay photography, highlighting the texture of the grass as a flat surface.
- Eye-Level: The classic, natural perspective for portraits and full-body shots.
6. Mixing and Matching Textures
A studio setup rarely consists of just one element. Combine your artificial grass with other backdrops and surfaces:
- Wood Panels: A wooden wall or floor section next to a patch of grass creates a rustic, earthy vibe.
- Brick Walls: The rough texture of brick contrasts beautifully with the softness of grass, offering an urban garden feel.
- Fabric Draping: Flowy fabrics (sheer, silk, linen) can add elegance and movement when draped around or on the grass.
- Concrete: For a minimalist, industrial-chic look, concrete and artificial grass are a surprisingly good pair.
Specific Photography Niches and Artificial Grass
Let’s consider how artificial grass can be a powerful tool for different types of photography:
Product Photography
For products, artificial grass provides a refreshing, organic alternative to plain white or black backgrounds. Use shorter pile grass for a clean look, arranging your products with natural elements like small stones, moss, or delicate flowers. It’s especially effective for outdoor gear, eco-friendly products, or items associated with nature.
Portrait Photography
Whether it’s individual portraits, family photos, or engagement shoots, artificial grass can create a relaxed, approachable, and natural environment. Combine it with cozy blankets, pillows, or a simple bench for subjects to interact with. Use soft, diffused lighting to create a flattering glow.
Pet Photography
Pets often look their best in natural settings, and artificial grass provides a controlled, comfortable, and hygienic substitute. It’s durable enough for playful pups and soft enough for sleepy kittens. Add their favorite toys or treats for engaging shots.
Baby & Children Photography
Imagine tiny hands and feet exploring a soft green carpet! Artificial grass offers a safe, non-allergenic, and visually appealing surface for baby and children’s photography. Pair it with whimsical props, colorful blankets, and gentle lighting for adorable results.
Fashion & Editorial
For high-concept fashion shoots, artificial grass can be a bold statement. Create an urban jungle, a minimalist green stage, or a surreal landscape. The texture and color can make garments pop, especially if they are in contrasting colors or natural fabrics.
Maintenance and Care for Your Artificial Grass Backdrop
One of the biggest perks of artificial grass is its low maintenance, but a little care goes a long way in keeping it looking its best for years of photo shoots.
- Regular Brushing/Vacuuming: Use a stiff brush or a vacuum cleaner with a brush attachment to remove dust, debris, hair, and to keep the blades standing upright.
- Spot Cleaning: For spills or marks, use a mild soap and water solution. Blot the area, don’t scrub aggressively.
- Fluffing: Over time, if the grass sees a lot of traffic, the blades might lie flat. A power brush or even a sturdy broom can help fluff it back up.
- Storage: If you’re using rolls or mats that are not permanently installed, store them rolled up (grass side out) or flat in a dry, clean area to prevent creases or damage.
Advanced Techniques and Creative Ideas
Ready to push the boundaries even further?
- Projections: Project patterns (leaves, shadows, abstract shapes) onto the grass and your subject to create dynamic and immersive effects.
- Underlighting: For a truly magical effect, consider placing LED light strips *under* a slightly transparent artificial grass mat. This creates a soft, ethereal glow coming from beneath the “ground.”
- Vertical Gardens: Attach smaller artificial grass panels to a wall to create a vertical garden backdrop, perfect for headshots or product displays.
- Mixed Media: Combine a natural grass floor with a hand-painted sky backdrop or a minimalist abstract wall for striking contrasts.
Conclusion
Artificial grass is far more than just a floor covering; it’s a dynamic, versatile, and incredibly inspiring tool for any photo studio. By understanding the nuances of choosing the right type and implementing creative styling techniques, you can transform your backdrops into captivating, lifelike scenes that will truly make your photographs stand out.
From product photography to intimate portraits, the lush texture and vibrant color of artificial grass offer endless possibilities for storytelling. So go ahead, embrace the green, experiment with lighting and props, and watch as your studio becomes a haven for unparalleled creativity. Your clients and your portfolio will thank you for it!