Hey there, fellow carving enthusiast! If you’re anything like me, you know the absolute joy of a sharp tool slicing through wood like butter. There’s nothing quite like it. But here’s the flip side: there’s also nothing quite like the frustration of a dull, chipped, or even rusty tool that just won’t cooperate. It’s a joy-killer, pure and simple.
I learned this lesson the hard way, many moons ago. I remember spending hours meticulously sharpening my favourite gouge, only to find a tiny nick in the edge a week later because I’d just tossed it into a communal drawer. Or worse, pulling out a perfectly sharpened knife only to see the tell-tale orange spots of rust blooming on its pristine blade because I left it exposed in my damp garage. Trust me, it hurts the soul (and the wallet!).
That’s when I realized that sharpening is only half the battle. The other, equally crucial half, is proper storage. It’s not just about protecting your investment; it’s about maintaining that razor-sharp edge, preventing rust, and ensuring your tools are always ready for action when inspiration strikes. Think of it as creating a happy, healthy home for your carving companions.
In this article, I want to walk you through my personal system and advice on how to store your wood carving tools to keep them sharp, rust-free, and always at their best. We’ll cover everything from simple habits to advanced storage solutions, all based on years of trial and error (and a few unfortunate nicks!). So, let’s dive in and make sure your tools stay as keen as your carving passion.
The Golden Rule: Clean Before You Store
This is non-negotiable, folks. Every single time I finish a carving session, no matter how tired I am, my tools get a quick clean. Wood sap, resin, dust, and even the oils from your hands are enemies of sharp edges and shiny steel. They attract moisture and can quickly lead to rust or build-up that dulls your blade over time.
My routine is simple: I grab a clean rag or an old t-shirt scrap and wipe down each tool thoroughly. If there’s stubborn sap, a little mineral spirits or denatured alcohol on the cloth does wonders. The key is to remove all residue. After cleaning, ensure your tools are completely dry. Even a tiny bit of moisture can wreak havoc.
Battling the Elements: Moisture and Rust Prevention
Rust is the arch-nemesis of any metal tool, and carving tools are especially vulnerable given their finely ground edges. Humidity is the main culprit. If you live in a humid climate, or your workshop is in a basement or garage, you need a proactive strategy.
-
Desiccants and VCI Emitters: Your Silent Guardians
Silica gel packets aren’t just for new shoes! I always toss a few into my toolboxes and drawers. They absorb moisture from the air, creating a drier micro-environment. You can even “recharge” them by baking them in a low oven for an hour or so when they change color (if they’re the indicating type). Another fantastic option is VCI (Vapor Corrosion Inhibitor) paper or emitters. These release a harmless vapor that creates a protective layer on metal surfaces, actively preventing rust. I line my drawers with VCI paper, and it’s made a huge difference.
-
Light Oiling: A Protective Kiss
After cleaning and ensuring they are dry, I give my tools a very thin coat of oil. My go-to is camellia oil (also known as Tsubaki oil), which is food-safe, non-gumming, and traditionally used on Japanese tools. Mineral oil works well too. The trick is to apply a *very* thin layer – just enough to coat the metal without leaving a sticky residue. Wipe off any excess with a clean cloth. This creates a barrier against moisture and air.
-
Location, Location, Location
Where you store your tools matters. Avoid storing them directly on concrete floors or against exterior walls, as these areas can be prone to temperature fluctuations and condensation. A climate-controlled workshop is ideal, but if that’s not possible, choose the driest, most stable area available. My old workshop in the garage used to be a nightmare until I invested in a small dehumidifier just for that corner.
Protecting the Edges: Preventing Nicks and Dings
This is where most edge damage occurs. A perfectly sharpened edge can be ruined in an instant if it bangs against another tool or a hard surface. Individual protection is key.
-
Tool Rolls and Pouches: The Mobile Carver’s Best Friend
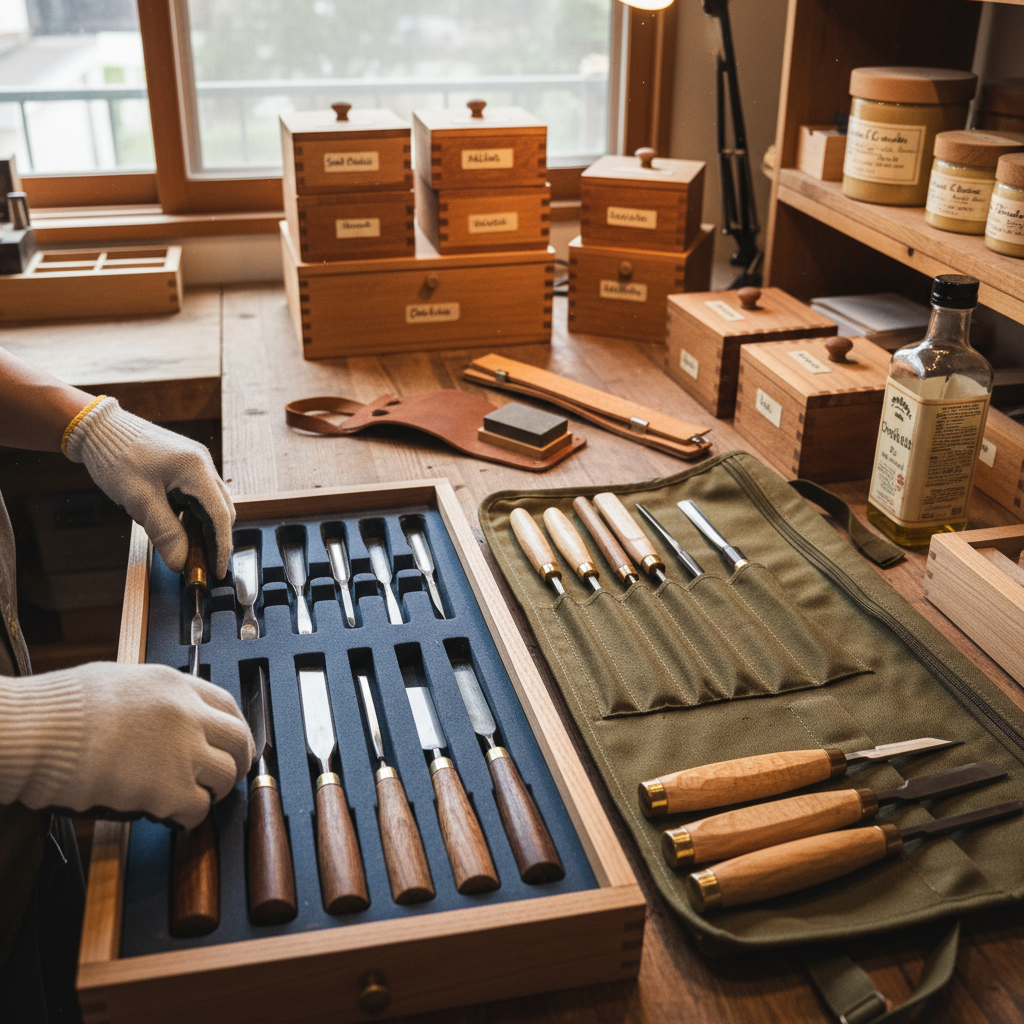
For me, tool rolls are indispensable. They’re my absolute favorite storage method for active tools. Each tool gets its own pocket, preventing blades from touching. They’re fantastic for portability, but even in the workshop, they keep everything organized and protected. Look for sturdy canvas or leather rolls with secure ties or buckles. I have several, organized by carving style – one for my detail knives, another for my gouges, and so on. It makes grabbing the right tool a breeze.
-
Custom Inserts for Toolboxes and Drawers
If you prefer toolboxes or workshop drawers, custom inserts are the way to go. You can cut foam (tool foam or even craft foam) to fit the shape of each tool, creating a snug, protected bed. Alternatively, make simple wooden dividers. The goal is to prevent tools from rolling around and bumping into each other. I’ve even seen clever carvers use PVC pipes cut lengthwise to cradle their gouges. Get creative!
-
Individual Sheaths or Blade Guards
For especially delicate or frequently used tools, consider individual leather sheaths or plastic blade guards. These offer excellent protection for the very tip of the blade. Many carving knives come with them, but you can also buy or make them for your gouges and chisels.
-
Magnetic Strips? Use with Caution
Some carvers use magnetic strips mounted on walls. While they offer easy access, I approach them with caution. There’s a risk of tools banging together when placing or removing them, and they can also attract fine metal dust, which isn’t ideal for keeping edges clean. If you use them, ensure your tools are securely placed and there’s no risk of accidental contact.
Specialized Storage for Delicate Tools
Some tools are just more fragile than others. My tiny chip carving knives, my delicate V-tools, or my super-fine detail gouges – these require extra TLC. I keep them in their own dedicated small wooden boxes, often with individual slots or foam cutouts, or even in clear plastic tubes with caps. This prevents any possibility of them being crushed or nicked by larger, heavier tools.
Maintenance Beyond Storage: A Quick Refresher
While storage is paramount, remember it’s part of a larger ecosystem of tool care. Even with perfect storage, tools will eventually need sharpening. My personal routine includes a quick strop before every carving session, even if the tool was perfectly sharp when stored. This just “kisses” the edge back to perfection and keeps it at its peak performance for longer, reducing the need for full re-sharpening.
Periodically, perhaps once a month or every few uses, give all your tools a thorough inspection. Look for any signs of rust developing (and address it immediately!), check for any nicks or dings that might have occurred despite your best efforts, and assess if they’re still performing as they should. This proactive approach will save you headaches down the line.
Conclusion
So there you have it – my tried-and-true methods for keeping wood carving tools sharp, protected, and ready for whatever creative project comes next. It might seem like a lot of steps at first, but trust me, once you build these habits into your carving routine, they become second nature. Cleaning, preventing rust, and protecting those precious edges are the three pillars of effective tool storage.
Investing a little time and thought into how you store your tools pays dividends in the long run. You’ll spend less time sharpening, less money replacing damaged tools, and most importantly, you’ll have more enjoyable, frustration-free carving sessions. Because at the end of the day, that’s what we all want, isn’t it? Happy carving, my friends, and may your edges always be keen!


