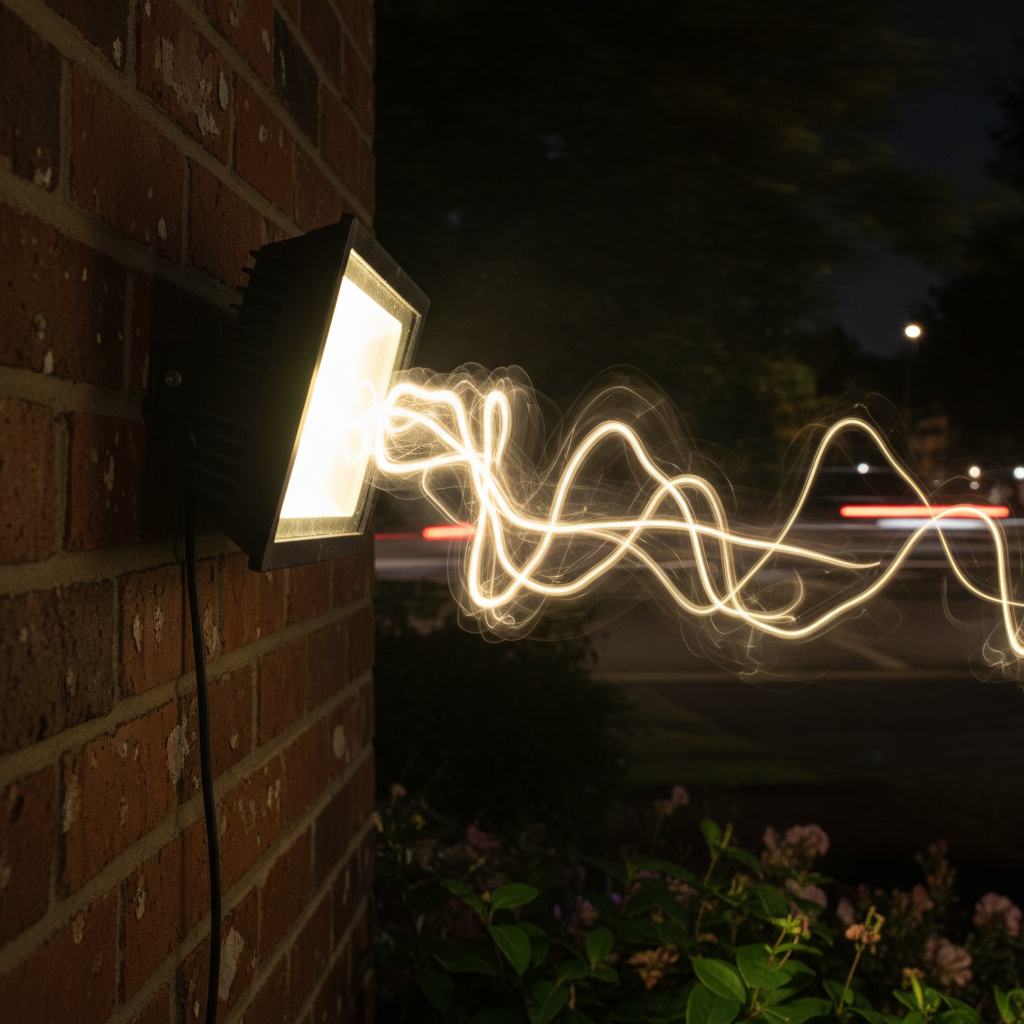
There’s nothing quite as frustrating as stepping outside after dark, expecting a warm, inviting glow from your outdoor flood lights, only to be met with an erratic, flickering display. Whether it’s a security light that won’t stay steady, a landscape light disrupting the ambiance, or a porch light acting erratically, flickering outdoor flood lights are a common nuisance. Beyond being annoying, they can be a sign of underlying electrical issues, safety hazards, or simply a bulb nearing the end of its life. This comprehensive guide will walk you through the various causes of flickering, how to safely diagnose the problem, and practical steps to restore consistent illumination to your outdoor spaces.
Understanding Why Your Outdoor Flood Lights Flicker
The first step in fixing a flickering light is understanding what might be causing it. Many factors can contribute to this problem, ranging from simple fixes to more complex electrical system issues. Identifying the root cause is crucial for an effective and safe repair.
Common Causes of Flickering Flood Lights
-
Loose Wiring or Connections
This is arguably the most common culprit. Over time, vibrations, weather changes, or improper initial installation can cause wires to loosen at the bulb socket, within the fixture itself, at the junction box, or even at the switch. A loose connection can interrupt the consistent flow of electricity, leading to intermittent power and a flickering effect.
-
Faulty Bulb
Sometimes, the problem is as simple as the bulb itself. Even new bulbs can be defective, and older bulbs naturally degrade. Different bulb types (LED, halogen, incandescent) can flicker for various reasons:
- LED Bulbs: Often flicker due to incompatible dimmer switches (if applicable), faulty internal drivers, or being of poor quality. They are sensitive to voltage fluctuations.
- Halogen Bulbs: Can flicker if the filament is starting to fail, or if they are overheating due to an enclosed fixture.
- Incandescent Bulbs: Typically flicker when the filament is breaking down, or if there’s a loose connection within the bulb base.
-
Power Fluctuations or Surges
External factors like power surges from the grid, issues with your home’s main electrical supply, or even heavy appliance usage on the same circuit can cause temporary voltage drops or spikes that make lights flicker. This is particularly true for sensitive LED lights.
-
Moisture Ingress or Weather Damage
Outdoor fixtures are constantly exposed to the elements. Rain, humidity, snow, and even condensation can seep into the fixture, causing corrosion, short circuits, or damaging internal components and wiring. This is a significant safety hazard and a common reason for flickering.
-
Aging Fixture or Wiring
Like all things, electrical fixtures and wiring have a lifespan. Over years of exposure to weather and constant use, wires can become brittle, insulation can degrade, and internal components can wear out. This can lead to unreliable connections and flickering.
-
Pest Damage
Rodents, insects, or birds can sometimes chew through wires or build nests within fixtures, leading to damage that causes flickering or complete power loss. Checking for signs of pest activity can be a part of your troubleshooting.
-
Issues with the Circuit Breaker or Electrical Panel
A loose breaker in your electrical panel, an overloaded circuit, or a failing breaker can cause inconsistent power delivery to the circuit where your flood lights are connected. While less common for just one light to flicker, it’s a possibility if multiple lights on the same circuit are affected.
-
PIR Sensor Malfunctions (for Motion-Sensor Lights)
If your flood lights are motion-activated, a faulty Passive Infrared (PIR) sensor can cause them to flicker or switch on and off erratically. Dirt, spiderwebs, or even extreme temperatures can interfere with the sensor’s operation.
Different Types of Flood Lights and Their Unique Flickering Tendencies
Understanding the specific technology behind your outdoor flood lights can help narrow down the cause of flickering.
-
LED Flood Lights
LEDs are known for their efficiency and longevity, but they have specific quirks. Flickering in LED flood lights is often attributed to:
- Driver Issues: LEDs require a “driver” to convert AC power to the low-voltage DC power they use. A failing or low-quality driver can cause flickering.
- Incompatible Dimmers: If you’re using a dimmer not designed for LEDs (leading-edge vs. trailing-edge), flickering is almost guaranteed.
- Voltage Fluctuations: LEDs are more sensitive to subtle voltage drops or surges in your home’s electrical system, which might not affect incandescent bulbs.
- Temperature Sensitivity: While modern LEDs are robust, extreme cold can sometimes affect their performance, leading to initial flickering until they warm up.
-
Halogen Flood Lights
Halogen lights are essentially improved incandescent bulbs. Their flickering is usually simpler to diagnose:
- Loose Filament: As the filament ages or experiences shock, it can become loose and intermittently break the circuit, causing a flicker.
- Overheating: If a halogen bulb is in an enclosed fixture that doesn’t allow proper heat dissipation, it can overheat and lead to premature failure and flickering.
- Power Surges: Strong power surges can stress the filament, causing it to weaken and flicker.
-
Incandescent Flood Lights
Though less common now due to energy inefficiency, many older homes still have incandescent flood lights. Their flickering reasons are quite straightforward:
- Nearing End of Life: The filament simply breaks down over time, causing intermittent connection.
- Loose Connection: A common problem, where the bulb isn’t screwed in tightly enough, or the contacts in the socket are corroded or bent.
Diagnosing the Flicker: A Step-by-Step Troubleshooting Guide
Before you dive into troubleshooting, always prioritize safety. Working with electricity can be dangerous if proper precautions are not taken.
Safety First: Essential Precautions
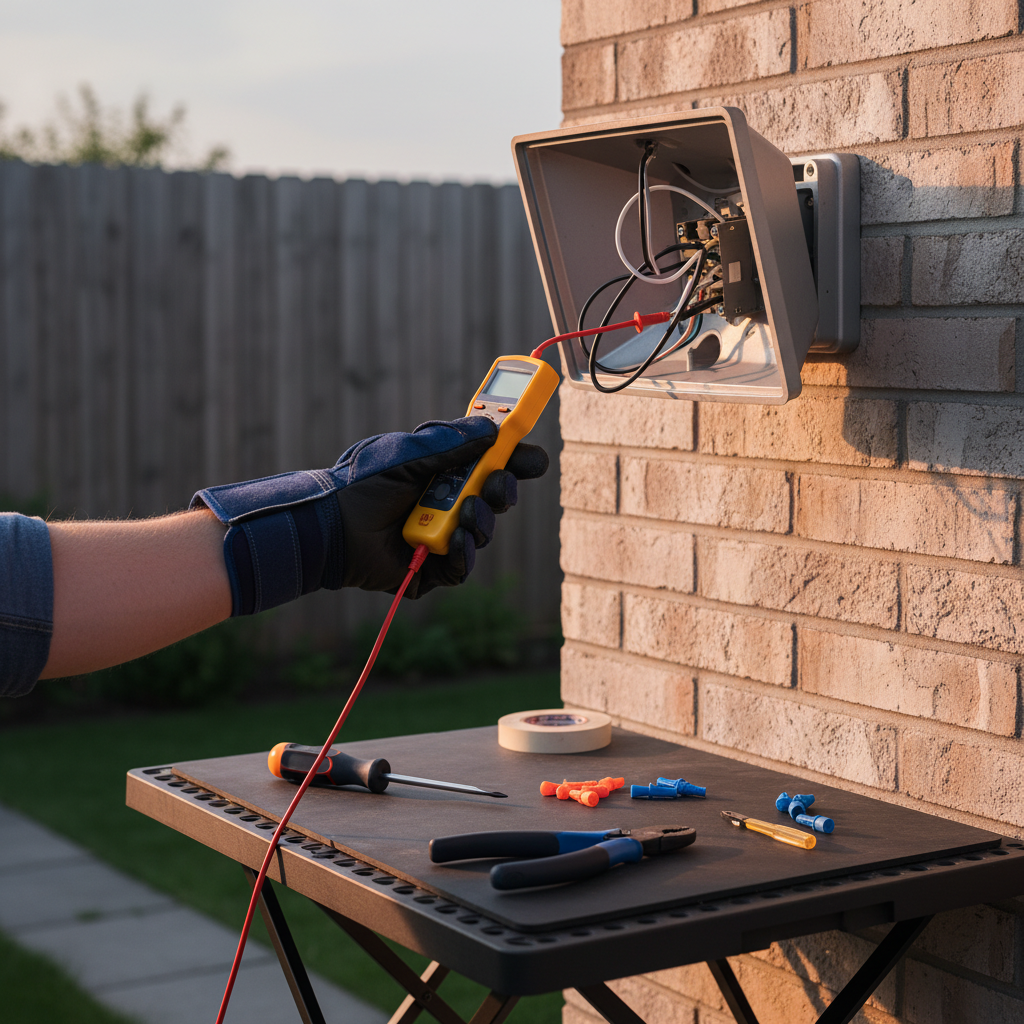
- Turn Off Power: ALWAYS turn off the power to the affected circuit at your home’s electrical panel before touching any wires, fixtures, or even changing a bulb. Test with a voltage tester to ensure the power is indeed off.
- Use Proper Tools: Have insulated screwdrivers, pliers, and a reliable voltage tester ready.
- Wear Protective Gear: Gloves and safety glasses are recommended, especially when dealing with older fixtures or potentially corroded components.
- Work in Dry Conditions: Never attempt electrical repairs outdoors in the rain or wet conditions.
- Don’t Rush: Take your time and double-check every step.
For more detailed safety guidelines when dealing with home electrical systems, it’s always wise to consult resources from trusted authorities, such as the Electrical Safety Foundation International (ESFI).
Initial Checks: The Easy Fixes
-
Replace the Bulb
This is the simplest and often most effective first step. Swap out the flickering bulb with a new, known-good bulb of the same type and wattage. If the new bulb doesn’t flicker, your problem is solved! Ensure the new bulb is screwed in snugly but not overtightened.
-
Check the Bulb Socket
With the power off, carefully inspect the socket where the bulb screws in. Look for:
- Corrosion: Green or black discoloration on the metal contacts can impede electrical flow. Gently clean with a wire brush or fine-grit sandpaper.
- Bent Tabs: The small metal tab at the bottom of the socket might be flattened, not making good contact with the bulb. Carefully bend it slightly upwards with a non-conductive tool (e.g., a wooden stick or needle-nose pliers with electrical tape on the tips).
- Loose Wires: If you can see any wires leading into the socket, ensure they are securely fastened.
-
Inspect the Fixture’s Exterior
Look for visible signs of damage: cracks in the housing, frayed wires, or moisture inside the lens. If you see water, dry it thoroughly before restoring power. If there’s significant damage, the fixture might need replacement.
-
Verify the Switch
If your flood light is connected to a dimmer, ensure it’s compatible with the bulb type, especially if it’s an LED. Try replacing the dimmer with a standard on/off switch temporarily to rule out dimmer issues. For standard switches, ensure it’s functioning correctly by testing it with another light or replacing it if it feels loose or faulty.
Advanced Troubleshooting: When the Easy Fixes Don’t Work
If the above steps don’t resolve the flickering, you’ll need to delve a bit deeper. Remember to keep the power OFF for all these steps until instructed to restore it.
-
Check the Circuit Breaker
Go to your main electrical panel. Locate the breaker that controls the outdoor flood lights. It should be fully in the “ON” position. Sometimes, a breaker can be “tripped” but look like it’s on (a “phantom trip”). Fully push the breaker to the “OFF” position, then firmly push it back to “ON.” If it repeatedly trips, there’s a more serious electrical issue.
-
Inspect Junction Boxes and Wiring
Outdoor flood lights often have a junction box where the fixture wires connect to your home’s main wiring. This box is usually mounted to the wall or ceiling. With the power off:
- Carefully open the junction box.
- Inspect all wire connections (wire nuts). Ensure they are tight and there’s no visible corrosion or frayed wires.
- Look for signs of moisture, pest damage, or burned insulation.
- If connections are loose, untwist the wire nuts, clean the wires, and re-twist them firmly, ensuring no bare wire is exposed outside the wire nut.
-
Examine the Fixture’s Internal Wiring
Some flood light fixtures allow access to their internal wiring. If yours does, carefully open it (again, power off) and check for loose connections, damaged insulation, or corrosion on wires and terminals. Tighten any screws holding wires in place.
-
Test for Voltage Fluctuations
If you have a multimeter and are comfortable using it, you can test the voltage at the socket or junction box. With the bulb removed and the power on (be extremely cautious), check if the voltage is consistent and within the expected range (e.g., 120V in North America). Significant fluctuations could indicate an issue with your home’s main power supply or an overloaded circuit. *Only perform this step if you are experienced and confident with electrical testing.*
-
Address PIR Sensor Issues (Motion Lights)
If it’s a motion-sensing flood light, clean the sensor lens with a soft cloth. Ensure there are no obstructions (tree branches, spiderwebs) blocking its view. Check the sensitivity and “on-time” settings – sometimes extreme settings can cause erratic behavior. If the sensor itself seems faulty, it may need replacement.
When to Call a Professional Electrician
While many flickering light problems can be resolved with DIY troubleshooting, there are clear instances when calling a licensed electrician is not just recommended, but essential for safety and proper functioning.
Signs You Need Expert Help
- Burning Smell or Charred Wires: Any sign of burning plastic, smoke, or visible charring around the fixture or junction box indicates a serious electrical fault that requires immediate professional attention. Turn off the main breaker to your house if this occurs.
- Repeated Circuit Breaker Trips: If your flood light’s circuit breaker repeatedly trips after you reset it, it’s a sign of an overload or a short circuit. This poses a fire risk and needs an electrician.
- Multiple Lights Flickering: If several outdoor flood lights, or even indoor lights on the same circuit, are flickering simultaneously, the issue might be deeper within your home’s electrical system or even external (utility company issue).
- Water Inside the Electrical Panel: Any moisture near or inside your main electrical panel is extremely dangerous and warrants an immediate call to an electrician.
- Lack of Confidence: If at any point you feel uncomfortable or unsure about performing an electrical repair, stop and call a professional. Your safety is paramount.
- Persistent Issues After Troubleshooting: If you’ve tried all the troubleshooting steps and the flickering persists, it’s time for an expert diagnosis.
Benefits of Professional Intervention
Hiring a licensed electrician offers several advantages:
- Safety: Electricians are trained to work safely with electricity, minimizing risks.
- Expert Diagnosis: They have specialized tools and knowledge to quickly and accurately identify complex electrical problems that might be invisible to the untrained eye.
- Correct Repairs: Professionals ensure repairs are done according to electrical codes and safety standards, preventing future issues.
- Warranty and Insurance: Reputable electricians typically offer warranties on their work and are insured, protecting you in case of any unforeseen issues.
Preventing Future Flickering: Maintenance Tips
Once you’ve resolved the flickering issue, implementing a proactive maintenance routine can help prevent future problems and extend the life of your outdoor flood lights.
Regular Inspections
- Visual Checks: Periodically (e.g., seasonally) inspect your outdoor fixtures for any visible signs of wear and tear, such as cracks, loose mounts, or corrosion.
- Wiring Check: If accessible and safe to do so, briefly check wire connections in junction boxes for tightness, especially after severe weather.
- Pest Control: Keep an eye out for signs of pests around your fixtures. Seal any openings that might allow critters to nest inside.
Proper Installation
- Sealed Fixtures: When installing or replacing fixtures, ensure they are rated for outdoor use (e.g., IP44 or higher for splash protection, IP65 for dust-tight and jet protection). Use proper sealing gaskets and outdoor-rated caulk to prevent moisture ingress.
- Tight Connections: Always ensure all electrical connections are tight and secure, using appropriate wire nuts or connectors.
- Proper Grounding: Verify that all outdoor fixtures are properly grounded according to electrical codes.
Protecting Against Elements
- Weatherproofing: Consider adding silicone caulk around the base of fixtures where they meet the wall or eaves, to create an extra barrier against water.
- Overhead Protection: If possible, install flood lights under eaves or overhangs to provide some natural protection from direct rain and snow.
- Surge Protectors: For sensitive LED flood lights, consider installing whole-house surge protectors to mitigate the impact of power surges.
Choosing Quality Components
- High-Quality Bulbs: Invest in reputable brands for LED bulbs, especially those designed for outdoor use, to ensure better internal drivers and durability.
- Durable Fixtures: Choose fixtures made from robust, weather-resistant materials like cast aluminum, brass, or high-grade plastics that can withstand harsh outdoor conditions.
- Compatible Dimmers: If using dimmable outdoor lights, always pair them with dimmers explicitly designed and rated for LED lighting.
Frequently Asked Questions (FAQs)
Why do my LED outdoor flood lights flicker after a power outage?
Power outages can sometimes cause temporary voltage fluctuations or “brownouts” when power is restored, which sensitive LED drivers may react to by flickering. Additionally, if the power surge associated with the outage damaged the LED driver or an internal component, the flickering could become permanent. Give the system some time to stabilize. If it persists, try resetting the circuit breaker or replacing the bulb.
Can temperature changes cause outdoor flood lights to flicker?
Yes, extreme temperature changes, especially cold, can sometimes affect older or lower-quality LED drivers, causing them to flicker briefly until they warm up. While modern LEDs are designed to be more robust, very low temperatures can still impact their performance. Halogen and incandescent bulbs are less prone to temperature-induced flickering unless the temperature change causes condensation within the fixture.
Is it dangerous if my outdoor flood lights are flickering?
A simple flickering bulb is usually not immediately dangerous, but it can be a symptom of underlying issues. If the flickering is caused by loose wiring, moisture ingress, or an overloaded circuit, it can indeed pose a fire hazard or an electric shock risk. Always prioritize investigating the cause, especially if you notice burning smells, tripping breakers, or visible damage.
How often should I replace outdoor flood light bulbs?
The lifespan of outdoor flood light bulbs varies greatly by type:
- LED: Can last 25,000 to 50,000 hours or more, meaning years or even a decade of use.
- Halogen: Typically last 1,000 to 2,000 hours.
- Incandescent: Usually last 750 to 1,000 hours.
You should replace bulbs when they burn out or begin to flicker consistently, as flickering can indicate they are nearing the end of their functional life.
Conclusion
Flickering outdoor flood lights don’t have to be a persistent headache. By systematically troubleshooting the potential causes, from simple bulb replacements to checking wiring connections and addressing sensor issues, you can often restore consistent, reliable lighting to your outdoor spaces. Always remember to prioritize safety by turning off power at the breaker before any inspection or repair. If the problem seems beyond your comfort level or involves complex electrical issues, don’t hesitate to call a qualified electrician. With a little diligence and preventive maintenance, your outdoor flood lights will continue to provide the illumination and security you need for years to come.


