This guide will walk you through the most common culprits behind attic ceiling leaks, from roof damage and plumbing failures to condensation problems. We’ll provide practical advice on how to pinpoint the source of the water, discuss immediate actions you can take, and outline long-term solutions and preventative measures to keep your attic dry and your home safe. Don’t let a drip turn into a downpour – let’s dive in and tackle that unwelcome moisture.
The Top Reasons for Water Dripping from Your Attic Ceiling
Identifying the source of water in your attic is the first, and often most challenging, step. The water you see dripping might be far from its origin point, having traveled along beams and through insulation. Here are the primary reasons you might discover water dripping from your attic ceiling:

1. Roof Leaks: The Most Common Culprit
Your roof is your home’s primary shield against the elements. Over time, wear and tear, severe weather, or improper installation can compromise its integrity, leading to water ingress.
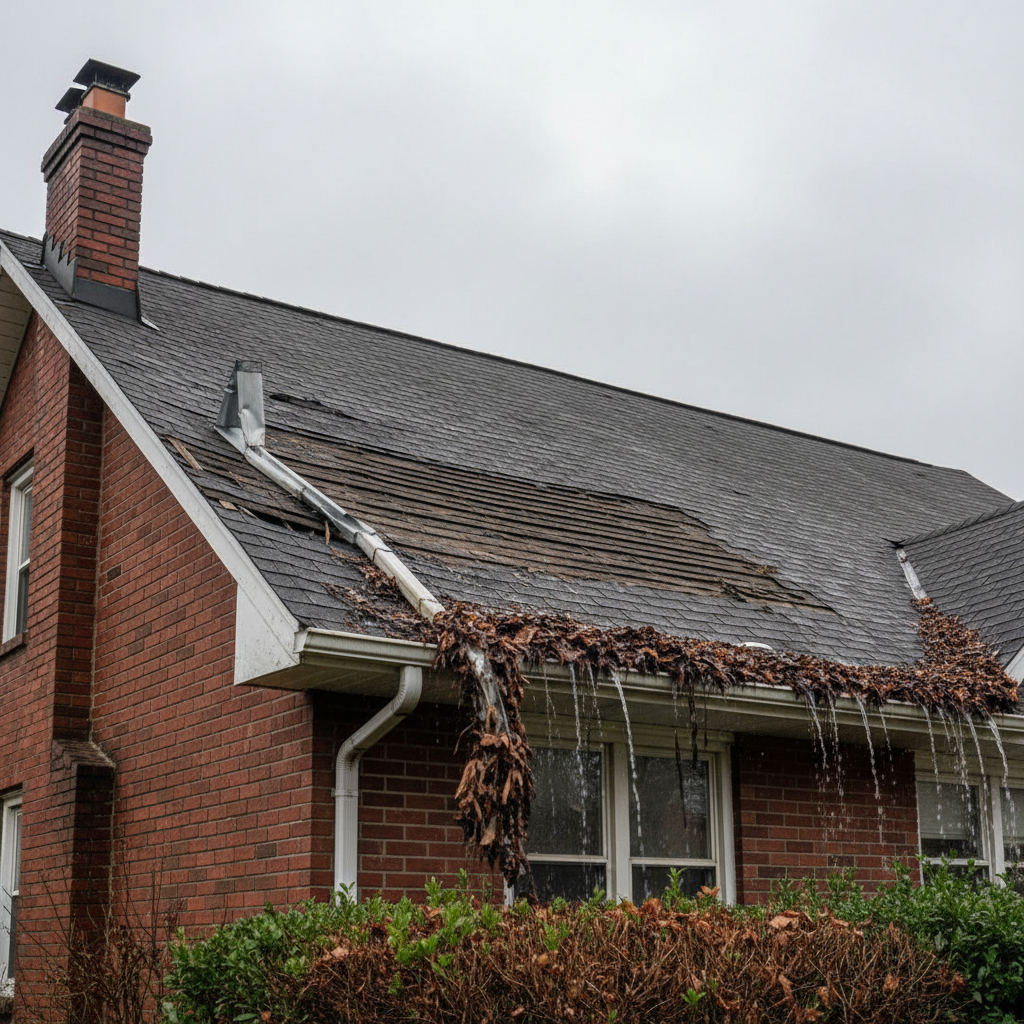
- Damaged or Missing Shingles: High winds, hail, or just old age can cause shingles to crack, curl, or become dislodged, creating direct pathways for water to seep through the roof deck and into your attic.
- Compromised Flashing: Flashing is a crucial waterproofing material, usually metal, installed around roof penetrations like chimneys, skylights, vents, and valleys where two roof planes meet. If flashing is bent, rusted, or improperly sealed, water can easily bypass it and enter your attic.
- Clogged or Damaged Gutters: While not a direct roof leak, overflowing gutters can cause water to pool along the roofline, backing up under shingles or behind fascia boards, eventually finding its way into your attic or wall cavities.
- Punctures or Holes: Anything from fallen tree branches to loose nails, or even previous repair attempts that weren’t fully sealed, can create small holes in your roof membrane, allowing water to drip in.
- Ice Dams: In colder climates, ice dams form when heat escaping from your home melts snow on the upper parts of the roof. The water then refreezes at the colder eaves, creating a barrier of ice that prevents melting snow from draining. This trapped water can then back up under shingles and into your attic.
- Worn Underlayment: Beneath your shingles is a protective layer called underlayment. If this material is old, torn, or damaged, it loses its waterproofing capability, especially during heavy rain or wind-driven snow.
2. Plumbing Leaks: Hidden Troubles Above
If you have plumbing pipes running through your attic – which is common for second-story bathrooms, or if your water heater or HVAC system is located there – a leak could be the cause of your attic moisture.
- Leaking Pipes: Supply lines (carrying fresh water) or drain lines (carrying waste water) can develop leaks due to corrosion, loose connections, extreme temperature changes causing pipes to burst, or even damage from pests.
- Leaking Water Heater: If your water heater is in the attic, a leak from its tank, pressure relief valve, or connecting pipes will certainly manifest as water dripping from the ceiling below.
- HVAC Condensation Issues: Air conditioning units or furnaces often have a condensate pan designed to catch excess moisture. If this pan overflows due to a clogged drain line, a damaged pan, or a malfunctioning pump, the water can quickly flood your attic floor and seep through to the ceiling.
3. Condensation: The Silent Intruder
Condensation occurs when warm, moist air meets a cold surface, turning into liquid water. While often overlooked, condensation can cause significant water damage in an attic, especially during colder months. It’s often mistaken for a roof leak.
- Poor Attic Ventilation: Without adequate ventilation, warm, humid air from your living space can rise into the attic and become trapped. When this moist air comes into contact with the cold underside of the roof deck, it condenses, leading to frost in winter and drips in warmer weather.
- Insufficient Insulation: Gaps or an overall lack of insulation can allow heat and moisture from your home to directly enter the attic space, exacerbating condensation problems.
- Exhaust Fans Venting into the Attic: Bathroom or kitchen exhaust fans should always vent directly to the exterior of your home. If they vent into the attic, they introduce large amounts of warm, moist air, a prime recipe for condensation.
- High Indoor Humidity: Excessive humidity within your home (due to cooking, showering, drying clothes indoors, etc.) can also contribute to condensation issues in the attic if not properly managed.
4. Other Less Common, But Possible, Causes
- Animal Damage: Rodents, squirrels, or other pests can chew through electrical wires, insulation, and even PEX or copper plumbing pipes, leading to leaks.
- Structural Issues: While rare, severe structural problems could potentially affect the integrity of your roof or attic floor, leading to water ingress points.
How to Identify the Source of the Water Dripping from Your Attic Ceiling
Finding the exact source of a leak can be like detective work. Water rarely drops straight down; it often travels horizontally along beams, wiring, and ductwork before it finally appears on your ceiling. Patience and a methodical approach are key.
Safety First: Before You Enter the Attic
Attics can be dangerous environments. Prioritize safety before you begin your inspection:
- Watch Your Step: Only step on ceiling joists or sturdy attic flooring. Stepping on insulation or drywall between joists will cause you to fall through the ceiling below.
- Lighting: Bring a bright flashlight or headlamp. Attic lighting is often poor or non-existent.
- Protective Gear: Wear long sleeves, gloves, a dust mask (to avoid inhaling insulation fibers or mold spores), and sturdy shoes.
- Electrical Hazards: Be aware of exposed wiring. If you suspect the water is near electrical components, consider turning off the power to that area at your main breaker.
- Pest Awareness: Attics can house pests. Be prepared to encounter rodents, insects, or their droppings.
The Inspection Process
- Contain the Immediate Drip: Place buckets, towels, or tarps under the dripping area in your living space to prevent further damage.
- Look for Obvious Signs in the Attic:
- Active Drips: If it’s currently raining or you’ve just had precipitation, look for actual drips from the roof deck, pipes, or HVAC units.
- Water Stains: Even if the leak isn’t active, water stains on wood framing, insulation, or the underside of the roof deck are clear indicators of past or intermittent leaks.
- Mold and Mildew: Black, green, or fuzzy growths are definite signs of prolonged moisture. The presence of mold indicates a persistent leak.
- Damp or Compacting Insulation: Wet insulation loses its effectiveness and often looks compressed, discolored, or feels heavy.
- Musty Odor: A damp, musty smell in the attic is a strong indicator of mold or mildew, even if you can’t see it yet.
- Trace the Water Uphill: Water flows downhill. Start at the spot where the water is dripping into your home and visually follow the path of the moisture marks upwards and outwards towards the roof. The actual source might be several feet away from where the drip appears on your ceiling.
- Examine Roof Penetrations: Pay close attention to areas where anything penetrates the roof: chimneys, plumbing vents, exhaust fans, skylights, and attic windows. These are common spots for flashing failure.
- Check Pipes and HVAC: Systematically inspect all plumbing pipes, drain lines, and your HVAC unit’s condensate pan for any signs of leaks or overflow.
- Consider Condensation: If you find no signs of a direct roof or plumbing leak, especially during cold weather, condensation is a strong suspect. Look for frost on the underside of the roof deck, particularly near the eaves or in poorly ventilated areas. Check if any exhaust fans are venting directly into the attic.
- Use a Moisture Meter: A non-invasive moisture meter can help detect moisture levels in wood, drywall, and insulation, even if it’s not visibly wet. This can help confirm a leak or condensation issue.
- Hose Test (If Safe): If it’s not raining and you suspect a roof leak, you can perform a controlled hose test. Have someone inside the attic while you carefully spray water on specific sections of the roof with a garden hose. Start with lower areas and work your way up. This can help isolate the exact breach point. Exercise extreme caution, especially on a sloped roof.
Immediate Actions and Long-Term Solutions
Once you’ve identified the likely cause of your water dripping from the attic ceiling, it’s time to take action.
Immediate Actions to Mitigate Damage
- Contain the Water: Continue to place buckets and tarps to protect your belongings and flooring.
- Punch a Hole (Carefully): If water is pooling and bulging your ceiling, carefully poke a small hole in the center of the bulge with a screwdriver or awl. This can relieve the pressure and allow water to drain in a controlled manner, preventing a larger ceiling collapse.
- Remove Wet Materials: If insulation or drywall is soaked, remove it to prevent mold growth and allow the area to dry out.
- Shut Off Water/Power: If the leak is from a plumbing pipe, turn off the main water supply to your home. If it’s near electrical wiring, turn off the power to that circuit at your breaker box.
- Ventilate: Use fans or open windows to help dry out the affected area, reducing the risk of mold.
When to Call a Professional
While some minor issues might be DIY-friendly, many attic leaks require professional expertise. Don’t hesitate to call if:
- You can’t locate the source of the leak.
- The leak is extensive or causing significant damage.
- It involves structural components of your roof or home.
- It’s a complex roof repair, especially on a steep roof or involving flashing.
- It’s a burst pipe or a complex plumbing issue.
- You suspect mold growth.
Consider hiring a professional roofer for roof-related issues, a licensed plumber for plumbing leaks, or an HVAC technician for condensation pan problems. For general water damage and mold remediation, a restoration company can assist.
Long-Term Solutions and Repairs Based on Cause
- Roof Leaks:
- Damaged Shingles: Repair or replace individual damaged shingles. For extensive damage or very old roofs, a full roof replacement may be necessary.
- Flashing Issues: Repair or replace compromised flashing around chimneys, vents, and skylights. Ensure proper sealing with roofing cement.
- Gutter Maintenance: Regularly clean gutters to prevent clogs and ensure proper drainage. Repair or replace damaged sections.
- Ice Dam Prevention: Improve attic insulation and ventilation, ensure proper sealing of air leaks from the living space into the attic, and consider installing heating cables along the roof edge in problem areas.
- Plumbing Leaks:
- Pipe Repair: Repair or replace the leaking section of pipe. For persistent issues, a professional plumber may recommend re-routing or upgrading piping.
- Water Heater Repair/Replacement: If the water heater is leaking, it often needs professional repair or replacement.
- HVAC Condensate Drain: Clear any clogs in the drain line using a wet/dry vacuum or by flushing with a bleach/water solution. Ensure the pan is properly installed and not cracked.
- Condensation Issues:
- Improve Attic Ventilation: Install or enhance existing soffit and ridge vents to create a continuous airflow, allowing warm, moist air to escape.
- Increase Insulation: Ensure your attic has adequate insulation to prevent heat transfer from your living space to the attic, keeping the attic cooler.
- Seal Air Leaks: Identify and seal any penetrations from your living space into the attic (e.g., around light fixtures, plumbing stacks, attic hatch, wiring) using caulk, spray foam, or weather stripping. This prevents warm, moist air from entering the attic.
- Proper Exhaust Venting: Reroute any bathroom or kitchen exhaust fans so they vent directly outside the home, not into the attic.
- Manage Indoor Humidity: Use exhaust fans during showers and cooking, and consider a dehumidifier in your home if indoor humidity levels are consistently high.
Preventing Future Water Dripping from Attic Ceilings
An ounce of prevention is worth a pound of cure, especially when it comes to attic leaks. Regular maintenance and proactive measures can save you thousands in repairs.
- Annual Roof Inspections: Have your roof professionally inspected at least once a year, or after severe weather. A professional can spot potential problems before they become major leaks. For more tips on maintaining your roof, check out this guide from Good Housekeeping on roof maintenance.
- Gutter Cleaning: Clean your gutters twice a year (spring and fall) to prevent clogs and ensure proper water drainage away from your home.
- Check Attic Ventilation: Ensure your attic has sufficient and unobstructed soffit and ridge vents. Clear any insulation that might be blocking airflow.
- Inspect Plumbing and HVAC in Attic: Periodically check any pipes, connections, and the condensate pan in your attic for signs of leaks or blockages.
- Seal Air Leaks: Regularly check and re-seal any gaps or penetrations between your living space and the attic.
- Monitor Indoor Humidity: Use a hygrometer to keep track of indoor humidity levels, aiming for 30-50%. Use exhaust fans and dehumidifiers as needed.
- Trim Trees: Keep tree branches trimmed back from your roof to prevent damage during storms and to reduce leaf debris in gutters.
Frequently Asked Questions About Attic Leaks
Is a small drip of water from the attic ceiling serious?
Absolutely. Even a small, intermittent drip can be a sign of a larger, underlying issue. Over time, even minor water exposure can lead to mold growth in insulation and drywall, rot in wooden structures, damage to electrical wiring, and a gradual weakening of your home’s integrity. It’s always best to investigate and address any drip promptly, no matter how small it seems.
Can I fix a water leak in my attic myself?
It depends on the cause and your DIY skill level. Minor issues like a small roof sealant crack, a loose pipe fitting, or a clogged HVAC drain line might be manageable for an experienced DIYer. However, extensive roof damage, complex plumbing repairs, or significant structural issues should always be handled by qualified professionals to ensure safety and proper repair.
How long does it take for mold to grow after an attic leak?
Mold can begin to grow within 24 to 48 hours of water exposure, especially in damp, warm, and dark environments like an attic. This is why immediate drying and remediation after a leak are critical to prevent widespread mold infestation.
What are the signs of a hidden attic leak?
Beyond visible water dripping, signs of a hidden leak can include: discolored spots or stains on your ceiling or walls (often yellowish or brownish), a musty or earthy odor in your home, peeling paint or wallpaper, sagging drywall, or an unexplained increase in your water bill. In the attic itself, look for damp insulation, dark spots on wood, or visible mold growth.
Does homeowner’s insurance cover water dripping from attic ceilings?
Typically, homeowner’s insurance covers sudden and accidental water damage, such as a burst pipe or damage from a severe storm that causes a roof leak. However, policies usually do NOT cover damage resulting from neglect, poor maintenance, or long-term issues like chronic leaks or condensation problems that develop over time. Always review your specific policy and contact your insurance provider as soon as you discover a leak to understand your coverage.
Conclusion
Discovering water dripping from your attic ceiling is a stressful experience, but with the right knowledge and a proactive approach, you can effectively address the problem and protect your home. Whether the culprit is a compromised roof, a faulty plumbing connection, or persistent condensation, understanding the cause is the first step towards a dry, safe, and healthy living environment. Don’t delay in investigating and resolving any signs of moisture in your attic – prompt action is key to preventing costly damage and ensuring the long-term integrity of your home.


