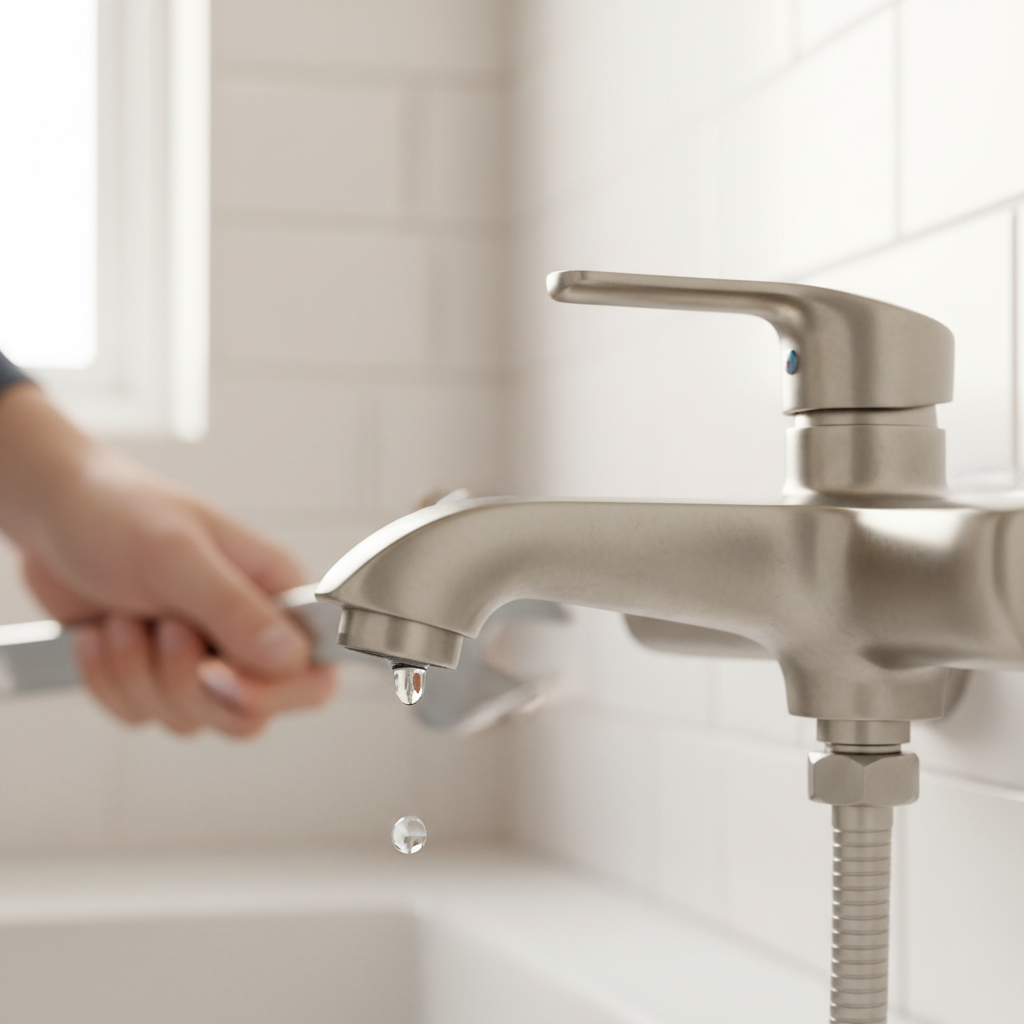
Understanding Why Your Shower Faucet Drips
Before you can fix a dripping shower faucet, it’s crucial to understand the common culprits behind the leak. Most shower faucet drips stem from worn-out internal components. Over time, constant use and exposure to water minerals can cause parts to degrade. Here are the primary reasons:
- Worn Washers: This is perhaps the most common cause, especially in older compression-style faucets. Rubber washers can harden, crack, or lose their elasticity, failing to create a tight seal when the faucet is turned off.
- Damaged O-Rings: Similar to washers, O-rings are small rubber seals that prevent water from leaking around the faucet stem or cartridge. They can dry out, crack, or become dislodged.
- Corroded Valve Seats: The valve seat is the component against which the washer presses to stop water flow. Mineral deposits and corrosion can pit or rough up the valve seat, preventing a complete seal.
- Faulty Cartridge: Many modern single-handle faucets use a cartridge that controls both water flow and temperature. If the cartridge is cracked, worn, or clogged, it can lead to drips.
- Worn Ball Valve Components: Ball faucets, typically found in kitchens but also in some showers, use a rotating ball to control water. Worn springs, O-rings, or seals within the ball assembly can cause leaks.
- Cracked Ceramic Discs: Ceramic disc faucets are known for their durability, but even their ceramic discs can crack or chip, or their inlet/outlet seals can wear out, leading to drips.
- High Water Pressure: Excessively high water pressure can sometimes exacerbate existing issues or even cause new ones by putting undue stress on faucet components.
The Cost of a Dripping Faucet: More Than Just Annoyance
Beyond the auditory annoyance, a dripping shower faucet can have tangible financial and environmental impacts:
- Wasted Water: Even a slow drip can waste hundreds, if not thousands, of gallons of water per year. According to the EPA, a faucet dripping once per second can waste over 3,000 gallons per year. That’s enough to take more than 180 showers!
- Higher Water Bills: More wasted water translates directly to higher utility bills. Repairing a leak can offer significant savings over time.
- Mold and Mildew: Constant moisture can encourage the growth of mold and mildew in your shower, leading to unsightly stains and potential health issues.
- Fixture Damage: The continuous drip can cause mineral buildup and staining on your showerhead, tub, and tiles, making them harder to clean and potentially shortening their lifespan.
DIY or Call a Professional Plumber?
Many dripping shower faucet repair tasks are manageable for the average homeowner with basic tools and some patience. However, there are instances where calling a professional is the wiser choice.
When to DIY:
- You have basic plumbing knowledge and feel comfortable turning off your home’s water supply.
- The leak is relatively minor and appears to be coming from the handle or spout.
- You can easily identify the type of faucet you have.
- You have the right tools or are willing to purchase them.
When to Call a Professional:
- You’re unsure about the cause of the leak or the type of faucet.
- The leak is severe, causing significant water damage, or coming from inside the wall.
- You lack the necessary tools, time, or confidence to perform the repair.
- After attempting a repair, the faucet continues to leak.
- The issue involves complex piping or specialized components.
For more detailed insights on when professional help is needed, you might find resources like HGTV’s guide on plumbing issues helpful in making your decision.
Preparation is Key: Before You Begin
Proper preparation not only makes the repair process smoother but also prevents potential mishaps.
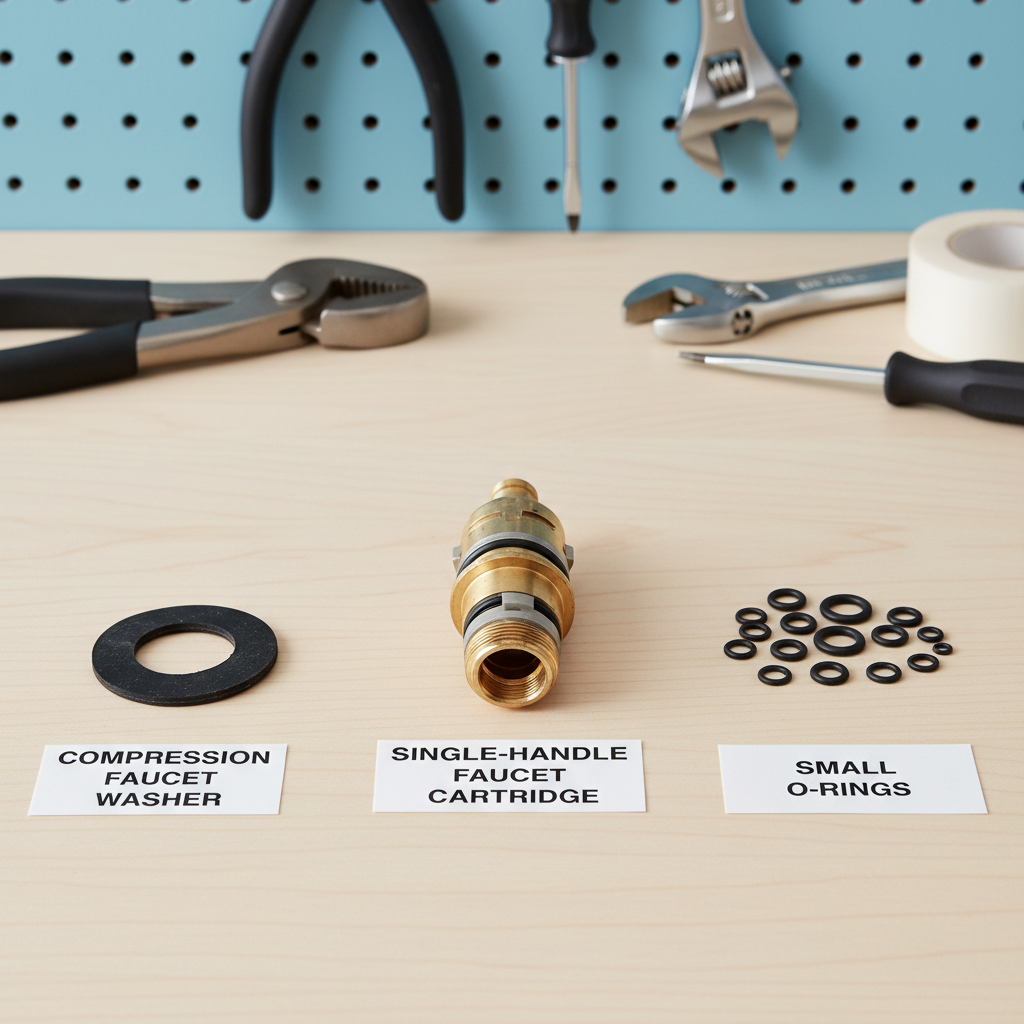
- Gather Your Tools:
- Screwdrivers (Phillips and flathead)
- Adjustable wrench or basin wrench
- Pliers (needle-nose and channel-lock)
- Hex keys (Allen wrenches)
- Utility knife or small pry tool
- Cleaning brush and rags
- Penetrating oil (e.g., WD-40)
- Replacement parts (washers, O-rings, cartridges – try to have them on hand or be prepared to get them)
- Plumber’s grease (silicone-based)
- Turn Off the Water Supply: This is the most critical step. Locate the main water shut-off valve for your house, usually in the basement, utility closet, or near the water meter. Turn it off completely. For some shower faucets, there might be individual shut-off valves in the wall behind an access panel. If you can locate these, you only need to turn off the water to the shower.
- Drain Remaining Water: Turn on the shower faucet to drain any residual water from the pipes. This prevents a surprise splash when you open the faucet.
- Protect Your Drain: Place a cloth or stopper over the shower drain. This prevents small screws or parts from falling into the drain and causing a new problem.
- Protect Surfaces: Lay down towels or rags in the shower to protect the tub or shower pan from scratches or dropped tools.
How to Diagnose the Cause of Your Shower Faucet Drip
Identifying your faucet type is the first step in successful dripping shower faucet repair. Most showers have one of four main faucet types:
1. Compression Faucets
- Appearance: Two separate handles for hot and cold water, often with a separate spout. These are common in older homes.
- How they work: Water is stopped by compressing a rubber washer against a valve seat.
- Common drip source: Worn-out rubber washers or corroded valve seats.
2. Cartridge Faucets
- Appearance: Single handle that you pull up for water and rotate for temperature control.
- How they work: A cylindrical cartridge moves up and down or rotates to control water flow and mix hot/cold water.
- Common drip source: Worn O-rings on the cartridge or a faulty cartridge itself.
3. Ball Faucets
- Appearance: Single handle that rotates on a spherical cap. These are less common in showers than kitchens.
- How they work: A metal or plastic ball with slots controls water flow and temperature.
- Common drip source: Worn O-rings, inlet seals, or springs within the ball assembly.
4. Ceramic Disc Faucets
- Appearance: Single handle that moves smoothly from side to side and up/down. They often have a wide, squat base.
- How they work: Two ceramic discs, one stationary and one movable, slide against each other to control water flow.
- Common drip source: Worn seals at the base of the cartridge or cracked ceramic discs (less common).
Step-by-Step Repair Guide for Common Shower Faucet Types
Once you’ve identified your faucet type and prepared your workspace, you’re ready to tackle the dripping shower faucet repair.
Repairing a Compression Faucet
This is often the easiest repair.
- Remove the Handle: Pop off the decorative cap (if any) on top of the handle. Unscrew the handle screw and pull the handle off.
- Remove the Packing Nut: Using an adjustable wrench, unscrew the large packing nut around the stem.
- Extract the Stem: Gently pull out the faucet stem. You might need to twist it slightly.
- Replace the Washer and O-Ring: At the bottom of the stem, you’ll see a rubber washer held by a screw. Remove the screw, pry off the old washer, and replace it with a new one of the same size. There might also be a small O-ring around the stem – replace this as well, applying a thin coat of plumber’s grease.
- Inspect the Valve Seat: Look into the faucet body where the stem was removed. The valve seat is at the bottom. If it appears corroded or pitted, you can try cleaning it with a wire brush or replacing it with a valve seat wrench.
- Reassemble: Reinsert the stem, tighten the packing nut (don’t overtighten), replace the handle, and turn the water back on to check for leaks.
Repairing a Cartridge Faucet
Cartridge faucets typically drip due to worn O-rings or a faulty cartridge.
- Remove the Handle: Look for a set screw on the side or back of the handle. Use an Allen wrench or screwdriver to loosen it and pull the handle off. You might need to remove a decorative cap first.
- Remove the Retaining Nut or Clip: Once the handle is off, you’ll see a metal or plastic retaining nut, clip, or washer holding the cartridge in place. Remove it carefully.
- Extract the Cartridge: Use a pair of pliers to grasp the top of the cartridge and pull it straight out. Some cartridges require a special puller tool, especially older or stubborn ones. Note its orientation for reinstallation.
- Inspect and Replace O-Rings: Examine the existing O-rings on the cartridge body. If they are worn or cracked, carefully remove them and replace them with new, identical O-rings. Apply plumber’s grease to the new O-rings.
- Replace the Cartridge (If Necessary): If the cartridge itself appears damaged, cracked, or if replacing O-rings doesn’t solve the drip, you’ll need a new cartridge. Take the old one to a plumbing supply store to ensure you get an exact match.
- Reassemble: Insert the new or refurbished cartridge, making sure it’s oriented correctly (there’s often a “hot” side indicator or alignment tabs). Secure it with the retaining nut or clip, replace the handle, and test.
Repairing a Ball Faucet
Ball faucets can be a bit more intricate due to their many small parts.
- Remove the Handle: Loosen the set screw (usually at the base of the handle) with an Allen wrench and lift the handle off.
- Remove the Cap and Collar: Unscrew the cap that covers the ball assembly. You might need groove-joint pliers or a special tool provided with the faucet.
- Remove the Cam and Washer: Lift out the cam, cam washer, and rotating ball. Note their arrangement.
- Replace Seals and Springs: Inside the faucet body, you’ll see two rubber seals and springs that the ball rests on. Use needle-nose pliers or a small screwdriver to carefully pry these out. Replace them with new ones from a repair kit.
- Replace O-Rings: There are also O-rings on the faucet body itself. Carefully remove and replace these, applying plumber’s grease.
- Reassemble: Place the new springs and seals, then the ball. Reinstall the cam, cam washer, and tighten the cap and handle. Test for leaks.
Repairing a Ceramic Disc Faucet
Ceramic disc faucets are durable, but their seals can still wear out.
- Remove the Handle: Typically, there’s a set screw under a decorative cap or on the side of the handle. Remove it and lift the handle off.
- Remove the Escutcheon Cap: Unscrew or lift off the decorative cap that covers the main body of the faucet.
- Remove the Mounting Screws: You’ll see screws holding the ceramic disc cartridge in place. Unscrew these.
- Remove the Cartridge: Carefully lift out the ceramic disc cartridge.
- Replace the Seals: At the bottom of the cartridge, or within the faucet body where the cartridge sits, you’ll find rubber seals. Pry them out and replace them with new ones, applying plumber’s grease. If the ceramic discs themselves are chipped or cracked (rare), you’ll need to replace the entire cartridge.
- Reassemble: Place the cartridge back into the faucet body, secure it with the mounting screws, reinstall the escutcheon cap and handle. Turn on the water and check for drips.
Troubleshooting Common Issues After Repair
Sometimes, even after a diligent dripping shower faucet repair, problems can persist. Here are some common troubleshooting tips:
- Drip Still Persists:
- Check for proper seating: Ensure all washers, O-rings, and cartridges are seated correctly and not pinched.
- Overtightening: Sometimes overtightening screws or nuts can damage new washers/O-rings. Loosen slightly then re-tighten just enough.
- Valve seat damage: If you didn’t replace the valve seat in a compression faucet and it was corroded, the new washer might still not seal properly.
- Incorrect part: Double-check that all replacement parts are the exact match for your faucet model.
- More than one issue: A leak might be stemming from another part of the faucet assembly you didn’t address.
- Low Water Pressure:
- Debris: A piece of debris might have dislodged during the repair and is now partially blocking water flow.
- Improperly seated cartridge: Ensure the cartridge is fully and correctly seated.
- Aerator/Showerhead Clog: While less likely to be caused by faucet repair, ensure the showerhead itself isn’t clogged with mineral deposits.
- Faucets are Stiff or Hard to Turn:
- Lack of lubrication: Ensure you applied plumber’s grease to O-rings and moving parts.
- Overtightened nuts: Back off packing nuts or retaining nuts slightly.
- Incorrect cartridge: An ill-fitting cartridge can cause friction.
Preventative Maintenance for a Drip-Free Shower
An ounce of prevention is worth a pound of cure, especially when it comes to plumbing. Here’s how to minimize future dripping shower faucet issues:
- Don’t Overtighten Handles: For compression faucets, cranking down on the handle to stop a drip will only prematurely wear out the washer. Repair the leak instead of forcing it.
- Regular Cleaning: Clean mineral deposits from your showerhead and faucet aerators regularly. This reduces strain on internal components.
- Check Water Pressure: If you suspect high water pressure, consider installing a pressure regulator for your home. Ideal pressure is typically between 40-60 psi.
- Use Quality Replacement Parts: When replacing components, opt for parts specifically designed for your faucet brand and model, ideally from reputable manufacturers. Generic parts might not fit perfectly or last as long.
- Annual Inspection: Periodically check your faucets for any signs of wear or very minor drips that can be addressed before they become major leaks.
When to Call a Professional
While DIY is empowering, sometimes a professional touch is indispensable. Don’t hesitate to call a licensed plumber if:
- You’ve attempted the repair but the drip persists.
- The leak is coming from inside the wall, indicating potential pipe damage.
- You encounter unexpected complications or cannot disassemble the faucet.
- You’re uncomfortable working with plumbing or lack the right tools.
- Your faucet is old, corroded, or has specialized components that are hard to find or repair.
A professional plumber can quickly diagnose complex issues, has specialized tools, and ensures the repair is done correctly, preventing further damage and saving you headaches in the long run.
Frequently Asked Questions About Shower Faucet Repair
Q1: How long does a typical shower faucet repair take?
A1: For a homeowner, a straightforward repair like replacing a washer in a compression faucet might take 30-60 minutes. More complex repairs, like replacing a cartridge or dealing with stubborn parts, could take 1-3 hours, especially if you need to identify and source specific replacement parts.
Q2: Can I use universal replacement parts for my shower faucet?
A2: While some washers and O-rings are fairly universal, cartridges and more complex internal components are often specific to the faucet brand and model. It’s always best to take the old part with you to a plumbing supply store or refer to your faucet’s manual to ensure you get an exact match. Using incorrect parts can lead to further leaks or improper faucet function.
Q3: What if I can’t find the main water shut-off valve?
A3: The main water shut-off valve is usually located where the main water line enters your home. Common locations include the basement, crawl space, utility room, near the water heater, or outside near your water meter. If you cannot locate it, or if it’s seized, you might need to contact your local water utility company for assistance or call a plumber before attempting any repairs.
Q4: My shower faucet is dripping, but it’s a new installation. What could be wrong?
A4: Even new faucets can drip. Common causes in new installations include a manufacturing defect in a component, improper installation (e.g., seals not seated correctly, connections not tightened enough), or debris from the initial pipe flushing getting caught in the valve mechanism. It’s often best to contact the installer or the faucet manufacturer if it’s under warranty.
Q5: Is it safe to use thread tape (Teflon tape) on shower faucet connections?
A5: Thread tape is primarily used on threaded pipe connections to help create a watertight seal and prevent leaks. It’s generally not used on internal faucet components like washers, O-rings, or cartridges, as these rely on their own specific sealing mechanisms. However, for threaded connections on the showerhead arm or spout, thread tape can be beneficial.
Conclusion
A dripping shower faucet is more than just a minor annoyance; it’s a source of wasted water and money. By understanding your faucet type, gathering the right tools, and following these step-by-step instructions, you can confidently undertake most dripping shower faucet repair tasks yourself. Not only will you restore peace and quiet to your bathroom, but you’ll also save on utility bills and prevent potential damage. Should the problem prove too challenging, remember that professional help is always available to ensure your plumbing system runs smoothly and efficiently.


