The charm of older homes often comes with a symphony of sounds – the gentle creak of stairs, the soft sigh of settling timbers, and, perhaps most notably, the persistent protest of squeaky floors in older homes. While a certain amount of character is welcome, a floor that groans with every step can become tiresome, disrupting the peace and even hinting at underlying issues. Fortunately, silencing these noisy nuances doesn’t always require a major renovation. With a bit of patience, the right tools, and a systematic approach, you can effectively learn how to repair squeaky floors in older homes and restore tranquility to your cherished living space.
Older homes, with their seasoned timber and historical integrity, often present unique challenges when it comes to floor squeaks compared to their modern counterparts. The very materials and construction methods that give them their distinctive character can also contribute to the symphony of creaks and groans underfoot. Understanding the root causes is the first crucial step in effectively diagnosing and rectifying these acoustic anomalies. This guide will walk you through everything from identifying the source of the squeak to implementing various repair methods, ensuring your antique abode retains its quiet dignity.
Why Do Older Homes Have Squeaky Floors? Understanding the Causes
Before you grab your toolbox, it’s essential to understand why older floors develop squeaks. Unlike newer constructions where materials are typically more uniform and construction methods standardized, older homes often used less kiln-dried lumber and different fastening techniques. This historical context plays a significant role in their current condition.
Shifting Wood and Shrinkage
Wood is a hygroscopic material, meaning it absorbs and releases moisture from the air. Over decades, repeated cycles of humid summers and dry winters cause floorboards and framing lumber to expand and contract. This constant movement leads to shrinkage, especially in drier seasons, creating tiny gaps between floorboards, subfloor, and joists. When weight is applied, these components rub against each other, generating friction and the familiar squeak. Original lumber in older homes might not have been as thoroughly dried as modern wood, making it more prone to significant movement over time.
Loose Floorboards
One of the most common culprits, loose floorboards happen when the nails or screws securing them to the subfloor or joists become dislodged, bent, or simply lose their grip. In older homes, nails were often the primary fastener, and over time, these can work their way loose due to foot traffic, vibrations, and the natural expansion and contraction of the wood. This allows the floorboard to move up and down slightly with each step, creating a squeaking sound as it rubs against its neighbors or the subfloor.
Subfloor and Joist Issues
Below the visible floorboards lies the subfloor, usually made of planks or plywood, which is then supported by structural joists. If the subfloor is damaged, warped, or not adequately secured to the joists, it can sag or flex, leading to squeaks. Similarly, joists themselves can develop issues. They might warp, crack, or become detached from the main structure dueating to house settling, water damage, or insect infestation. Any instability in this foundational layer will inevitably translate into noisy floors above. Furthermore, the bridging or blocking between joists, designed to stiffen the floor system, can also come loose, allowing joists to twist and rub against the subfloor.
Inadequate Fastening
Original construction methods in older homes sometimes used fewer fasteners than modern building codes recommend, or the fasteners themselves (e.g., cut nails) were less robust than today’s options. Over decades, this can lead to widespread loosening. Additionally, if the subfloor wasn’t adequately nailed or screwed into every joist, or if the finish floor wasn’t properly secured to the subfloor, areas of movement and friction are almost guaranteed to develop. Sometimes, pipes, ducts, or electrical conduits running through the joist bays might also be inadequately secured, vibrating and rubbing against the wood structure, contributing to the noise.
Essential Tools and Materials for Floor Squeak Repair
Before embarking on your mission to silence those noisy floors, gather the necessary tools and materials. Having everything on hand will streamline the process and prevent unnecessary interruptions.
- Drill: A cordless drill is indispensable for driving screws.
- Screws:
- Trim-head screws: Small head for minimal visibility on finished floors.
- Construction screws: For securing subfloor or joists from below.
- Squeak repair kits: Specialized screws designed to break off below the surface.
- Shims: Thin pieces of wood (cedar shakes work well) for filling gaps.
- Wood Glue/Construction Adhesive: For strengthening joints and securing shims.
- Talcum Powder or Graphite Powder: For lubricating squeaking floorboards.
- Stud Finder: To locate joists beneath finished floors.
- Chalk Line or Straightedge: For marking joist locations.
- Pry Bar and Hammer: For minor adjustments or if temporary board removal is needed.
- Safety Glasses and Gloves: Always protect your eyes and hands.
- Headlamp or Flashlight: Essential for working in dimly lit basements or crawl spaces.
- Wood Putty/Filler: To fill screw holes if working from above.
- Blocking/Scrap Lumber: For reinforcing joists or bridging gaps.
- Mending Plates or Metal Brackets: For strengthening weak joints from below.
- Small Level: To check for evenness or sag.
How to Repair Squeaky Floors: Step-by-Step Solutions
Repairing squeaky floors often depends on whether you can access the floor from below (e.g., from a basement or crawl space) or if you must work solely from above the finished floor. We’ll explore both scenarios.
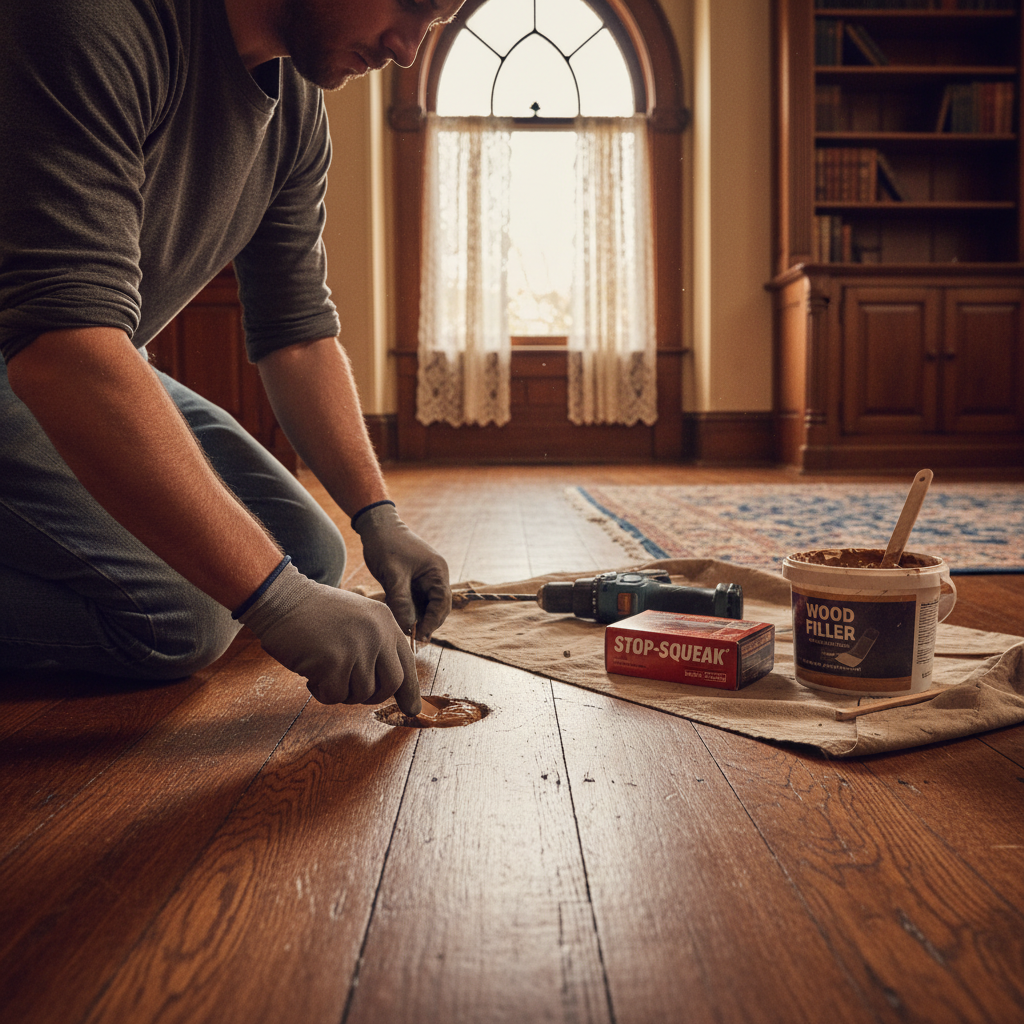
Addressing Squeaks from Above the Floor (Finished Floors)
Working from above is often necessary when there’s no access to the underside of the floor (e.g., on a second story or over a finished ceiling). This approach focuses on securing the visible floorboards to the subfloor or joists.
The Powder/Talc Method (Temporary Fix)
For minor squeaks caused by friction between floorboards, a simple lubrication can sometimes work wonders.
- Locate the exact squeak by having someone walk across the noisy area while you listen closely.
- Sprinkle a generous amount of talcum powder, baby powder, or graphite powder into the seams between the squeaky floorboards.
- Gently sweep the powder back and forth, using a soft brush or cloth, encouraging it to fall into the gaps.
- Walk over the area again to work the powder deeper and assess if the squeak has diminished.
This method provides temporary relief by reducing friction but doesn’t address the underlying looseness. It’s often effective for hardwood floors and can be a good first step, especially for very old, delicate floors.
Lubricating Gaps with Wood Glue
For slightly more stubborn squeaks between floorboards, a thin bead of wood glue can be applied. Use a very fine applicator (like a syringe or a small artist’s brush) to work wood glue into the gaps. The glue will harden and bond the boards together, eliminating the rubbing. Wipe off any excess immediately with a damp cloth. This is suitable for smaller gaps and can be more permanent than powder.
Using Screws to Secure Loose Floorboards
This is often the most effective method when working from above, but requires precision to avoid damaging the finished floor.
- Locate the Joists: Use a stud finder to identify the joists beneath the floorboards. Mark their center lines with a chalk line or pencil. Squeaks often occur where floorboards cross joists or where the subfloor isn’t adequately attached to a joist.
- Drill Pilot Holes: Using a drill bit slightly smaller than your screw shank, drill a pilot hole through the floorboard and into the joist. This prevents splitting the wood, especially in older, brittle timber. If using a squeak repair kit, follow their specific instructions for drilling and depth.
- Drive Screws:
- For finished hardwood floors: Use specialized trim-head screws or squeak repair screws (like Squeak-No-More). These screws have thin heads that can be driven below the surface of the floorboard. A squeak repair kit typically includes a special bit that ensures the screw head snaps off cleanly below the surface.
- For carpeted floors: You can carefully pull back the carpet in the squeaky area, drive standard construction screws through the subfloor into the joist, and then replace the carpet. Be mindful of nails or tack strips.
- For areas without a joist: If the squeak is between joists, you’re likely addressing a loose subfloor board. Drive screws at opposing angles into the subfloor, ensuring they penetrate deeply enough to secure the loose section to the underlying structure or even angle them into the adjacent joist if possible.
- Conceal the Screws: For hardwood floors, fill the small pilot holes with wood putty that matches your floor’s finish. Sand lightly once dry, if necessary, and apply a touch-up finish.
Specific Squeak Repair Kits
Several brands offer specialized squeak repair kits (e.g., Squeak-No-More). These kits typically involve a unique screw and a precise snapping tool that drives the screw through the finish floor, into the joist, and then allows you to break off the screw head just below the surface, minimizing visible damage. They are designed for ease of use and effective, discreet repair.
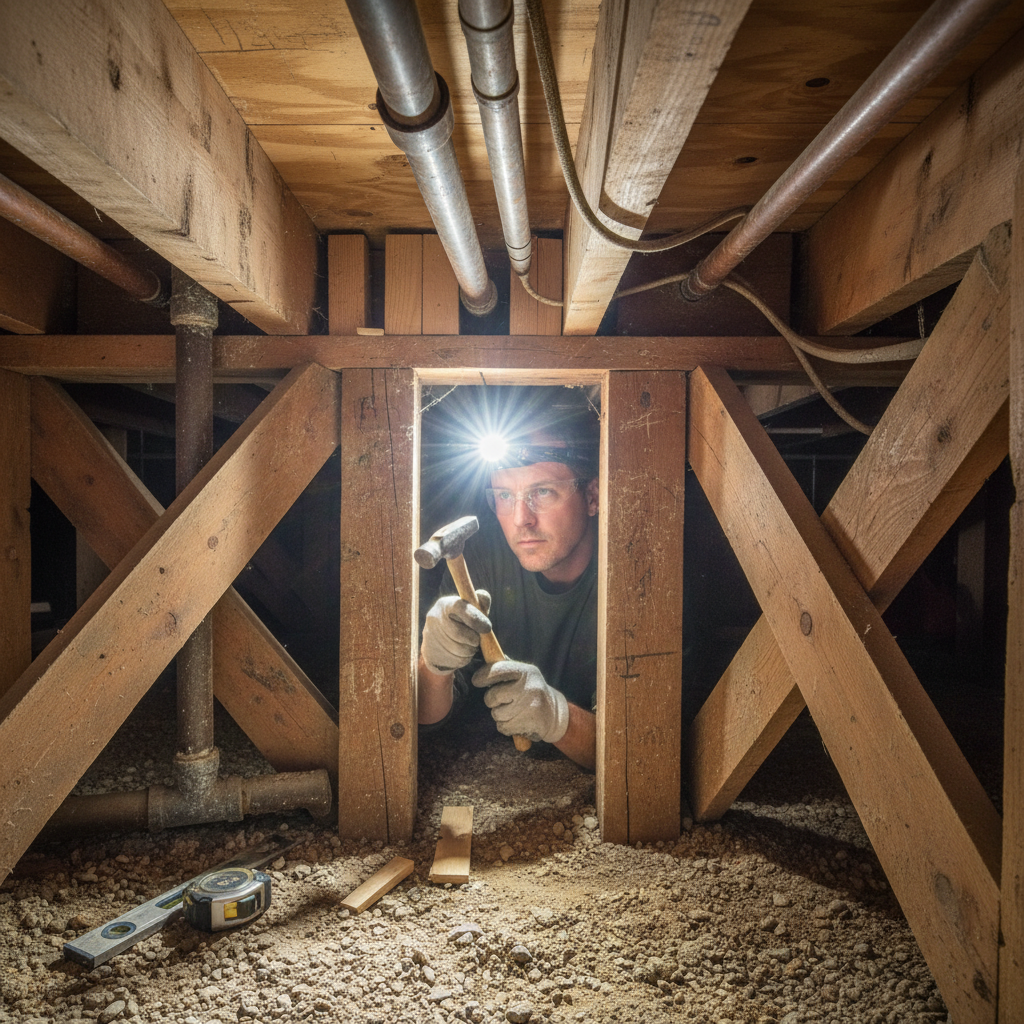
Repairing Squeaks from Below the Floor (Access to Joists)
This is often the most effective and permanent solution for older homes with accessible basements or crawl spaces. It allows direct access to the subfloor and joists, addressing the structural issues head-on.
Identifying the Source from Below
This step is critical. Have someone walk around upstairs on the squeaky area while you listen and observe from below. Look for movement, gaps between joists and subfloor, or any rubbing components. Use a flashlight to pinpoint the exact locations of movement. Mark these spots clearly on the subfloor or joists with a pencil.
Bridging Joists and Subfloor with Shims
Many squeaks occur because of a small gap between the top of a joist and the underside of the subfloor.
- Locate these gaps by having someone walk above you.
- Gently tap thin wooden shims (cedar shingles or shims from a hardware store work well) into these gaps.
- Be careful not to over-tighten, which can push the floor up, creating a hump. Tap until snug, then break off the excess shim flush with the joist.
- For added security, you can apply a bead of wood glue to the shim before tapping it into place.
This effectively bridges the gap, preventing the subfloor from rubbing against the joist.
Adding Blocking Between Joists
If you notice joists twisting, bowing, or showing excessive flex, adding solid blocking can stiffen the floor system.
- Cut pieces of lumber (the same dimension as your joists) to fit snugly between the joists, perpendicular to them.
- Stagger the blocking for easier nailing or screwing.
- Secure the blocking to the joists using construction screws or structural nails.
- You can also add construction adhesive to the ends of the blocks before fastening for a stronger bond.
This method helps distribute weight and prevents individual joists from moving independently, reducing squeaks and improving floor stability. For more extensive issues, cross-bridging (diagonal pieces between joists) can also achieve similar stiffness.
Using Mending Plates or Brackets
For loose or separated joist connections, or where a joist has split, metal mending plates or L-brackets can provide reinforcement.
- Position the plate or bracket across the compromised joint or split.
- Secure it firmly with appropriate screws or structural nails, ensuring they are long enough to penetrate well into the wood without going through the finished floor above.
This is particularly useful for areas where joists meet support beams or where older framing might be showing signs of fatigue.
Attaching Joists to Subfloor with Screws
This is a direct method to eliminate movement between the subfloor and joists.
- From below, identify the areas where the subfloor seems loose from the joist.
- Drive construction screws up through the joist and into the underside of the subfloor. Use screws that are long enough to penetrate the subfloor adequately (e.g., 2.5-inch to 3-inch screws for typical subfloor and joist thickness) but not so long they pierce through the finished floor.
- Angle the screws slightly for better grip, or drive them straight up if you are confident about the subfloor’s thickness and the finished floor’s depth.
This method is highly effective in permanently binding the subfloor to the joists.
Addressing Loose Ductwork or Wiring
Sometimes, the squeak isn’t the floor itself, but rather unsecured ductwork, plumbing pipes, or electrical conduits vibrating and rubbing against the wooden structure.
- Carefully inspect all utility lines running through the joist bays.
- If you find loose sections, secure them with appropriate hangers, straps, or clamps to the joists or blocking. Ensure that the fasteners don’t interfere with the floor’s integrity.
- You might also wrap noisy pipes with rubber or foam insulation where they pass through holes in joists to prevent rubbing.
Advanced Solutions for Persistent or Widespread Squeaks
If individual repairs aren’t solving the problem, or if the squeaks are widespread, you might need to consider more significant interventions.
Reinforcing the Subfloor
In older homes, the original subfloor might consist of individual planks rather than modern plywood sheets. These planks can warp, cup, or become extensively loose.
- If feasible, adding a new layer of plywood (e.g., 1/2-inch or 3/4-inch) over the existing subfloor can dramatically stiffen the floor and eliminate many squeaks.
- Ensure the new plywood is securely screwed (not just nailed) into the original subfloor and into the joists.
- This often requires removing the existing finish floor first, making it a more involved renovation.
Adding New Underlayment
For softer finish floors like linoleum, vinyl, or carpet, an underlayment is often used. If this underlayment is old, degraded, or improperly installed, it can contribute to squeaks. Replacing or adding a new, properly installed underlayment can improve the floor’s stability and reduce noise, though this also often requires removing the finish floor.
Professional Consultation
If you’ve tried various DIY solutions without success, or if you suspect structural issues beyond typical squeaks (e.g., significant sagging, water damage, widespread insect activity, or foundation problems), it’s time to call in a professional. A structural engineer or an experienced contractor specializing in older homes can diagnose complex problems and recommend appropriate, safe solutions. They can provide insights into the overall integrity of your home’s framing and foundation, which is paramount for safety and longevity.
Preventive Measures to Keep Your Floors Quiet
Once you’ve quieted your floors, a few practices can help keep them silent for years to come.
Humidity Control
As discussed, wood movement is a primary cause of squeaks. Maintaining consistent humidity levels in your home, especially in older structures, can significantly reduce this movement. Use humidifiers in dry winter months and dehumidifiers in damp summer months. Aim for a relative humidity level between 30% and 50% to minimize expansion and contraction of wood components.
Proper Installation Techniques (if replacing floors)
If you’re undertaking a floor replacement project in your older home, ensure that modern best practices are followed. This includes using properly acclimated wood, adequate subfloor preparation, proper fastening schedules (screws preferred over nails for subfloor), and expansion gaps around the perimeter. Even with older homes, modern techniques can be adapted to provide long-lasting, quiet results.
Regular Inspection and Maintenance
Periodically inspect your basement or crawl space for any signs of new movement, loose connections, or environmental factors (like leaks). Addressing small issues as they arise can prevent them from escalating into widespread squeaks. Keeping an eye on your home’s structural health is part of responsible homeownership, as Good Housekeeping often emphasizes for common home maintenance.
Safety Considerations When Repairing Floors
Working in older homes, especially in basements or crawl spaces, comes with specific safety concerns. Always prioritize your safety and the integrity of your home.
- Asbestos and Lead Paint: Older homes may contain asbestos in floor tiles, mastic, or insulation, and lead paint on various surfaces. Do not disturb these materials without professional assessment and abatement if necessary. Wear appropriate PPE (respirator, gloves) if there’s any doubt.
- Structural Integrity: Before making any cuts or significant changes to joists or beams, be absolutely sure you understand the structural implications. If you suspect any major structural damage, consult a professional.
- Electrical and Plumbing: Be aware of hidden wires and pipes when drilling or cutting. Always use a stud finder with electrical detection capabilities and know the location of your main power shut-off.
- Crawl Space Hazards: Crawl spaces can harbor pests, mold, sharp objects, and uneven terrain. Wear sturdy shoes, thick gloves, a headlamp, and consider a Tyvek suit. Ensure adequate ventilation.
- Eye and Ear Protection: Always wear safety glasses when drilling, hammering, or working with power tools. Ear protection is recommended for extended periods of noise.
FAQs About Squeaky Floors
How much does it cost to fix squeaky floors?
The cost varies widely depending on the method, the extent of the squeaks, and whether you do it yourself or hire a professional. DIY solutions using shims or screws can cost as little as $20-$100 for materials. If you hire a professional, specific spot repairs might range from $200-$500 per room. Widespread, complex issues requiring subfloor reinforcement or extensive work from below could easily run into several thousand dollars, especially if structural repairs are needed.
Can squeaky floors be a sign of a structural problem?
While most squeaks are benign and result from normal wood movement, persistent, widespread, or newly developed severe squeaks accompanied by visible sagging, bowing, or cracking could indicate a more serious structural problem. This might include foundation issues, water damage to joists, or insect infestation. If you have concerns, especially in an older home, it’s best to consult a structural engineer or a reputable contractor specializing in historic homes.
Is it normal for old houses to have squeaky floors?
Yes, it is very common for older homes to have some degree of squeaky or creaky floors. Their original construction methods, the natural aging and movement of wood over decades, and numerous cycles of expansion and contraction all contribute. A few minor squeaks are often considered part of the charm of an older home. However, excessively loud or widespread squeaks are usually addressable.
Can I fix squeaky floors without tearing up the carpet?
Yes, for carpeted floors, you have a few options. You can sometimes drive specialized squeak-eliminating screws (like those in a Squeak-No-More kit) directly through the carpet and padding into the joist. These screws are designed to break off below the carpet surface. Alternatively, you can carefully pull back the carpet in the affected area, make the repair to the subfloor or joist, and then re-stretch and re-tack the carpet. This second method often provides a more robust fix.
How long does a floor squeak repair last?
The longevity of a repair depends on the method used and the underlying cause. Simple fixes like powder or shims can be temporary, lasting months to a few years. More robust solutions, such as securing floorboards with screws from above or reinforcing joists and subfloor from below, can be very long-lasting, often for many years or even decades, especially if humidity levels are consistently maintained within the home.
Conclusion
Silencing the squeaky floors in older homes is a rewarding project that can significantly enhance the comfort and tranquility of your living space. By understanding the common causes, carefully diagnosing the source of the noise, and applying the appropriate repair techniques—whether working from above or below—you can effectively transform a noisy nuisance into a quiet historical charm. Remember to prioritize safety, especially when working in older structures, and don’t hesitate to seek professional help for persistent or complex issues. With patience and the right approach, your cherished older home can once again offer the peaceful serenity it deserves, letting its stories be told through its enduring beauty, not its protesting floorboards.


