Understanding Low Shower Water Pressure: The Basics
Before diving into fixes, it’s helpful to understand what “low water pressure” truly means. While subjective, optimal shower pressure typically ranges between 40 and 60 pounds per square inch (psi). Anything significantly below this can feel inadequate. Many factors, both internal to your shower head and external within your home’s plumbing, can contribute to a noticeable drop in water flow. Pinpointing the exact cause is the first critical step toward a successful shower head low water pressure fix.
Common Culprits Behind Weak Shower Flow
Identifying the source of your low pressure is half the battle. Here are the most frequent reasons why your shower might be underperforming:
- Clogged Shower Head: This is by far the most common cause. Mineral deposits (limescale, calcium, rust) from hard water can accumulate in the tiny nozzles and internal components of your shower head over time, restricting water flow.
- Flow Restrictor Issues: Many modern shower heads include a flow restrictor – a small device designed to conserve water by limiting the maximum flow rate. While usually beneficial, it can sometimes become partially blocked or dislodged, exacerbating low pressure.
- Kinked or Damaged Hose (Handheld Showers): If you have a handheld shower unit, the hose can become kinked, twisted, or even internally damaged, impeding water’s path.
- Issues with the Shower Valve or Cartridge: The mixing valve behind your shower handle controls the water flow and temperature. If this valve’s cartridge is old, worn out, or clogged with sediment, it can restrict water pressure.
- Partially Closed Shut-Off Valves: There might be a main water shut-off valve for your house, or individual shut-off valves for the shower or bathroom, that haven’t been fully opened after plumbing work or maintenance.
- Water Heater Sediment Buildup: Sediment can accumulate at the bottom of your water heater, potentially affecting the pressure of hot water or even the overall flow if it enters your hot water lines.
- Whole-House Water Pressure Issues: If low pressure is affecting more than just your shower (e.g., other faucets), the problem might stem from your main water supply, a malfunctioning pressure regulator, or larger plumbing issues like leaks or corroded pipes.
- Municipal Water Supply Problems: Rarely, the issue might be with your city’s water supply, especially during peak usage times or if there’s ongoing work in your area.
DIY Steps for a Shower Head Low Water Pressure Fix
Many low shower pressure problems can be resolved with a few common household tools and a bit of patience. Let’s tackle the most likely culprits first.
Step 1: Clean Your Shower Head – The #1 Fix for Weak Pressure
A clogged shower head due to mineral buildup is the most frequent reason for low pressure. Here’s how to clean it:
Tools You’ll Need:
- White vinegar
- Plastic bag (gallon-sized ziplock works well) or a small bucket
- Old toothbrush or small scrub brush
- Pliers or an adjustable wrench (if removing the shower head)
- Plumber’s tape (optional, for reinstallation)
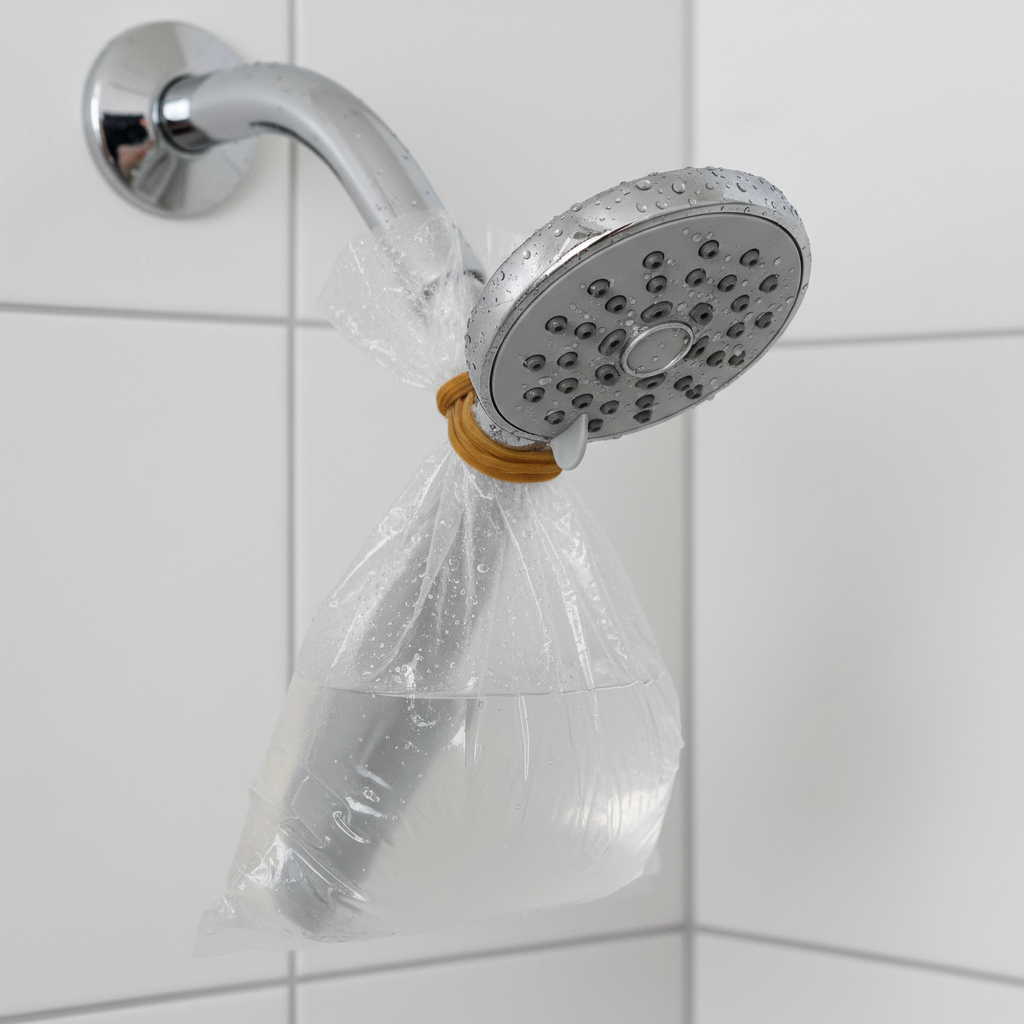
Method 1: Soaking Without Removal
- Fill a Bag with Vinegar: Pour enough white vinegar into a plastic bag to completely submerge the shower head’s face.
- Attach the Bag: Secure the bag around the shower head using a rubber band or zip tie, ensuring the head is fully immersed in the vinegar.
- Soak: Let it soak for several hours, preferably overnight, to dissolve mineral deposits. For stubborn clogs, a 50/50 mix of vinegar and water or even undiluted vinegar can be used.
- Rinse and Scrub: Remove the bag and turn on the hot water to flush out any loosened debris. Use an old toothbrush or scrub brush to gently clean the nozzles and faceplate, dislodging any remaining buildup.
- Test: Turn on the shower to check the pressure.
Method 2: Removing and Soaking
- Remove the Shower Head: Carefully unscrew the shower head from the shower arm. You might need pliers or an adjustable wrench, but be gentle to avoid stripping the threads or damaging the arm. Place a cloth over the shower arm if using tools to protect the finish.
- Disassemble (If Possible): Some shower heads can be partially disassembled. Consult your manufacturer’s instructions if unsure. This allows better access to internal screens or filters.
- Soak in a Bucket: Place the removed shower head (and any disassembled parts) in a bucket filled with white vinegar.
- Soak and Scrub: Let it soak for several hours or overnight. Afterward, use a small brush to clean the nozzles and any internal screens or filters. Rinse thoroughly under running water.
- Reinstall: Screw the shower head back onto the arm. If you removed plumber’s tape, reapply a new layer (clockwise) to the threads of the shower arm before screwing on the head to ensure a watertight seal.
- Test: Turn on the shower and check the water pressure.
For more detailed instructions on cleaning, you can refer to resources like Good Housekeeping’s guide on how to clean a shower head.
Step 2: Check and Remove the Flow Restrictor
Flow restrictors are small, often colorful, plastic discs located inside the base of your shower head where it connects to the shower arm. While designed to save water, they can sometimes be the primary cause of low pressure, especially in older homes or if they become clogged.
How to Check and Remove:
- Remove the Shower Head: If you haven’t already, carefully unscrew the shower head from the shower arm.
- Locate the Restrictor: Look inside the threaded end of the shower head. You’ll likely see a small O-ring gasket, a mesh screen filter, and then a plastic disc (the flow restrictor). It might be colored (green, red, white) and often has a small hole in the center.
- Remove the Restrictor: Using a pair of needle-nose pliers, tweezers, or a small flathead screwdriver, carefully pry or pull out the flow restrictor. Be gentle not to damage the threads or internal components. You might also remove the mesh screen and clean it while you’re there.
- Reassemble and Test: Reinstall the shower head (with new plumber’s tape if needed) and test the water pressure.
Important Note: Removing a flow restrictor will increase water usage. Be mindful of water conservation and local regulations, as some areas have strict water-saving mandates. This is a personal choice, balancing water conservation with desired shower experience.
Step 3: Inspect Your Shower Valves and Cartridge
If cleaning the shower head and checking the flow restrictor didn’t work, the issue might be with the internal workings of your shower’s mixing valve.
Checking Shut-Off Valves:
- Shower/Bathroom Shut-Offs: Some homes have individual shut-off valves for each bathroom or even each fixture. Ensure these are fully open. They are often found under sinks or behind access panels.
- Main Water Shut-Off: Locate your home’s main water shut-off valve (usually in the basement, garage, or near the water meter). Ensure it’s fully open. A partially closed main valve will affect all water fixtures.
Inspecting the Shower Cartridge:
The cartridge inside your shower’s mixing valve controls the flow and temperature. It can become clogged with mineral deposits or simply wear out.
- Turn Off Water: Before attempting to remove the cartridge, turn off the main water supply to your house.
- Remove Handle and Trim: Carefully remove the shower handle and any decorative trim plate. This usually involves unscrewing a small screw (often hidden under a cap) and then prying off the trim.
- Access the Cartridge: Once the trim is off, you’ll see the valve body and the cartridge. There might be a retaining clip or nut holding the cartridge in place. Remove it carefully.
- Remove and Inspect: Gently pull out the cartridge. Inspect it for signs of damage, wear, or significant mineral buildup. If it’s clogged, try cleaning it by soaking in vinegar and scrubbing. If it’s old or damaged, it might need replacement.
- Replace or Reinstall: If replacing, ensure you get the exact make and model of cartridge. Reinstall the cartridge, clip, trim, and handle in reverse order.
- Restore Water and Test: Turn the main water supply back on and test the shower pressure.
Note: Shower valve repair can be more complex. If you’re unsure, it’s often best to consult a licensed plumber to avoid potential leaks or further damage.
Step 4: Consider Your Water Heater and Supply Lines
If your low pressure is primarily affecting hot water, or if it’s a whole-house issue, your water heater could be a factor.
Sediment Buildup in Water Heater:
Over time, sediment (minerals, rust) can accumulate at the bottom of your water heater tank. This can impede the flow of hot water and reduce its efficiency. Flushing your water heater annually can help prevent this.
- Turn Off Power/Gas: Turn off the electricity or gas supply to your water heater.
- Turn Off Cold Water Supply: Close the cold water inlet valve at the top of the water heater.
- Attach a Hose: Connect a garden hose to the drain valve at the bottom of the water heater. Extend the hose to a floor drain or outside.
- Open Hot Water Faucet: Open a hot water faucet somewhere in your house to break the vacuum in the tank and allow it to drain.
- Drain the Tank: Open the drain valve on the water heater and allow the tank to completely empty. You’ll likely see sediment-laden water.
- Flush: Once empty, briefly open the cold water supply valve with the drain valve still open to stir up and flush out more sediment. Close the cold water supply again.
- Refill and Restart: Close the drain valve, disconnect the hose, and open the cold water supply valve. Let the tank refill completely, then turn on the power/gas to the water heater.
Safety Warning: Working with water heaters involves electricity or gas. If you’re uncomfortable, hire a professional to perform this maintenance.
Step 5: Address Whole-House Pressure Issues
If low pressure affects all your faucets, not just the shower, the problem extends beyond a simple shower head low water pressure fix. Here are some potential causes:
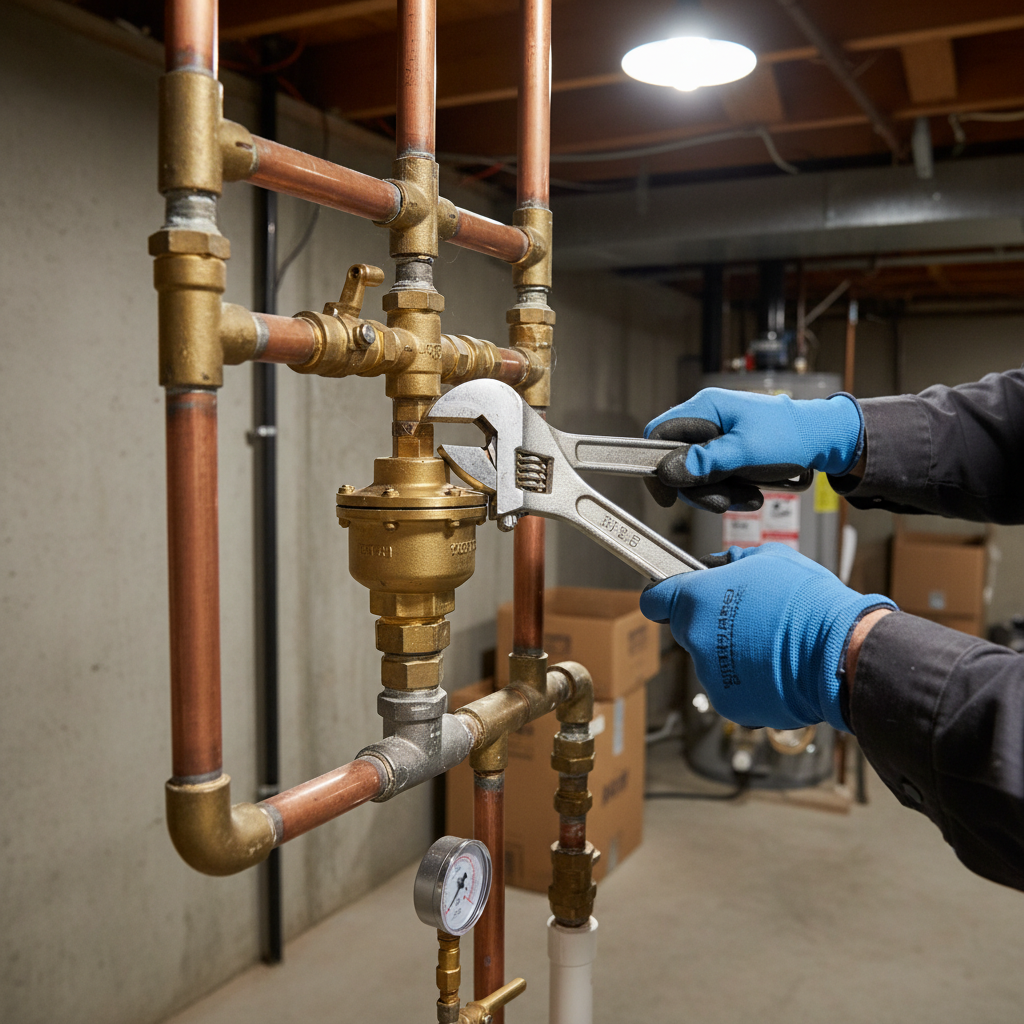
Water Pressure Regulator (PRV):
Many homes have a pressure reducing valve (PRV) installed on the main water line where it enters the house. This device lowers incoming high municipal pressure to a safe level for your home’s plumbing. A faulty PRV can get stuck, causing excessively low pressure. You can buy a water pressure gauge (screws onto an outdoor spigot or laundry hookup) to test your home’s pressure. If it’s consistently below 40 psi, your PRV might need adjustment or replacement. This is usually a job for a plumber.
Leaks in Your Plumbing System:
A hidden leak can divert water away, significantly reducing pressure throughout your home. Look for signs of water damage, listen for hissing sounds behind walls, or check your water meter for unusual activity when no water is being used. If you suspect a leak, call a plumber immediately.
Corroded or Old Pipes:
In older homes, galvanized steel pipes can corrode and accumulate rust and mineral deposits on their interior surfaces. This narrows the internal diameter of the pipes, restricting water flow, often leading to a gradual but persistent drop in pressure over many years. This is a major plumbing issue requiring professional assessment and potentially whole-house repiping.
Preventative Measures to Maintain Good Shower Pressure
Once you’ve achieved your desired water pressure, a little maintenance can go a long way in keeping it consistent.
- Regular Shower Head Cleaning: Make it a habit to clean your shower head every 3-6 months, especially if you live in an area with hard water.
- Consider a Water Softener: If mineral buildup is a persistent problem, a whole-house water softener can significantly reduce limescale accumulation in your pipes and fixtures, extending their lifespan and maintaining pressure.
- Annual Plumbing Check: For older homes, consider having a licensed plumber inspect your system annually. They can identify potential issues like corroding pipes, failing PRVs, or sediment buildup before they become major problems.
- Use High-Quality Fixtures: When replacing shower heads or other plumbing components, invest in reputable brands known for durability and good flow design.
When to Call a Professional Plumber
While many shower head low water pressure fix efforts are DIY-friendly, there are situations where professional help is necessary:
- Persistent Low Pressure: If you’ve tried all the common fixes and your pressure remains low, it indicates a more complex underlying issue.
- Whole-House Issues: If low pressure affects multiple fixtures throughout your home, it’s likely a problem with your main water supply, PRV, or main plumbing lines.
- Suspected Leaks: Any signs of a hidden leak should prompt an immediate call to a plumber to prevent water damage and high utility bills.
- Old or Corroded Pipes: If your home has old plumbing (e.g., galvanized pipes), a professional can assess their condition and recommend appropriate solutions, such as repiping.
- Unfamiliar with Plumbing: If you’re uncomfortable performing any of the DIY steps, especially those involving dismantling valves or working with your water heater, it’s always safer to hire a licensed professional.
Frequently Asked Questions About Shower Pressure
Q1: Can a new shower head fix low water pressure?
A: Yes, in some cases. If your current shower head is old, clogged beyond repair, or has an inefficient design, a new, high-efficiency shower head with larger nozzles or a pressurized design can improve the *feel* of the pressure, even if the underlying water supply pressure remains the same. However, if the low pressure is due to a whole-house issue or a clogged valve further up the line, a new shower head alone won’t solve the root problem.
Q2: How often should I clean my shower head?
A: It depends on your water quality. If you have hard water, cleaning every 3-6 months is a good practice. If your water is softer, you might get away with once a year. If you notice a reduction in spray consistency or pressure, it’s time for a cleaning.
Q3: What is considered good water pressure for a shower?
A: A healthy water pressure range for most residential homes is between 40 and 60 psi (pounds per square inch). Anything consistently below 40 psi is generally considered low, and above 80 psi can be too high and potentially damaging to plumbing.
Q4: Does a water softener help with shower pressure?
A: Indirectly, yes. A water softener removes minerals like calcium and magnesium from your water, which are the primary culprits behind limescale buildup. By preventing this buildup in your shower head nozzles, pipes, and valves, a water softener helps maintain consistent water flow and pressure over time, rather than actively increasing it.
Q5: Is low shower pressure bad for my plumbing?
A: Not directly. Low pressure itself isn’t inherently damaging to your plumbing. However, the *causes* of low pressure (like severe mineral buildup, leaks, or heavily corroded pipes) can certainly be detrimental to your plumbing system over time. Addressing the root cause is crucial for the longevity of your pipes and fixtures.
Conclusion
A weak shower stream doesn’t have to be a permanent fixture in your home. By systematically investigating the potential causes and applying the appropriate shower head low water pressure fix, you can often restore your shower to its former glory. From a simple vinegar soak to a more involved valve inspection, empowering yourself with this knowledge means you’re well-equipped to tackle most common pressure issues. Remember, for complex problems or when in doubt, a qualified plumber is always your best resource to ensure your home’s plumbing remains healthy and your showers stay invigorating.


