Are you constantly bundling up indoors, even with the thermostat cranked? Chances are, cold drafts coming from windows are the culprits stealing your home’s warmth and inflating your energy bills. A drafty window isn’t just an annoyance; it’s a direct pathway for heated air to escape and chilly outdoor air to sneak in, making your living spaces uncomfortable and inefficient. The good news is that many solutions for how to fix cold drafts from windows are simple, affordable, and can be tackled by homeowners of all skill levels. This comprehensive guide will walk you through identifying the sources of drafts and implementing effective DIY fixes to transform your home into a cozy, energy-efficient haven.
Understanding Why Windows Draft
Before you can effectively tackle drafts, it’s essential to understand why they occur in the first place. Windows are complex structures, and several factors can contribute to air leakage over time. Knowing the root cause will help you choose the most appropriate and lasting solution.

Age and Wear
Just like any other part of your home, windows can degrade with age. Over decades, constant exposure to the elements—sun, rain, snow, and extreme temperatures—takes its toll. Materials can become brittle, warp, or shrink, leading to tiny gaps that widen into significant pathways for cold air.
Poor Installation
Sometimes, drafts aren’t due to wear and tear but rather issues that began the day your windows were installed. If the original installation wasn’t meticulous, there might be insufficient insulation or sealing around the window frame where it meets the house’s rough opening. This can create hidden air leaks that are difficult to detect without a thorough inspection.
Material Degradation
The components of a window designed to prevent drafts – such as caulk, weatherstripping, and glazing putty – have a finite lifespan. Caulk can crack and pull away, weatherstripping can compress, tear, or lose its flexibility, and old glazing putty can dry out and crumble, creating openings around the glass panes themselves.
Seasonal Changes (Expansion/Contraction)
Materials naturally expand when heated and contract when cooled. This constant movement, especially between different materials like wood, vinyl, glass, and metal, can eventually create small separations where cold air can infiltrate. Windows that are perfectly sealed in summer might develop small gaps in the dead of winter.
Identifying the Source: Your Draft Detective Toolkit
You can’t fix what you can’t find. Pinpointing exactly where cold air is entering is the crucial first step. Luckily, you don’t need fancy equipment to be an effective draft detective.
The Hand Test
This is the simplest and most accessible method. On a cold, windy day, slowly move your open hand around the perimeter of your window frames, along the sashes where they meet, and even around the electrical outlets on exterior walls near windows. If you feel a distinct stream of cold air, you’ve found a likely culprit.
The Incense or Candle Test
For a more visual confirmation, light an incense stick or a thin candle (be cautious with open flames). Hold it a few inches away from the window frame, sashes, and where the glass meets the frame. If the smoke from the incense wavers or the candle flame flickers or bends, it indicates an air current. This method is particularly effective for small, subtle leaks.
The Thermal Camera (Advanced)
While an investment, a thermal imaging camera (some smartphone attachments are available) can provide a precise visual map of heat loss. Cold spots will appear as different colors on the screen, indicating exactly where heat is escaping and cold air is entering. This is excellent for identifying hidden leaks behind walls or in less obvious places.
Visual Inspection
A simple visual check can often reveal obvious problems. Look for:
- Cracked or missing caulk around the window frame.
- Worn, torn, or compressed weatherstripping.
- Gaps where the window sashes meet the frame when closed.
- Loose or rattling glass panes.
- Light showing through gaps when the window is closed.
DIY Solutions to Fix Cold Drafts from Windows
Once you’ve identified the problem areas, it’s time to put your DIY skills to the test. Most window draft fixes are straightforward and require only basic tools and materials.
Weatherstripping: The First Line of Defense
Weatherstripping is a flexible material installed along the moving parts of a window, such as where the sashes meet the frame, to create a seal when the window is closed. It’s incredibly effective for stopping drafts through these operable gaps.
Types of Weatherstripping:
- Foam Tape: Inexpensive and easy to install, ideal for irregular gaps. It’s self-adhesive but can compress over time.
- V-Strip (Tension Seal): Made of plastic or metal, it creates a spring-like seal when compressed. Durable and effective for sash windows.
- Tubular Gasket (Rubber or Silicone): Creates a strong, flexible seal. More durable than foam and suitable for larger, more consistent gaps.
- Felt: Less durable and not as effective as other types, but good for very old windows where aesthetics are a concern.
How to Install Weatherstripping:
- Clean the Surface: Thoroughly clean the area where the weatherstripping will be applied. Remove any old weatherstripping, dirt, or debris.
- Measure and Cut: Measure the length of the sash or frame where the strip will go. Cut the weatherstripping to size.
- Apply: For adhesive types, peel back the backing and firmly press the strip into place. For other types, follow the manufacturer’s instructions, often involving small nails or staples. Ensure a continuous, tight seal without hindering the window’s operation.
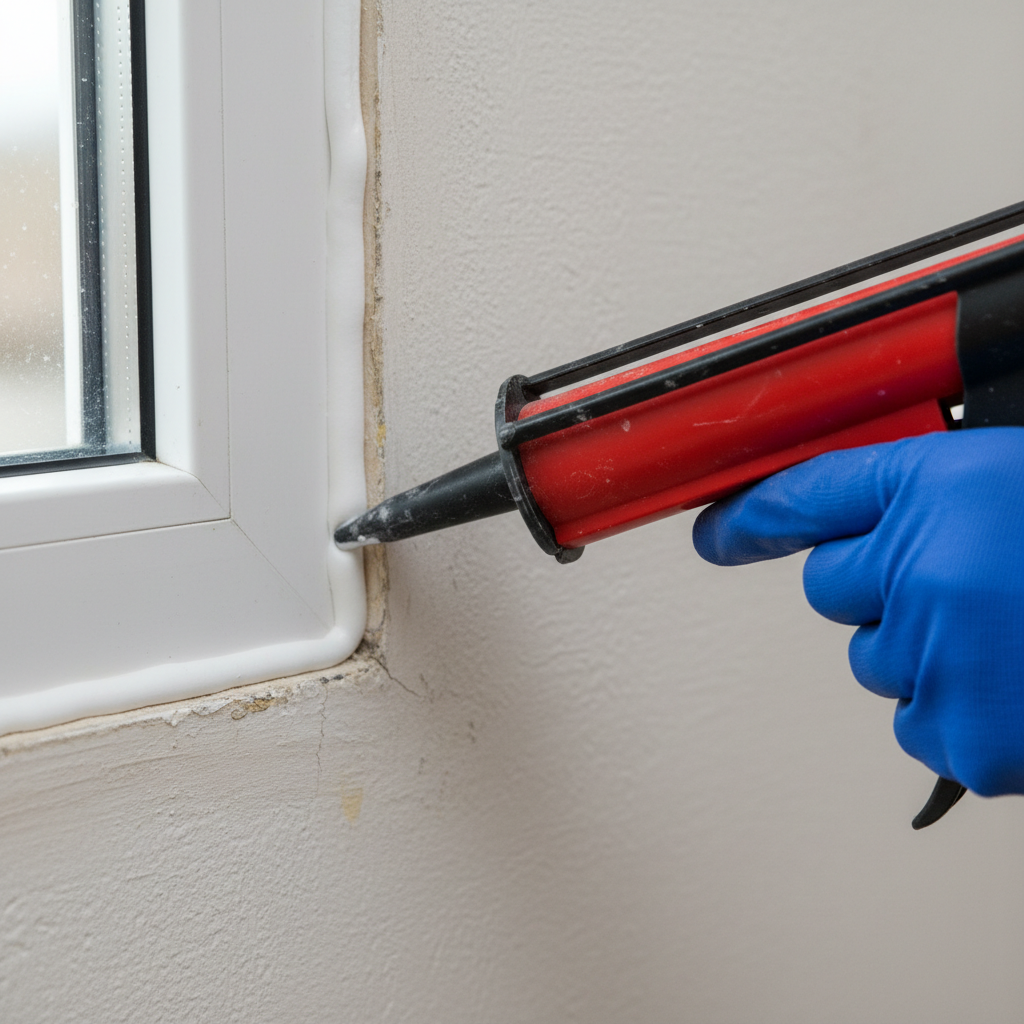
Caulking: Sealing the Gaps
Caulk is a sealant used to fill stationary gaps and cracks around the non-moving parts of a window, such as where the window frame meets the wall, or where fixed panes of glass meet the frame. It’s a crucial step to eliminate persistent air leaks.
Where to Use Caulk:
- Around the exterior perimeter of the window frame where it meets the siding or brick.
- Around the interior perimeter of the window frame where it meets the drywall or trim.
- For fixed glass panes, where the glass meets the frame (if glazing putty is missing or cracked).
How to Apply Caulk:
- Clean and Prepare: Remove all old, cracked, or loose caulk using a utility knife or caulk removal tool. Clean the surface thoroughly to ensure good adhesion.
- Choose the Right Caulk: Select a high-quality, paintable, flexible caulk. Acrylic latex caulk with silicone is often a good choice for interior and exterior use. For larger gaps, a backer rod might be needed before caulking.
- Cut the Nozzle: Cut the tip of the caulk tube nozzle at a 45-degree angle, making an opening just slightly smaller than the gap you intend to fill.
- Apply Evenly: Hold the caulk gun at a 45-degree angle to the joint. Apply a continuous, even bead of caulk with steady pressure.
- Smooth the Bead: Immediately after applying, smooth the caulk with a wet finger, a damp cloth, or a caulking tool for a clean, professional finish.
Window Film Insulation Kits: A Temporary Barrier
Window insulation film kits are a fantastic, cost-effective, and temporary solution for drafty windows, especially during the coldest months. They create an insulating air pocket between the window pane and the film.
How They Work:
A clear plastic film is taped to the inside window frame, then shrunk taut with a hairdryer, creating an airtight seal and an insulating layer of still air. They are often removed in warmer months.
Installation Steps:
- Clean Windows and Frame: Ensure the window glass and frame are spotless and dry for proper tape adhesion.
- Apply Double-Sided Tape: Apply the double-sided tape included in the kit around the entire interior perimeter of the window frame, pressing firmly.
- Apply the Film: Carefully unroll and apply the plastic film to the tape, starting from the top and working your way down. Ensure the film is taut but not stretched, covering the entire window opening.
- Shrink with Hairdryer: Use a hairdryer on a warm setting to gently heat the film. You’ll see it magically tighten and become clear, creating an airtight seal.
Draft Snakes: Simple & Effective
Draft snakes are fabric tubes filled with insulating material (rice, sand, beans, or even old towels) placed at the bottom of a window or door. They are a quick, no-installation required fix for drafts coming from the base of the sash.
Using Draft Snakes:
Simply place them on the windowsill where the bottom sash meets the frame. You can buy them or easily make your own with scrap fabric and filling. While they don’t seal the entire window, they are excellent for immediate relief from low-level drafts.
Heavy Curtains or Thermal Blinds: Layered Protection
Adding appropriate window treatments can significantly reduce heat loss and block drafts, acting as an extra layer of insulation. Thermal curtains are specifically designed for this purpose.
How They Help:
- Heavy Curtains: Thick, lined curtains create a barrier, trapping a layer of air between the curtain and the window, which helps insulate.
- Thermal Blinds/Shades: These often feature honeycomb cells or multiple layers of fabric designed to trap air, providing superior insulation compared to standard blinds.
Ensure curtains are long enough to reach the windowsill or even the floor, and wide enough to cover the entire window opening to maximize their effectiveness. Close them during the coldest parts of the day and night.
Window Inserts: A Step Up
Window inserts are a more robust solution than film kits, offering better long-term performance without replacing the entire window. They are typically clear acrylic or glass panels custom-fit to the inside of your existing window frame.
Benefits:
- Enhanced Insulation: Creates a dead air space that significantly improves the thermal performance of single-pane or older double-pane windows.
- Sound Reduction: Can also help reduce outside noise.
- Easy Installation/Removal: Many are designed for DIY installation and can be easily removed for cleaning or during warmer months.
Repairing or Replacing Glazing
If your drafts are coming directly through loose or cracked glass panes, or if the putty holding the glass in place is crumbling, you may need to re-glaze or replace the pane itself.
Addressing Glazing Issues:
- Re-glazing: For old single-pane windows, carefully remove old, loose glazing putty, clean the area, and apply new glazing compound to seal the glass firmly into the frame.
- Replacing Cracked Panes: This is a more involved DIY project but can be done. It typically requires removing the old pane, cleaning the frame, installing a new pane with glazing points, and then applying new glazing compound. If uncomfortable, this is a good task for a local glazier.
Advanced Considerations and When to Call a Professional
While many draft issues are DIY-friendly, some situations warrant professional expertise. Knowing when to call in the pros can save you time, effort, and potentially prevent more significant problems.
Assessing Window Condition
If your windows are severely deteriorated—rotted wood, bent frames, or extensive moisture damage—DIY fixes will likely only be temporary bandages. A professional can assess whether repairs are cost-effective or if replacement is the better long-term investment. For insights on maintaining your windows for longevity, you might find valuable information on sites like Better Homes & Gardens regarding window care and sealing techniques.
Major Structural Issues
Sometimes, drafts aren’t solely due to the window itself but rather problems with the wall structure surrounding it. Gaps between the window rough opening and the wall studs, or compromised exterior siding/sheathing, can allow air infiltration. These issues often require more extensive repairs than a typical DIY project.
Professional Energy Audit
If you’ve addressed all obvious window drafts and still feel cold spots or have high energy bills, a professional home energy audit can be incredibly beneficial. Auditors use specialized equipment (like blower doors and thermal cameras) to pinpoint all air leakage points in your home, not just windows, and recommend comprehensive solutions.
Full Window Replacement
Ultimately, if your windows are very old, single-pane, severely damaged, or beyond repair, replacement with modern, energy-efficient windows may be the most effective and economically sensible solution. Modern windows come with features like double or triple-pane glass, low-emissivity (Low-E) coatings, and argon or krypton gas fills, all designed to dramatically reduce heat transfer and stop drafts.
Maintaining Your Windows for Long-Term Draft Prevention
Fixing drafts isn’t a one-time task. Regular maintenance can prevent new drafts from forming and ensure your efforts last.
Regular Inspection
Make it a habit to inspect your windows annually, ideally before the start of the heating season. Look for cracked caulk, worn weatherstripping, and any signs of deterioration. Early detection allows for quick, simple fixes before problems escalate.
Cleaning and Lubrication
Keep window tracks clean and free of debris. Lubricate moving parts (like sash balances or cranks) as needed to ensure smooth operation and a tight seal when closed. Dirt and grime can prevent windows from closing completely, creating small gaps.
Seasonal Adjustments
Some windows have cam locks or latches that can be adjusted to pull the sash tighter against the frame, improving the seal. Check your window manufacturer’s instructions for specific adjustment procedures.
Beyond Windows: A Holistic Approach to Home Energy Efficiency
While fixing cold drafts from windows is a significant step, remember that your home’s energy efficiency is a system. Don’t forget to check other common culprits for air leaks. Drafts can also come from poorly sealed doors, electrical outlets, recessed lighting, and even the attic hatch. Addressing these areas, perhaps by installing foam gaskets behind outlet covers or ensuring your attic is properly insulated, can further enhance your home’s comfort and energy savings. For more comprehensive home winterization strategies, explore resources on improving overall home insulation and air sealing.
Frequently Asked Questions About Window Drafts
How much energy can I save by fixing drafts?
According to the U.S. Department of Energy, sealing air leaks and adding insulation can save homeowners an average of 15% on heating and cooling costs, or even more in older, draftier homes. Windows are a significant source of air leakage, so fixing their drafts can lead to noticeable savings.
Are draft stoppers really effective?
Yes, draft stoppers (or draft snakes) are surprisingly effective for blocking drafts at the bottom of windows and doors. While they don’t create a perfect airtight seal for the entire window, they do an excellent job of preventing a steady stream of cold air from entering at floor level, significantly improving localized comfort. They are a great temporary or supplemental solution.
How often should I re-caulk my windows?
The lifespan of caulk varies depending on the type of caulk, climate, and exposure to sunlight. High-quality acrylic latex or silicone caulk can last 5-10 years or even longer. It’s best to inspect your caulk annually and re-apply whenever you notice cracks, shrinkage, or signs of detachment from the window frame or wall. Addressing these issues promptly prevents drafts from returning.
Dealing with cold drafts from windows doesn’t have to be a costly or overwhelming endeavor. By systematically identifying the sources of leaks and applying the right DIY solutions, you can dramatically improve your home’s comfort, reduce your energy consumption, and enjoy a warmer, cozier living space all year round. Start today, and feel the difference!


