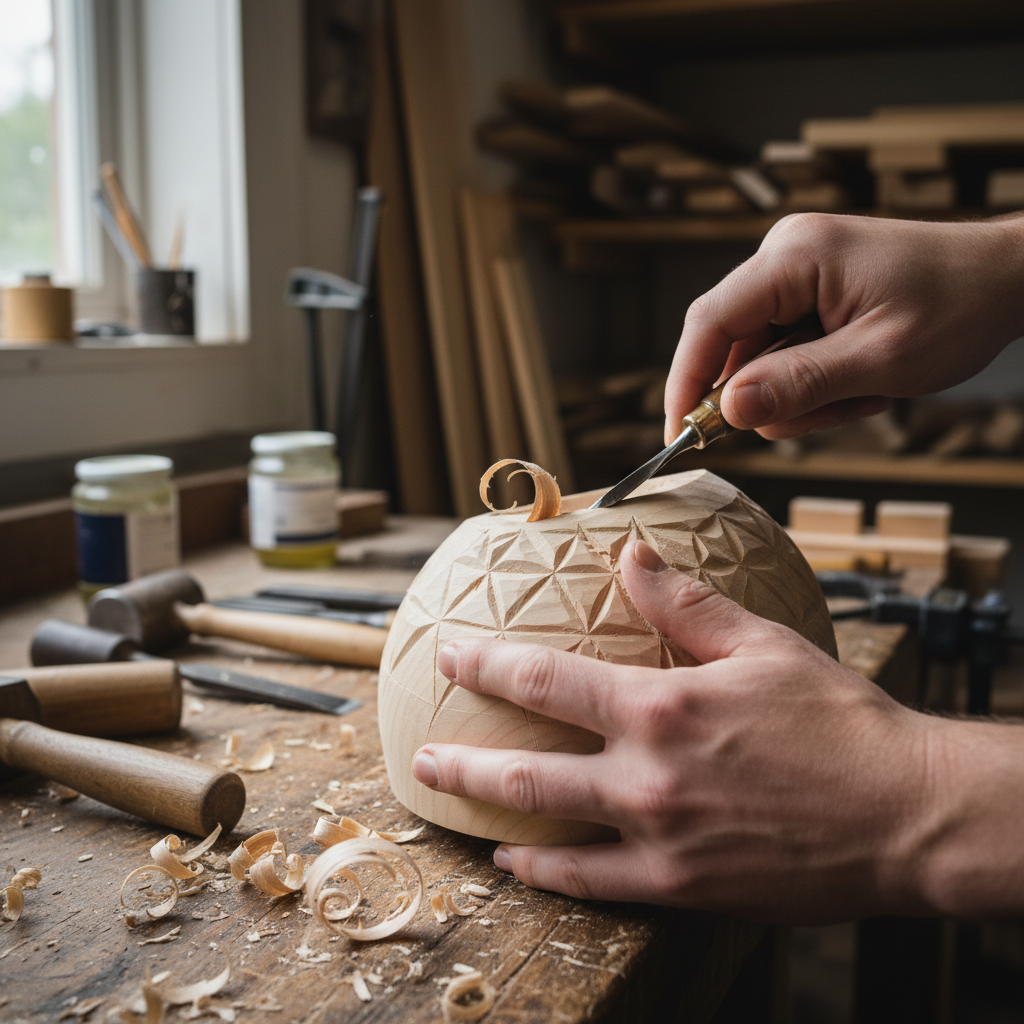
Hey fellow woodcarvers! If you’ve ever looked at a beautiful chip-carved bowl and thought, “How on earth do they manage those perfect, clean chips on a curved surface?”, you’re not alone. Chip carving on a flat board is one thing, but tackling the nuanced contours of a bowl introduces a whole new set of delightful challenges. And at the heart of mastering those curves? It’s all about picking the right gouge. Trust me, as someone who’s spent countless hours (and a few frustrated moments!) experimenting with different tools on various wooden bowls, I’ve learned a thing or two about what works and what doesn’t. And today, I’m going to share that hard-won wisdom with you.
Forget the myth that chip carving is *only* done with a straight chip carving knife. While that knife is your best friend on flat surfaces, bowls demand a different approach, and that’s where the humble, yet mighty, carving gouge steps in. Getting your gouge selection right isn’t just about making your life easier; it’s about unlocking new possibilities for intricate designs and achieving that professional, flowing look on your curved projects. So, let’s dive in and demystify the world of gouges for chip carving bowls!
Why Gouges for Chip Carving Bowls Are Different (and Essential!)
Imagine trying to peel an apple with a butter knife. Possible, maybe, but certainly not efficient or clean. That’s a bit like trying to chip carve a bowl exclusively with a straight knife. The fundamental difference lies in the surface geometry. A straight chip carving knife excels at making crisp, angled cuts on a flat plane. But when you introduce a curve – whether it’s the gentle slope of a shallow bowl’s interior or the pronounced swell of its exterior – a straight blade struggles. It tends to dig in unevenly, skip, or create inconsistent chip depths because its flat edge can’t conform to the wood’s changing angle.
This is precisely why gouges become your indispensable allies. Gouges, by their very nature, have a curved profile (called a “sweep”). This curve allows the cutting edge to hug the contour of the bowl, making clean, controlled cuts possible. You can maintain a consistent depth and angle across the curved surface, which is absolutely vital for achieving uniform, beautiful chips. They reduce the risk of unwanted slips and provide much greater control, making the whole process safer and far more enjoyable. From defining the initial pattern lines to carefully excavating each chip, a well-chosen gouge will transform your bowl carving experience.
Understanding Gouge Terminology: Sweep, Width, and Grind
Before we jump into specific recommendations, let’s quickly get on the same page about what those numbers and terms on gouges actually mean. Knowing this vocabulary will empower you to choose the right tools, not just for bowls, but for any carving project you tackle.
-
Sweep (Curvature): This is arguably the most crucial factor for bowl carving. The sweep refers to the curvature of the gouge’s cutting edge. It’s usually indicated by a number (e.g., #3, #5, #7, #9, #11). The lower the number, the flatter the sweep; the higher the number, the more deeply curved or U-shaped the gouge. Think of a #2 as almost flat, while an #11 is nearly a semi-circle. For bowls, you’ll primarily be looking at mid-range sweeps that can comfortably follow the bowl’s form.
-
Width: This refers to the width of the cutting edge, measured across the blade from one side to the other. You’ll see measurements in imperial (e.g., 1/8″, 1/4″, 3/8″) or metric (e.g., 3mm, 6mm, 9mm). The width dictates the size of the chip you can take with a single cut and how intricate your details can be. For chip carving, especially on bowls, you’ll generally gravitate towards narrower widths for precision.
-
Grind/Bevel: This describes how the cutting edge is sharpened. Most gouges come with an outer bevel (the sharpened angle is on the outside curve of the gouge). Sometimes you’ll see an ier bevel or a “fishtail” grind, but for general chip carving on bowls, a standard outer bevel is what you’ll typically use and maintain. What’s most important here is that the edge is hair-popping sharp!
The Sweet Spot: Recommended Gouge Sizes for Chip Carving Bowls
Alright, let’s get to the brass tacks – what sizes should you be looking for? Based on my experience, you don’t need a huge arsenal of gouges to start. A few carefully selected pieces will cover most of your chip carving bowl needs.
For Small to Medium Bowls (4-8 inches diameter):
-
Sweep: #5 to #7. These are your absolute workhorses. A #5 sweep offers a gentle curve that works wonderfully for the broader interior and exterior surfaces of smaller to medium bowls. A #7 has a slightly more pronounced curve, making it excellent for tighter radii or establishing deeper primary cuts. These sweeps allow you to make consistent, flowing cuts without feeling too flat or too aggressive.
-
Width: 1/8″ to 1/4″ (3mm to 6mm). These widths provide the precisioecessary for chip carving. A 1/8″ (3mm) gouge is fantastic for fine details, small chips, and navigating tighter pattern elements. A 1/4″ (6mm) gouge is versatile for establishing larger chip boundaries or working on slightly larger pattern repeats. Starting with one of each in the #5 or #7 sweep range will give you a solid foundation.
-
Why these? The combination of these sweeps and widths gives you the control to execute traditional chip carving patterns – pyramids, triangles, pinwheels – on curved surfaces. They allow you to define the outline of a chip, then gently excavate the waste, maintaining that characteristic clean edge all around.
For Larger Bowls (8+ inches diameter):
-
For larger bowls, the principles remain largely the same, but you might find yourself reaching for slightly wider tools, or even a flatter sweep if your design calls for broader, less intricate chips. However, for true chip carving, precision is key, so don’t abandon your smaller gouges entirely!
-
Sweep: Still #5 to #7, but sometimes a #3. While your #5 and #7 will still be invaluable for detail work, if you’re working on expansive, gently curving surfaces or creating larger, bolder chips, a flatter #3 sweep can sometimes be useful to cover more ground efficiently. Just be mindful that a flatter sweep on a very curved surface requires more careful handling to avoid digging in at the edges.
-
Width: 1/4″ to 3/8″ (6mm to 9mm). On larger bowls, a 3/8″ (9mm) gouge can be handy for setting up primary cut lines or removing larger sections of waste wood if your design permits. However, for the actual “chipping,” you’ll still frequently revert to your narrower 1/8″ and 1/4″ tools for the intricate work that defines chip carving.
My “Secret Weapon” (An Experienced Carver’s Tip):
Once you’ve got your core set, consider adding a very small, high-sweep gouge. I’m talking a #9 or #11 sweep with a width of 1/16″ or 2mm. This tiny marvel is incredible for cleaning up the tightest corners, refining the absolute smallest details, or reaching into highly concave areas that your other gouges can’t quite manage. It’s a game-changer for adding that extra layer of finesse to your work.
The “V” Gouge (A Versatile Addition):
While not a primary tool for *removing* chips, a small V-gouge (e.g., 1/8″ or 3mm, 60-degree angle) can be incredibly useful for defining crisp lines, separating pattern elements, or adding unique texture. Sometimes, the initial outline of a chip pattern can be precisely scored with a V-gouge before using your curved gouges to remove the waste. It offers a distinct linear quality that can complement the curved chips beautifully.
Beyond Size: Other Factors to Consider When Buying Gouges
It’s not just about the numbers; the overall quality and feel of a gouge matter immensely, especially when you’re spending hours with it in your hand.
-
Quality of Steel: This is paramount. Good quality high carbon steel or high-speed steel (HSS) will hold a sharp edge much longer, meaning less time sharpening and more time carving. While they might cost more upfront, they save you frustration in the long run. Look for brands with good reputations in the carving community.
-
Handle Comfort: Carving is an intimate, hands-on craft. An ergonomic handle that fits comfortably in your hand can prevent fatigue and even carpal tuel issues during long sessions. I personally prefer handles that are a bit larger and rounded, allowing for various grips. Everyone’s hands are different, so if possible, try holding a few before you buy.
-
Sharpness out of the Box: While you should always expect to hone and strop any new tool before its first use, a gouge that comes with a decent initial grind indicates good manufacturing quality. It means less work for you to get it ready.
-
Budget: You absolutely do not need to break the bank to get started. My advice is to buy individual gouges in the specific sweeps and widths you need, rather than investing in a large, generic set where many tools might go unused. Build your collection slowly with quality pieces.
My Workflow: Using Gouges for Bowl Carving (A Practical Approach)
So, you’ve got your gouges – now what? Here’s a peek into how I approach carving a bowl with these tools:
-
Secure Your Bowl: First and foremost, safety! Make sure your bowl is firmly secured. A carving vise, a non-slip mat, or even a simple bench hook can prevent slips and keep your hands safe.
-
Layout Your Design: Lightly pencil your chosen chip carving pattern onto the bowl. Use a compass for circles and a ruler (or just freehand) for straight lines. Don’t press too hard, as pencil marks can be stubborn.
-
Define Major Lines (Sweeping Cuts): I usually start with one of my go-to gouges (like a #5 x 1/4″) to make the initial, defining cuts of the pattern. These are often the outer boundaries of the chips. Hold the gouge firmly, and use a consistent push or tap with a mallet (if needed for harder woods) to establish your lines. Always try to cut with the grain where possible, or take very shallow, controlled cuts against it.
-
Excavate the Chips (Controlled Pushes): Now, switch to your smaller, more precise gouges (like a #7 x 1/8″ or even the tiny #11). Position the gouge at the apex of the chip you want to remove, and push or pivot it to scoop out the wood. The goal is to make a clean, consistent cut that meets your initial defining lines. Remember, chip carving is about removing *waste* material to leave the raised pattern. Work slowly, and don’t try to take too much wood in one go, especially on curves.
-
Refinement and Detail: Once the main chips are removed, use your smallest gouges or even a very sharp detail knife to clean up any fuzzy edges, perfect the points of your chips, and add any micro-details your design requires. This is where your secret weapon gouge shines!
-
Always Sharp: I can’t stress this enough – a sharp tool is a safe tool, and it’s a joy to work with. Keep your strop and honing compound handy, and give your gouges a few passes frequently to maintain that keen edge.
Conclusion
Choosing the right gouge for chip carving bowls isn’t some esoteric art form; it’s a practical skill you’ll quickly master with a bit of understanding and practice. By focusing on the interplay of sweep and width, and investing in a few quality tools, you’ll unlock a world of possibilities for intricate and beautiful designs on curved surfaces. Don’t be afraid to experiment a little, to find what feels best in your hand and what produces the results you love. The joy of seeing those clean, perfect chips emerge from a piece of wood on a bowl is truly rewarding.
So, grab a wooden bowl, sketch out a design, and confidently reach for those curved blades. You’ve got this! Happy carving, and may your chips be crisp and your curves be flawless!


