Understanding Your Bathroom’s Electrical System
Before diving into troubleshooting, it’s helpful to understand the basic electrical setup common in bathrooms. Most modern bathrooms have specific wiring considerations due to the presence of water and high humidity, which pose unique electrical hazards. Understanding these fundamentals can make identifying the root cause of power loss much easier.
Dedicated Circuits vs. Shared Circuits
Bathroom fan and light units are typically powered by one of two types of circuits:

- Dedicated Circuit: In newer homes or renovated bathrooms, the fan and light may be on a circuit solely dedicated to the bathroom. This means fewer appliances are competing for power on that specific circuit, reducing the risk of overload.
- Shared Circuit: More commonly, especially in older homes, your bathroom fan and light might share a circuit with other bathroom outlets, lights in adjacent rooms, or even other small appliances. This arrangement makes the circuit more susceptible to overloading if too many high-draw devices are used simultaneously.
Knowing whether your bathroom is on a dedicated or shared circuit can help narrow down potential issues, particularly if you suspect an overload.
GFCI Protection
Ground Fault Circuit Interrupter (GFCI) outlets are a critical safety feature mandated by electrical codes in areas where water and electricity are in close proximity, such as bathrooms, kitchens, and outdoor spaces. A GFCI outlet is designed to quickly detect ground faults – instances where electricity takes an unintended path to the ground – and immediately cut off power, preventing electric shock.
- How it Relates to Your Fan and Light: Even if your fan and light unit isn’t directly plugged into a GFCI outlet, it might be on the “load” side of one. This means that if a GFCI outlet on the same circuit trips, it can cut power to everything downstream, including your fan and light. This is a common, often overlooked, cause for power loss in bathrooms.
Common Causes for Power Loss to Your Bathroom Fan and Light
When your bathroom fan and light stop working, it can be due to a range of issues, from simple fixes to more complex electrical problems. Here are the most common culprits:
Tripped Circuit Breaker
One of the most frequent causes of power loss to any part of your home, including your bathroom fan and light, is a tripped circuit breaker. A circuit breaker is a safety device designed to protect your home’s electrical system from overloads and short circuits. When it detects an issue, it “trips” and cuts off power to that specific circuit.
- What Causes It: An overload (too many high-power devices running on one circuit), a short circuit (faulty wiring or appliance), or a ground fault.
- How to Identify: Look for a breaker switch that is in the “OFF” position or, more commonly, somewhere in between “ON” and “OFF” (often called the “tripped” position).
Faulty GFCI Outlet
As discussed, GFCI protection is vital for bathroom safety. If a GFCI outlet on the same circuit as your fan and light detects a ground fault, it will trip, cutting off power to everything connected to it, including your fan and light.
- What Causes It: Water splash, an old or faulty GFCI outlet, or a device plugged into the GFCI outlet or downstream from it experiencing a fault.
- How to Identify: Look for the “RESET” button on any GFCI outlets in your bathroom or even in adjacent rooms (like a hallway or garage) that might be on the same circuit.
Loose Wiring Connections
Over time, or due to improper installation, electrical connections can become loose. A loose connection at the wall switch, inside the fan/light unit, or within a junction box can interrupt the flow of electricity, causing intermittent or complete power loss.
- Where to Check: The wall switch box, the wiring compartment of the fan/light unit itself, or any junction boxes on the circuit.
- Danger: Loose connections can not only cause power loss but also create resistance, leading to overheating and potential fire hazards.
Defective Wall Switch
The wall switch that controls your fan and light is a mechanical device, and like all mechanical devices, it can fail. A switch can wear out internally, develop faulty contacts, or experience a loose connection at its terminals.
- Symptoms: Sometimes, a faulty switch will only work intermittently, require jiggling, or feel loose. Other times, it will simply stop working altogether.
- Types: You might have a single switch for both, or separate switches for the fan and light, or a multi-function switch combining both.
Overloaded Circuit
If your bathroom fan and light share a circuit with other high-draw appliances (e.g., a hair dryer, curling iron, or space heater), running too many of them at once can draw more current than the circuit is designed to handle. This will cause the circuit breaker to trip as a safety measure.
- Prevention: Be mindful of what you’re plugging in and running simultaneously on shared circuits.
Issues with the Fan/Light Unit Itself
Sometimes, the problem isn’t with the external wiring or switch but within the fan and light unit itself.
- Motor Failure (Fan): The fan motor can burn out or seize up over time, especially if not regularly cleaned. If the motor fails, the fan won’t spin, and in some integrated units, this can affect the light as well if they share internal components.
- Light Socket Issues / Bulb Burnout: While a burnt-out bulb won’t affect the fan, a faulty light socket can. Corrosion, loose internal wiring, or physical damage to the socket can prevent power from reaching the bulb.
- Internal Wiring of the Unit: Within the fan/light unit, there are internal wires connecting the motor, light socket, and external power. These can come loose or become damaged.
Wiring Damage
Less common but more serious, wiring inside your walls can be damaged by rodents chewing through insulation, nails accidentally piercing wires during construction or renovation, or general wear and tear over decades.
- Signs: Frayed wires, burn marks, or intermittent power issues not easily explained by other causes.
Faulty Circuit Breaker (Rare)
While circuit breakers are designed to be durable, they can occasionally fail. A faulty breaker might not trip when it should, or it might trip too easily without an actual overload or fault. This is rare and usually requires professional diagnosis.
Step-by-Step Troubleshooting Guide
When your bathroom fan and light are losing power, follow these steps to systematically diagnose the problem. Remember, safety is paramount when dealing with electricity.
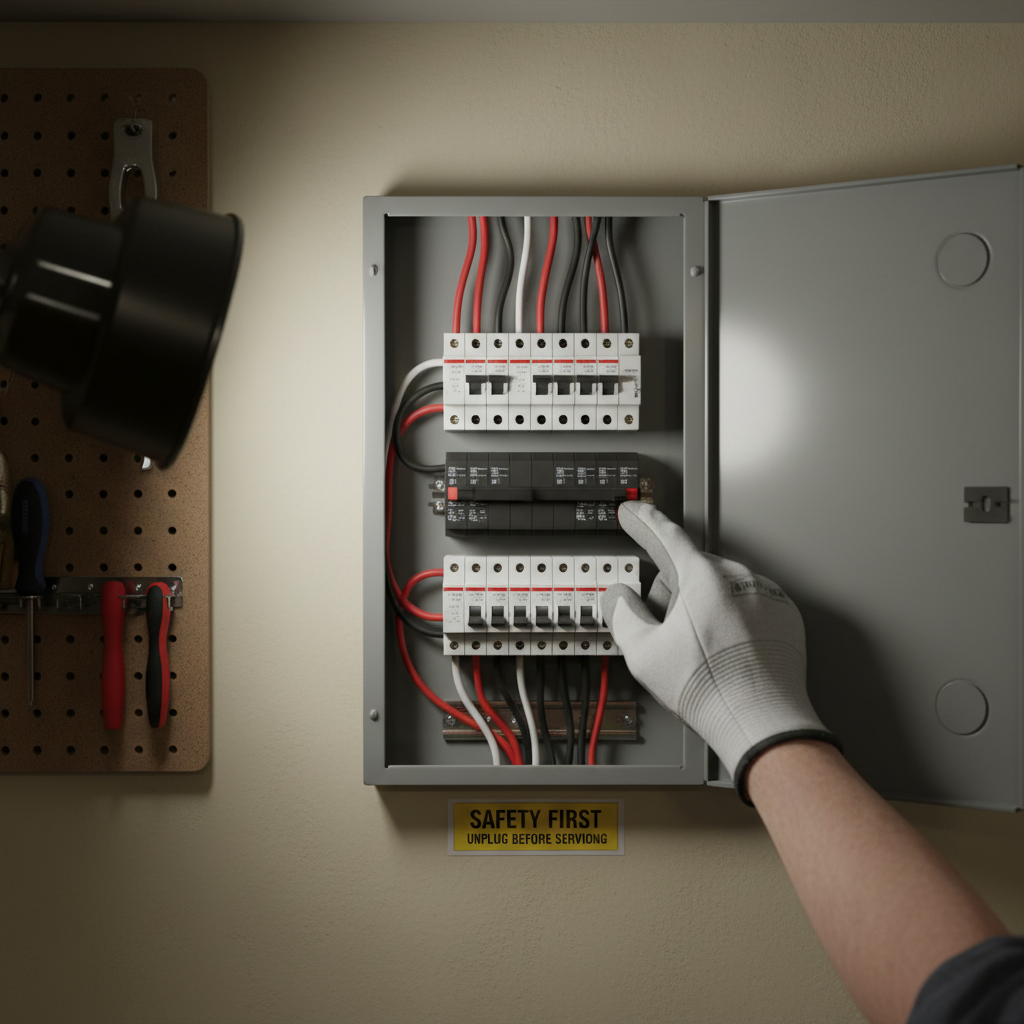
Safety First: Turn Off Power!
Before you touch any wiring, switches, or the fan unit itself, ALWAYS turn off the power to the affected circuit at your home’s main electrical panel. To be extra safe, use a non-contact voltage tester to confirm that the power is indeed off at the switch and the fan/light unit before proceeding. Safety is crucial when working with electricity. For more detailed electrical safety guidelines, you can refer to resources like Better Homes & Gardens’ Home Electrical Safety Do’s and Don’ts.
1. Check the Breaker Box
- Locate Your Panel: Find your home’s main electrical panel, usually in a basement, garage, utility closet, or outside wall.
- Identify the Breaker: Look for a breaker that is tripped (usually in the middle position, or fully “OFF”). If your panel is labeled, look for one that controls your bathroom.
- Reset the Breaker: Firmly push the tripped breaker completely to the “OFF” position, then push it back to the “ON” position.
- Test: Go back to your bathroom and try the fan and light.
- If it Trips Again: If the breaker immediately trips again, there’s a persistent overload or short circuit. Do NOT keep resetting it. This indicates a serious electrical issue requiring professional attention.
2. Inspect GFCI Outlets
- Locate GFCIs: Identify all GFCI outlets in your bathroom, and potentially any in adjacent bathrooms, hallways, or the garage that might be on the same circuit.
- Test and Reset: Press the “RESET” button firmly on each GFCI outlet. You should hear a click. If the “TEST” button is popped out, push “RESET” until it clicks in.
- Test: Return to your bathroom and try the fan and light.
- If it Trips Again: If the GFCI immediately trips again, there’s a ground fault somewhere on the circuit. Do not ignore this; it’s a safety mechanism working as intended to prevent shock.
3. Examine the Wall Switch
With the power OFF at the breaker:
- Remove Cover Plate: Unscrew and carefully remove the wall switch cover plate.
- Inspect Connections: Gently pull the switch out from the box (it will still be connected by wires). Look for any loose wires, discolored (burned) wires, or obvious signs of damage to the switch itself. Wires should be securely fastened to the terminals.
- Test the Switch (Optional, with proper tools): If you have a multimeter, you can test the switch for continuity. With power OFF, disconnect the wires from the switch. Set your multimeter to the continuity setting. When the switch is ON, you should have continuity; when OFF, you shouldn’t. If it fails this test, the switch is likely bad.
- Replace if Needed: If the switch appears damaged or fails the continuity test, replace it with a new one of the same type. Always ensure wires are securely connected.
4. Investigate the Fan/Light Unit
With the power OFF at the breaker:
- Access the Unit: Remove the cover grille of the fan/light unit. You may need a screwdriver or simply squeeze retaining clips.
- Inspect Light Bulb and Socket: First, replace the light bulb with a known good one. If the light still doesn’t work, inspect the socket for corrosion, burn marks, or loose wires.
- Check Internal Wiring: Look inside the wiring compartment of the unit. Ensure all wire nuts are secure and that there are no loose or scorched wires. Gently tug on each wire to confirm it’s seated properly.
- Motor Inspection (Fan): Gently try to spin the fan blades with your hand. If they’re stiff or won’t move, the motor might be seized, or debris might be jamming it. Clean any dust or debris from the motor and fan blades.
- Consider Unit Replacement: If you find significant damage, burn marks, or a seized motor, the entire fan/light unit may need replacement.
5. Look for Visible Wiring Damage
While often difficult without opening walls, look for any external signs of wiring damage, such as:
- Rodent Damage: In attics or crawl spaces, check for signs of rodents (droppings, gnaw marks) near electrical runs leading to the bathroom.
- Burn Marks: Any visible burn marks on outlets, switches, or the unit itself are a serious red flag.
When to Call a Professional Electrician
While some issues can be resolved with DIY troubleshooting, many electrical problems are complex and potentially dangerous. Knowing when to call a professional electrician is crucial for your safety and the integrity of your home’s electrical system.
Signs It’s Time to Call
- Repeated Breaker Trips: If the circuit breaker or GFCI outlet trips immediately or repeatedly after resetting, there’s a serious underlying issue that needs expert diagnosis. Do not repeatedly reset it.
- Burning Smells or Scorched Marks: Any sign of burning plastic, melting, or charred components around switches, outlets, or the fan unit indicates an immediate fire hazard. Turn off power to the entire circuit (or even the main breaker if unsure) and call an electrician immediately.
- Humming or Buzzing Sounds: Strange electrical noises coming from the wall switch, outlet, or the fan/light unit itself can indicate a faulty component or loose wiring that could lead to overheating.
- Intermittent Power Without Clear Cause: If the power comes and goes sporadically, and you’ve ruled out tripped breakers or GFCIs, it could be a loose connection deeper in the wiring, which is best handled by a professional.
- No Obvious DIY Fix: If you’ve gone through all the troubleshooting steps and still can’t identify or resolve the problem, it’s time to call in an expert.
- Lack of Confidence: If you’re uncomfortable at any point during the troubleshooting process, or if you don’t have the necessary tools or knowledge to safely proceed, always err on the side of caution and contact a licensed electrician.
Why DIY Can Be Dangerous
Working with electricity without proper knowledge and precautions can lead to:
- Electric Shock or Electrocution: The most immediate and severe risk.
- Electrical Fires: Improper wiring or faulty repairs can create overheating, leading to fires.
- Further Damage: Incorrect troubleshooting or repair attempts can worsen the problem or damage other parts of your electrical system.
- Voided Insurance: Some home insurance policies may not cover damages resulting from uncertified DIY electrical work.
Preventative Maintenance Tips
While you can’t prevent every electrical issue, regular maintenance and smart habits can significantly reduce the chances of your bathroom fan and light losing power.
Regular Cleaning of Fan Vents
Dust, lint, and debris can accumulate in your exhaust fan’s grille and motor housing, impeding its efficiency and potentially leading to motor burnout.
- How Often: At least once or twice a year, depending on usage.
- Method: Turn off power at the breaker. Remove the fan cover and thoroughly vacuum or wipe down the grille, fan blades, and motor housing. You can use a damp cloth (ensure it’s dry before restoring power) or compressed air.
Avoiding Circuit Overload
Be mindful of how many high-wattage appliances you’re using simultaneously on a shared circuit.
- Awareness: If your bathroom shares a circuit with other rooms or high-power outlets, try to stagger the use of items like hair dryers, space heaters, and curling irons.
- Upgrade if Necessary: If frequent tripping is an ongoing issue, consider having an electrician assess your home’s electrical load and potentially install dedicated circuits for high-draw appliances.
Periodic Electrical Checks
While not a DIY task, having a licensed electrician perform a periodic inspection of your home’s electrical system, especially in older homes, can catch potential issues before they become major problems.
- Benefits: Identifies loose connections, aging wiring, outdated components, and other potential hazards.
Frequently Asked Questions (FAQs)
Q1: Why does my bathroom fan work but not the light, or vice versa?
If only one component is failing (fan or light), it usually points to an issue specific to that component rather than the entire circuit. For the light, it could be a burnt-out bulb, a faulty light socket, or a loose wire to the light component within the unit. For the fan, it might be a seized motor, a broken fan blade, or a specific wire connection to the fan motor. If they have separate switches, the issue could be with the individual switch.
Q2: Can a bad light switch cause a fan to stop working?
Yes, absolutely. If your fan and light are controlled by a single switch (or if a multi-function switch for both fails in its common power feed), a faulty switch will prevent power from reaching both components. Even if they have separate switches, a shared power feed to the switch box could be the culprit if a connection there becomes loose or corroded.
Q3: How much does it cost to fix a bathroom fan and light?
The cost varies widely depending on the cause and whether you DIY or hire a professional. Replacing a light bulb or resetting a GFCI is free. Replacing a wall switch might cost $10-$30 for the part and 30 minutes of your time. Replacing an entire fan/light unit can range from $50-$200+ for the unit itself, plus several hours of an electrician’s labor ($75-$150+ per hour). If the issue is complex wiring damage, costs can be significantly higher due to diagnostic time and potential wall repairs.
Q4: Is it safe to use a bathroom without a working fan?
While not an immediate electrical hazard, a non-working bathroom fan poses other risks. Without proper ventilation, moisture and humidity will build up, leading to mold and mildew growth on walls, ceilings, and grout. This can damage your bathroom’s finishes and potentially lead to respiratory issues. It’s best to get the fan fixed promptly or use alternative ventilation like opening a window after showers.
Q5: Why does my bathroom fan hum but not spin?
If your bathroom fan hums but the blades don’t spin, it typically indicates that the motor is receiving power but something is preventing it from turning. Common causes include a seized motor (often due to dirt, dust, or age), an obstruction in the fan blades (like a foreign object or excessive debris), or a failing capacitor within the motor. In most cases, cleaning the fan or lubricating the motor might help, but often a humming fan that doesn’t spin signals it’s time for a motor replacement or a new fan unit.
Conclusion
A non-functional bathroom fan and light unit is more than just an inconvenience; it can be a sign of underlying electrical problems. By systematically troubleshooting common issues like tripped circuit breakers, faulty GFCI outlets, and problematic switches or units, you can often identify and resolve the problem yourself. However, always prioritize safety and never hesitate to call a qualified electrician if you’re uncomfortable, unsure, or if the problem persists after basic checks. Regular maintenance and awareness of your home’s electrical system will ensure your bathroom remains a well-lit, well-ventilated, and safe space for years to come.


