What is a Roof Water Barrier and Why is it Essential?
Before diving into the issues, it’s vital to understand what a roof water barrier is and why it holds such a pivotal role in your home’s defense system. Often referred to by various names such as underlayment, synthetic underlayment, or ice and water shield, this barrier is an integral component of a multi-layered roofing system.
Beyond the Shingles: Understanding the Layers
Your roof is much more than just the visible shingles. It’s a complex assembly designed to channel water away from your home. Beneath the outermost layer of shingles or tiles, you typically find the underlayment. This underlayment is the primary water barrier. Traditionally, it was made from asphalt-saturated felt paper. However, modern roofing often utilizes advanced synthetic underlayments, which offer superior durability, tear resistance, and moisture protection. In colder climates or areas prone to heavy rain, an additional self-adhering modified bitumen membrane, commonly known as an ice and water shield, is often applied to vulnerable areas like eaves, valleys, and around penetrations (e.g., chimneys, vents). This self-sealing membrane provides an extra layer of waterproofing, particularly effective against water backup from ice dams or wind-driven rain.
The Critical Role of a Water Barrier
The main function of the roof water barrier is to serve as a secondary line of defense against water penetration. While shingles are designed to shed the majority of water, they are not entirely waterproof on their own. High winds can lift shingles, heavy downpours can drive water underneath them, and melting ice can cause water to back up and seep through tiny gaps. This is where the water barrier steps in. It prevents this residual moisture from reaching the roof deck, which is the structural plywood or OSB foundation of your roof. Without a properly functioning water barrier, any water that breaches the primary shingle layer will directly soak into the roof deck, leading to rapid deterioration and interior damage.
Early Warning Signs: How to Spot a Failing Roof Water Barrier
Detecting a failing roof water barrier early can save you thousands in repairs and prevent significant damage to your home. While some signs are obvious, others can be subtle and require a keen eye or even a professional inspection.
Visible Interior Clues
- Water Stains on Ceilings and Walls: This is perhaps the most common and unmistakable sign. Yellow, brown, or dark stains, especially on the top floor ceilings or upper parts of walls, directly indicate water intrusion. The location of the stain might not be directly below the leak, as water can travel along structural elements before dripping.
- Peeling Paint or Wallpaper: Moisture accumulating behind paint or wallpaper can cause it to bubble, peel, or blister. This often occurs near the top of walls or around ceiling edges.
- Dampness or Musty Odors: Even without visible stains, a persistent musty smell in certain rooms, particularly after rain, can signal hidden moisture and potential mold growth due to a compromised barrier.
- Sagging Ceilings: In severe cases, prolonged water saturation can weaken drywall or plaster, causing sections of the ceiling to sag or bulge. This is a critical sign that requires immediate attention.
- Mold or Mildew Growth: Black, green, or white fuzzy patches on ceilings, walls, or even in closets indicate the presence of excessive moisture and mold. This is not only damaging to your home but also poses serious health risks.
Exterior Indicators
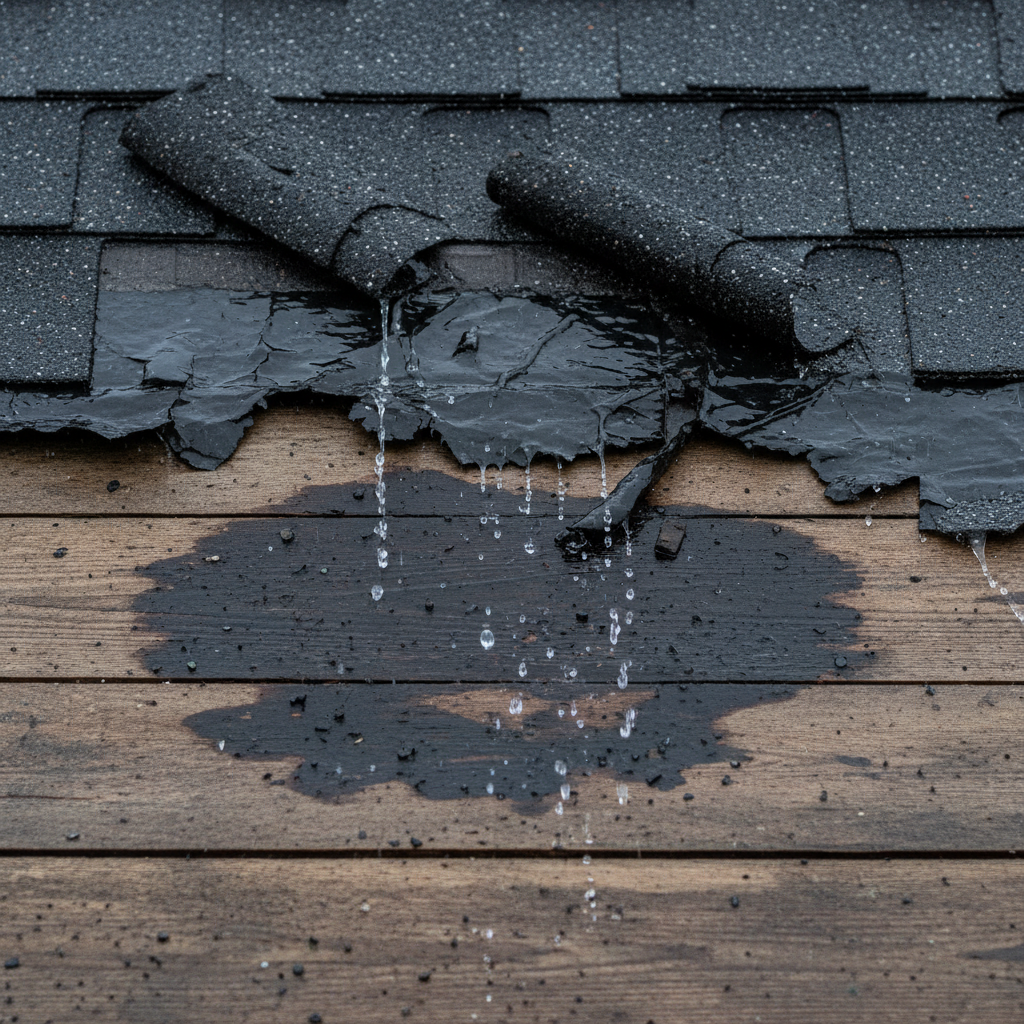
- Missing, Cracked, or Damaged Shingles: While shingles themselves are not the water barrier, damaged shingles expose the underlayment to the elements, accelerating its deterioration. High winds, hail, or even general wear and tear can compromise the shingle layer, making the water barrier work harder and potentially fail faster.
- Granule Loss: Shingles shedding an excessive amount of granules (the small, coarse particles on their surface) means the shingle is nearing the end of its life and losing its protective capabilities, leaving the underlayment more exposed.
- Curling or Buckling Shingles: Shingles that are curling at the edges or buckling in the middle are often a sign of aging, improper installation, or excessive heat buildup, all of which can compromise the underlying barrier.
- Damaged Flashing: Flashing is the metal or composite material installed around roof penetrations (chimneys, skylights, vents) and in valleys to prevent water intrusion. If the flashing is bent, rusted, missing, or improperly sealed, water can easily bypass the water barrier and seep into your home.
- Clogged Gutters and Downspouts: While not a direct sign of barrier failure, clogged gutters cause water to pool on the roof or overflow, potentially backing up under shingles and stressing the underlying water barrier, especially in areas prone to ice dams.
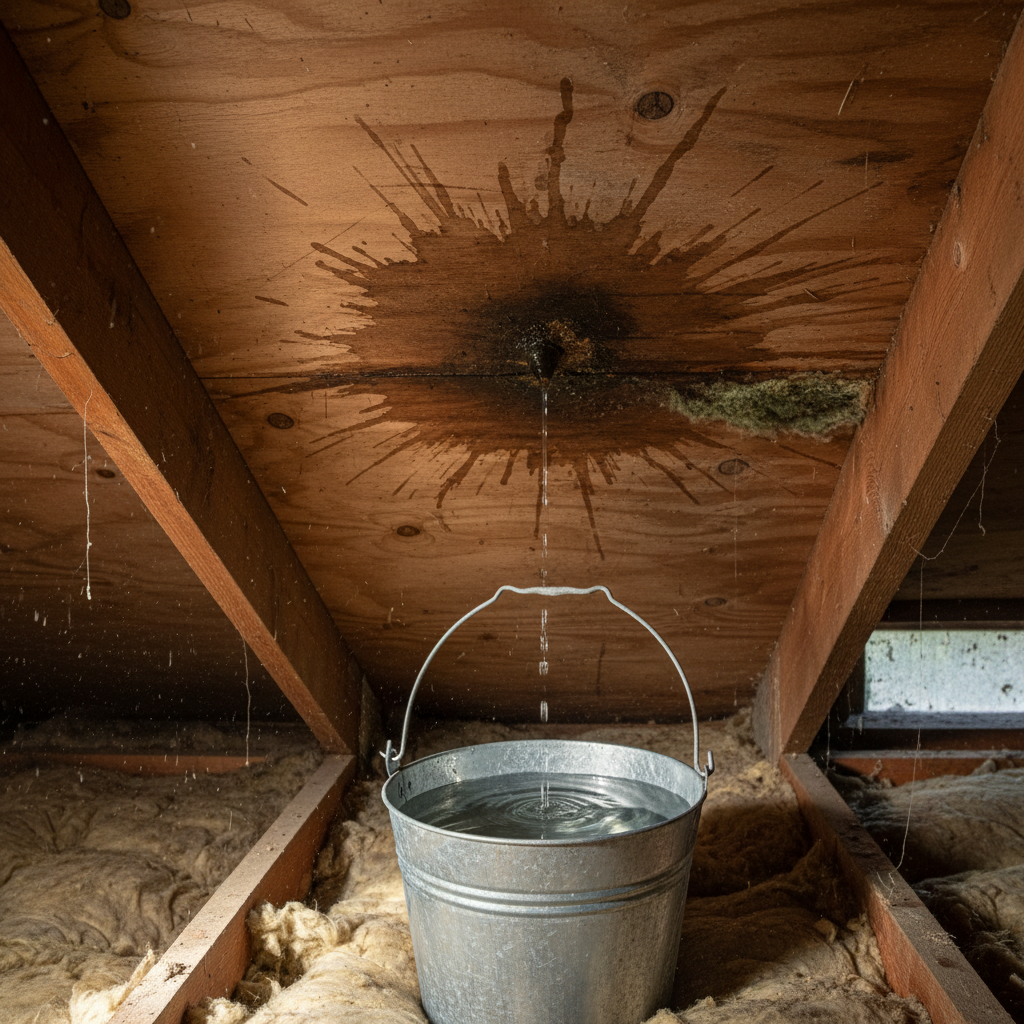
- Wet Spots on the Roof Deck (from the attic): If you can access your attic, use a flashlight to examine the underside of the roof deck. Any dark spots, streaks, or signs of damp wood are clear indications of a leak.
Subtle Sensory Signals
- Increased Energy Bills: While not a direct indicator, consistent roof leaks and moisture can damage insulation, reducing its effectiveness and leading to higher heating and cooling costs.
- A Lingering “Wet Dog” Smell: Sometimes, the smell of dampness or mildew might be present even before visible signs appear, particularly in the attic or top-floor rooms. Trust your nose as an early warning system.
Common Culprits: What Causes a Roof Water Barrier to Fail?
Understanding the root causes of failure is essential for both prevention and effective repair. A roof water barrier doesn’t just fail overnight; it’s often the result of a combination of factors accumulating over time.
Age and Wear: The Inevitable Deterioration
Like any building material, roof water barriers have a lifespan. Traditional felt underlayments can become brittle, crack, or tear over time due to exposure to UV rays (even indirectly through shingle gaps) and temperature fluctuations. Synthetic underlayments are more durable but are not immortal. Over decades, the adhesive properties of self-adhering membranes can weaken, or the material itself can degrade, losing its waterproofing capabilities.
Improper Installation: A Foundation for Failure
Many roof water barrier failures stem from poor installation practices. This includes:
- Insufficient Overlap: If the rolls of underlayment are not overlapped correctly, water can easily seep through the seams.
- Improper Fastening: Staples or nails that aren’t driven flush or are spaced too far apart can create entry points for water or cause the underlayment to lift.
- Incorrect Flashing Application: Flashing must be integrated seamlessly with the underlayment. If not, it creates vulnerable spots where water can bypass the barrier.
- Lack of Ice and Water Shield: In cold climates, omitting an ice and water shield in critical areas leaves the roof highly susceptible to damage from ice dams, which can force water under shingles and ordinary underlayment.
- Damaged During Installation: Accidental tears, punctures, or nicks to the underlayment during shingle installation can create immediate weaknesses.
Extreme Weather Events: Nature’s Assault
Mother Nature can be merciless.
- High Winds: Powerful winds can lift or strip away shingles, exposing the underlayment directly to rain, hail, and UV radiation, leading to rapid degradation.
- Hailstorms: Hail can directly damage shingles and, if severe enough, can also bruise or puncture the underlying water barrier.
- Heavy Rains: Prolonged, torrential downpours increase the hydrostatic pressure on the roofing system, testing the limits of the barrier, especially if there are pre-existing weaknesses.
- Ice Dams: In winter, when heat escapes from the attic, it melts snow on the upper roof. This water then refreezes at the colder eaves, forming an ice dam that prevents melting snow from draining. The trapped water backs up under shingles and can eventually seep through even well-installed underlayment, particularly if an ice and water shield is absent or improperly applied.
Poor Ventilation: Trapped Moisture
An improperly ventilated attic can create a host of problems that indirectly contribute to water barrier failure. Excessive heat buildup in the attic can cook shingles from underneath, shortening their lifespan and causing them to curl or crack. This heat can also accelerate the degradation of the underlayment. In colder months, poor ventilation combined with warm, moist air from the living space can lead to condensation in the attic, potentially saturating the roof deck and underlayment from below.
Neglected Maintenance: A Recipe for Disaster
Ignoring basic roof maintenance is a common cause of premature failure.
- Clogged Gutters: When gutters are full of leaves and debris, water has nowhere to go but to back up onto the roof, exacerbating ice dam issues and saturating the edges of the roofing system.
- Unaddressed Shingle Damage: Leaving broken or missing shingles unrepaired directly exposes the water barrier to the elements.
- Lack of Inspections: Without regular professional inspections, small issues go unnoticed and unaddressed, escalating into major problems.
Structural Movement and Settling
Over time, homes can settle, or foundations can shift, causing slight movements in the roof structure. These movements, however minor, can put stress on the roofing components, including the water barrier, leading to cracks, tears, or separation at seams.
The Cascade of Consequences: What Happens When Your Barrier Fails?
When a roof water barrier is failing, the consequences extend far beyond a simple drip. The issues can rapidly multiply, affecting nearly every aspect of your home.
Interior Water Damage
This is the most immediate and visible result. Water can seep into your attic, through ceilings, and down walls, leading to unsightly stains, peeling paint, warped drywall, and damaged plaster. Personal belongings, furniture, and electronics can also be ruined.
Structural Integrity Compromise
Prolonged exposure to moisture can cause the wooden components of your roof structure—rafters, trusses, and the roof deck—to rot and weaken. This compromises the structural integrity of your entire roof, potentially leading to sagging, collapse, and extensive, costly repairs.
Mold and Mildew Growth
Moisture is the perfect breeding ground for mold and mildew. These fungi can quickly proliferate in damp attics, within wall cavities, and on ceilings. Mold not only causes unpleasant odors and further structural damage but also poses significant health risks.
Decreased Energy Efficiency
When water infiltrates the roof system, it often saturates attic insulation. Wet insulation loses its effectiveness dramatically, leading to heat loss in winter and heat gain in summer. This forces your HVAC system to work harder, resulting in significantly higher energy bills.
Health Risks
Black mold (Stachybotrys chartarum) and other types of mold can release spores that trigger allergies, asthma attacks, respiratory problems, and other health issues, especially in vulnerable individuals like children, the elderly, or those with compromised immune systems. Persistent dampness can also attract dust mites, another common allergen.
Pest Infestations
Damp, rotting wood in an attic or walls creates an inviting environment for various pests. Termites, carpenter ants, rodents, and other insects are attracted to softened wood and moisture, exacerbating damage and introducing new problems.
Diminished Property Value
A history of roof leaks, visible water damage, and potential structural issues will significantly deter potential buyers and reduce your home’s market value. Buyers are often wary of homes with unresolved moisture problems due to the potential for hidden damages.
Proactive Protection: Preventing Roof Water Barrier Failure
Prevention is always better, and far less costly, than cure. A proactive approach to roof maintenance can extend the life of your roof water barrier and protect your home.
Regular Roof Inspections
Schedule professional roof inspections at least once a year, preferably in the spring or fall. After severe weather events (heavy storms, hail), an additional inspection is highly recommended. A professional can identify minor issues like cracked flashing, loose shingles, or subtle signs of underlayment wear before they escalate into major leaks. Consider working with a reputable roofing contractor for these inspections. For more tips on home maintenance, check out resources like Good Housekeeping’s home maintenance checklist.
Proper Gutter Maintenance
Keep your gutters and downspouts clean and free of debris. Clogged gutters prevent proper drainage, causing water to pool on the roof or overflow, which can put undue stress on your water barrier and contribute to ice dam formation in winter.
Addressing Ventilation Needs
Ensure your attic has adequate ventilation. Proper attic ventilation helps regulate temperature and moisture levels, preventing heat buildup that can degrade shingles and underlayment, and reducing condensation that can saturate the roof deck.
Pruning Overhanging Branches
Trim any tree branches that hang over your roof. These branches can scratch and damage shingles, drop debris that clogs gutters, and provide pathways for pests. In strong winds, falling branches can cause significant damage to the roof structure and barrier.
Timely Repairs
Address any visible damage to your shingles, flashing, or other roofing components immediately. A small repair now can prevent a much larger and more expensive problem later. Don’t wait until you see water stains inside your home.
Professional Installation and Upgrades
If you’re replacing your roof, invest in quality materials and professional installation. Ensure your contractor uses a high-quality water barrier, such as a synthetic underlayment or ice and water shield where appropriate, and adheres to manufacturer specifications and local building codes for proper installation.
Action Plan: What to Do When Your Roof Water Barrier is Failing
Discovering that your roof water barrier is failing can be alarming, but acting swiftly and methodically can significantly mitigate damage and recovery costs.
Immediate Steps: Mitigating Further Damage
- Contain the Leak: Place buckets, towels, or tarps under any active drips to catch water and protect your belongings.
- Move Valuables: Relocate furniture, electronics, and personal items away from the leak area to prevent water damage.
- Turn Off Power: If water is near electrical outlets, light fixtures, or major appliances, turn off the power to that area from your main electrical panel to prevent electrical hazards.
- Ventilate the Area: If safe to do so, open windows or use fans to improve air circulation, which can help dry out damp areas and deter mold growth.
- Temporary Patch (if safe): For experienced DIYers, a temporary patch with roofing cement and plastic sheeting might offer very short-term relief, but this is often best left to professionals and only attempted if it’s safe to access the roof.
Documenting the Damage
Before any repairs begin, thoroughly document the extent of the damage with photos and videos. This includes interior water stains, damaged belongings, and any visible exterior roof damage. This documentation will be crucial for insurance claims.
Contacting a Qualified Professional
This is arguably the most important step. Contact a reputable roofing contractor immediately. Look for contractors with:
- Proper licensing and insurance.
- Positive customer reviews and references.
- Experience with water barrier issues and roof repairs/replacement.
- Warranties on their work and materials.
A professional can safely assess the full extent of the damage, identify the precise source of the leak (which can be tricky, as water travels), and recommend the most effective and lasting repair solutions.
Understanding the Repair Process
Depending on the severity and location of the failure, repairs could range from localized patching of the underlayment and flashing to a complete roof section replacement or even a full roof replacement. Your contractor will explain the necessary steps, materials, and timeline.
Navigating Insurance Claims
If the damage is extensive, contact your homeowner’s insurance provider. Provide them with your documentation and contractor’s assessment. Be prepared to understand your policy’s coverage, deductibles, and claim process.
FAQs About Roof Water Barriers
What’s the difference between a roof water barrier and an ice and water shield?
A roof water barrier is a general term for the underlayment that goes beneath your shingles to provide secondary waterproofing. An ice and water shield is a specific type of self-adhering, modified bitumen water barrier that offers superior protection against water backup from ice dams and wind-driven rain. It’s typically installed at eaves, valleys, and around penetrations, often in addition to or as part of the overall underlayment system.
Can I repair a failing roof water barrier myself?
While minor, temporary fixes might be possible for very handy homeowners, significant repairs or replacement of a failing roof water barrier should almost always be left to professionals. Roofing work is dangerous, requires specialized knowledge and tools, and improper repairs can lead to further damage, void warranties, and potentially cause serious injury. Identifying the exact source of a leak, especially one originating from the underlayment, can be complex.
How often should my roof water barrier be inspected?
The roof system, including the underlying water barrier, should be professionally inspected at least once a year. It’s also wise to have an inspection after any major weather event, such as a severe hailstorm or high winds. Regular inspections can catch minor issues before they become major problems.
How long do roof water barriers typically last?
The lifespan of a roof water barrier depends heavily on the type of material, quality of installation, and environmental factors. Traditional felt underlayment might last 10-20 years, while high-quality synthetic underlayments can last 20-30 years or more. Self-adhering ice and water shields are often designed to last the lifetime of the shingle roof, typically 20-30 years, assuming proper installation and protection from direct UV exposure.
Is a failing roof water barrier always covered by homeowner’s insurance?
Homeowner’s insurance typically covers sudden and accidental damage, such as a roof water barrier failing due to a storm, hail, or a fallen tree. However, it generally does not cover damage resulting from neglect, poor maintenance, or general wear and tear due to the age of the roof. It’s crucial to review your specific policy and consult with your insurance provider to understand your coverage.
Conclusion: Safeguarding Your Home from the Top Down
The integrity of your home hinges significantly on the health of its roofing system, and the roof water barrier plays an indispensable role in that defense. A failing roof water barrier is a serious issue that demands immediate attention, but with proper understanding, vigilant observation, and timely professional intervention, you can safeguard your home from the silent threat of water intrusion. Regular maintenance, prompt repairs, and smart choices when installing or replacing your roof are your best tools in ensuring this vital component continues to protect your home and your family for years to come. Don’t wait for the drip to become a deluge; empower yourself with knowledge and take proactive steps to maintain your home’s most essential shield.


