Why a Leaking Sprinkler Line Demands Immediate Attention
Ignoring a leaking sprinkler line is like leaving a dripping faucet unattended – the cumulative effect can be surprisingly significant. Here’s why addressing a leak promptly is essential:
- Excessive Water Waste: Even a small leak can waste thousands of gallons of water over a season, especially if it runs for hours daily. This isn’t just bad for your wallet; it’s detrimental to environmental conservation efforts.
- Soaring Water Bills: Unseen leaks translate directly to higher monthly water bills, often baffling homeowners who haven’t changed their water usage habits.
- Landscape Damage: Constant saturation from a leak can drown certain plants, create muddy, eroded spots, and lead to nutrient leaching, harming the health of your lawn and garden. Conversely, other areas might not get enough water due to reduced pressure.
- Property Damage Risks: Prolonged saturation near your home’s foundation can lead to soil erosion and even compromise the structural integrity of your house. Puddles can also create slip hazards and attract pests.
- Reduced System Efficiency: A leak causes a drop in water pressure across your entire sprinkler system, meaning other zones or sprinkler heads may not receive adequate water for proper coverage, leading to dry spots and an unhealthy lawn.
Common Causes Behind a Leaking Sprinkler Line
Sprinkler lines are buried underground, making them susceptible to a variety of factors that can lead to leaks. Knowing the common culprits can help in both diagnosis and prevention.
1. Freezing Temperatures and Winter Damage
This is one of the most common causes in regions with cold winters. If sprinkler lines are not properly winterized and drained before the first hard freeze, any residual water inside the pipes can freeze, expand, and crack the PVC or polyethylene pipes. This often results in multiple leaks appearing when the system is reactivated in spring.
2. Aging and Material Degradation
Like all components, sprinkler lines have a lifespan. Over time, PVC pipes can become brittle, polyethylene pipes can harden, and seals on fittings can degrade due to exposure to soil, water, chemicals, and UV rays (if any part is exposed). This natural wear and tear increases the likelihood of cracks, breaks, and joint failures.
3. Root Intrusion from Trees and Shrubs
Tree and shrub roots are incredibly strong and relentless in their search for water. As roots grow, they can wrap around, crush, and even puncture buried sprinkler lines, especially if the pipes are laid too close to mature plantings. This creates tiny, hard-to-find leaks that can grow over time.
4. Mechanical Damage and Accidental Punctures
This is often due to human error. Shovels, garden spades, aerators, post-hole diggers, or even lawn care equipment can accidentally strike and damage buried sprinkler lines. Construction work, fence installations, or other landscaping projects are also common sources of mechanical damage.
5. High Water Pressure
If your home’s water pressure is consistently too high for your sprinkler system, it can put excessive stress on pipes, fittings, and sprinkler heads. This increased pressure can lead to blown seals, burst pipes, and loosened connections, causing leaks throughout the system. A pressure regulator can mitigate this issue.
6. Poor Installation or Faulty Fittings
Initial installation quality plays a significant role in preventing future leaks. Improperly glued PVC joints, loose clamps on polyethylene pipes, or sub-standard fittings can lead to leaks shortly after installation or surface years down the line. Sometimes, a fitting itself might be defective from the factory.
7. Soil Shifting and Ground Movement
While less common, significant soil erosion, ground settling, or even minor seismic activity can cause buried pipes to shift, bend, or pull apart at the joints, leading to leaks. This is more prevalent in areas with unstable soil conditions.
Detecting a Leaking Sprinkler Line: Signs to Look For
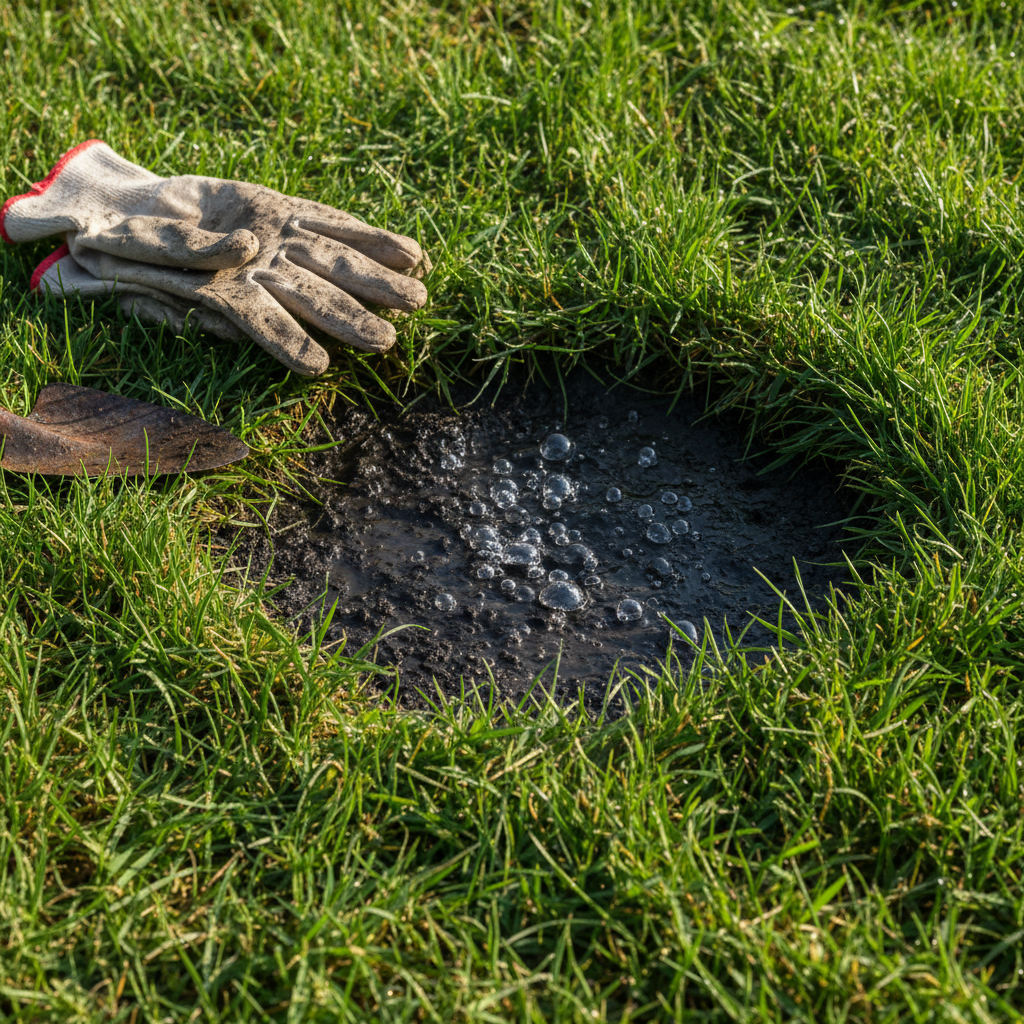
Sometimes a leak is obvious, with water bubbling to the surface. Other times, it’s more subtle. Being vigilant about these signs can help you catch a leak before it becomes a major problem.
1. Unusually Wet, Soggy Spots on Your Lawn
This is the most direct indicator. If you have areas of your lawn that are perpetually wet, marshy, or unusually lush, even during dry periods or when the sprinklers aren’t running, it’s a strong sign of an underground leak. These spots often appear “greener” due to constant moisture.
2. Significantly Higher Water Bills
If your water bill suddenly jumps without a corresponding increase in usage (e.g., filling a pool, watering a new garden), a hidden leak in your sprinkler system or elsewhere in your home could be the culprit. Compare your current bill to previous months or the same month last year.
3. Low Water Pressure in Specific Zones
When a leak occurs, water escapes before reaching all the sprinkler heads, causing a noticeable drop in pressure. If one or more zones of your system have weak spray patterns, reduced distance, or heads that barely pop up, it could indicate a leak within that zone’s line.
4. Visible Puddles or Eroded Soil
In more severe cases, a significant leak can cause water to pool on the surface, creating visible puddles. Over time, this constant flow can also lead to soil erosion, washing away mulch or creating small trenches.
5. Uneven Lawn Growth
While a soggy spot might be unusually green, areas further down the line from a leak might actually be drier than usual due to reduced water pressure. This can lead to patches of stressed or brown grass amidst healthy green areas, indicating uneven water distribution caused by a leak.
6. Hissing or Gurgling Sounds
If you listen closely, especially when the water is turned on to the sprinkler system, you might hear a faint hissing, gurgling, or trickling sound coming from underground. This often indicates water escaping from a crack or break in the pipe.
7. Water Meter Test
To confirm a leak, turn off all water-using appliances inside your home and ensure your irrigation system is off. Check your water meter. If the meter’s dial is still spinning, you have a leak somewhere. To determine if it’s specifically your sprinkler system, turn off the main shut-off valve for your irrigation system (usually located near the backflow preventer). If the meter stops spinning, the leak is in your sprinkler system.
Tools and Materials for DIY Sprinkler Line Repair
Before you start digging, gather the necessary tools and replacement parts. Having everything on hand will make the repair process smoother and quicker.
Essential Tools:
- Shovel or Spade: For excavating the leak area.
- Pipe Cutter: Essential for making clean cuts on PVC or polyethylene pipe. A hacksaw can also work for PVC.
- Measuring Tape: To measure replacement pipe sections.
- Rag or Towel: For cleaning pipes before gluing.
- Safety Glasses and Gloves: To protect your eyes and hands.
- Adjustable Wrench (for threaded fittings): To tighten or loosen threaded connections.
- Channel Locks or Pliers: For gripping and turning.
Materials (vary based on pipe type and leak severity):
- PVC Primer and Cement: For repairing PVC pipes. Ensure they are suitable for wet conditions if necessary.
- Replacement PVC Pipe Section: Match the diameter and Schedule (e.g., Schedule 40) of your existing pipe.
- PVC Couplings, Tees, or Elbows: Depending on the type of repair needed.
- Slip Fix Repair Coupling: A special coupling that allows for easier installation when replacing a section of pipe in a tight space.
- Polyethylene Repair Clamps and Fittings: If you have flexible poly pipe, you’ll need specialized barbed fittings, clamps (often stainless steel), and perhaps a crimping tool.
- Teflon Tape or Pipe Dope: For sealing threaded connections.
- Sand or Pea Gravel: To create a soft bed around the repaired pipe before backfilling.
Step-by-Step Guide to Fixing a Leaking Sprinkler Line
Once you’ve identified a leak and gathered your supplies, it’s time to roll up your sleeves and get to work. This general guide covers common repairs for both PVC and polyethylene lines.
Step 1: Shut Off the Water Supply
This is the most crucial first step. Locate the main shut-off valve for your irrigation system, typically near your backflow preventer or main water connection. Turn it completely off to prevent water from flowing through the lines while you work. If you have an automatic timer, ensure it’s also turned off or put into a “rain delay” mode.
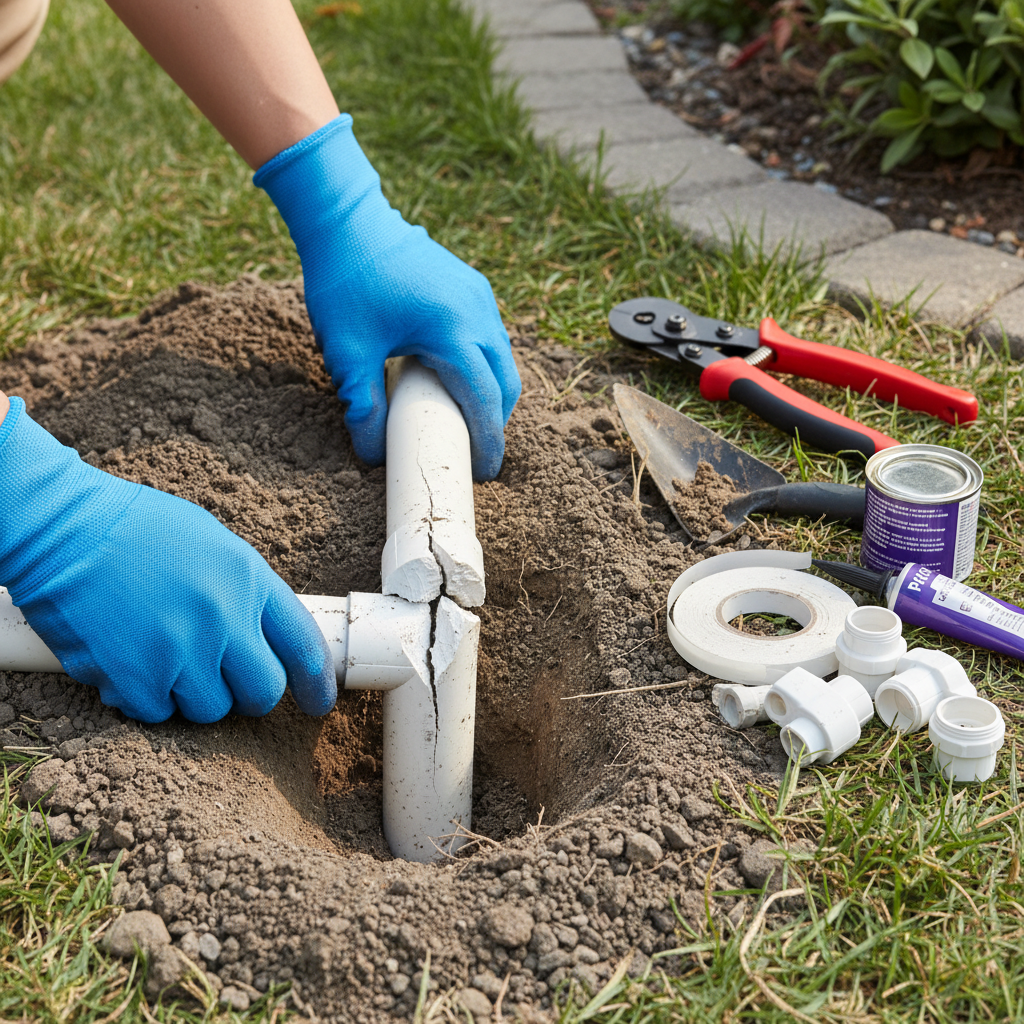
Step 2: Locate and Excavate the Leak
Using the signs you’ve observed (soggy spots, low pressure, etc.), pinpoint the general area of the leak. Carefully begin digging around the suspected location with your shovel. Dig slowly and meticulously to avoid further damaging the pipes or other utility lines. Once you find the pipe, expose enough of it to work comfortably, typically a section of 1-2 feet around the leak.
Step 3: Assess the Damage
Once the pipe is exposed and cleaned of mud, thoroughly inspect the damage. Is it a small crack, a complete break, a loose fitting, a punctured hole, or a damaged sprinkler head? The type of damage will dictate your repair method.
Step 4: Prepare for Repair (PVC Pipe Example)
- For a Small Crack/Puncture: If the crack is minor, you might be able to use a repair coupling. For a larger break, you’ll need to cut out the damaged section.
- Cutting Out Damaged Section: Use your pipe cutters to make clean, straight cuts on either side of the damaged area. Aim to remove only the necessary portion, leaving healthy pipe on both ends. Ensure the cut ends are smooth and free of burrs.
- Clean the Pipes: Wipe down the outside of the existing pipes and the inside of the new fittings with a clean rag to remove any dirt or moisture.
Step 5: Perform the Repair
Option A: Repairing PVC with Couplings
- Apply Primer: Apply PVC primer generously to the outside of the existing pipe ends and the inside of the new coupling(s). The primer helps soften the PVC for a stronger bond.
- Apply Cement: Immediately after priming, apply PVC cement evenly to the same primed surfaces.
- Join the Pipes: Slide the coupling onto one end of the existing pipe, twisting slightly to ensure even cement distribution. Hold firmly for about 30 seconds. Repeat for the other side, or if replacing a section, attach the new pipe piece between two couplings.
- Using a Slip Fix Coupling: If space is tight, a slip fix (or telescopic) coupling allows you to connect the new pipe section by sliding one end of the coupling completely over the existing pipe, then pulling it back to bridge the gap and seal both ends.
Option B: Repairing Polyethylene Pipe
- Cut Out Damaged Section: Similar to PVC, cut out the damaged portion of the poly pipe.
- Insert Barbed Fittings: Insert barbed fittings (couplings, elbows, etc.) into the ends of the existing pipe and the new pipe section.
- Secure with Clamps: Slide stainless steel clamps over the pipe ends and tighten them securely over the barbed fittings using a screwdriver or crimping tool. Ensure a tight seal to prevent future leaks.
Step 6: Test the Repair
Before backfilling, slowly turn the main water supply back on to your irrigation system. Watch the repaired area carefully for any signs of leakage. Also, cycle through the sprinkler zones to check for proper pressure and coverage. If you see any drips or moisture, immediately shut off the water and re-evaluate the repair.
Step 7: Backfill and Restore
Once you’ve confirmed there are no leaks, you can backfill the trench. Start by carefully placing a layer of sand or soft soil directly around the repaired pipe to protect it from sharp objects or rocks. Then, gradually fill the rest of the trench with the excavated soil, compacting it gently as you go. Restore any sod or landscaping disturbed during the repair.
When to Call a Professional for Sprinkler Line Repair
While many common sprinkler line leaks can be a DIY project, there are situations where calling a professional irrigation specialist is the wisest course of action.
- Deep or Complex Leaks: If the leak is in a main supply line that’s very deep, under concrete, or difficult to access, a professional has the specialized equipment and expertise to handle it.
- Persistent or Multiple Leaks: If you’ve tried repairing a leak only for it to return, or if you’re experiencing multiple leaks throughout your system, it might indicate a larger underlying issue (like high pressure or systemic aging) that requires a professional diagnosis.
- Lack of Tools or Experience: If you don’t have the proper tools, aren’t comfortable working with plumbing, or are unsure about the repair process, it’s better to avoid further damage by hiring an expert.
- Damage to Backflow Preventer: Issues with the backflow preventer are often regulated by local codes and typically require a certified professional to inspect and repair.
- Time Constraints: If you simply don’t have the time to dedicate to the repair, a professional can get the job done efficiently.
Preventing Future Leaking Sprinkler Lines
An ounce of prevention is worth a pound of cure, especially when it comes to your irrigation system.
- Regular System Inspections: Periodically run your system and visually inspect all zones for obvious leaks, low pressure, or damaged heads. Early detection can prevent minor issues from becoming major repairs.
- Proper Winterization: If you live in a climate with freezing temperatures, always winterize your system by blowing out the lines with an air compressor or having a professional do it. This removes all water, preventing freeze damage.
- Install a Pressure Regulator: If your home’s water pressure is consistently high, install a pressure regulating valve for your irrigation system to protect pipes and components from undue stress.
- Careful Digging: Before any digging project in your yard, know the location of your buried sprinkler lines (and other utilities). Mark them clearly.
- Smart Landscaping: When planting trees or large shrubs, consider their mature root systems and plant them a safe distance from irrigation lines.
- Quality Installation: If installing a new system or adding zones, ensure it’s done correctly with high-quality materials and proper techniques to minimize future problems.
- Check Valve Boxes: Regularly check valve boxes for standing water, which could indicate a leaking valve.
Frequently Asked Questions About Leaking Sprinkler Lines
Q1: How much water can a small sprinkler leak waste?
A seemingly small leak can be surprisingly wasteful. A leak as tiny as 1/32nd of an inch (the size of a pencil tip) can waste over 6,300 gallons of water per month if left unaddressed. Larger leaks can waste tens of thousands of gallons, significantly impacting your water bill and the environment.
Q2: Can I repair a leaking sprinkler line without digging it up?
In most cases, no. For effective and lasting repair, you need to expose the damaged section of the pipe to properly cut, clean, and attach new fittings or pipe sections. There are some temporary patch kits available, but they are rarely a long-term solution for buried lines and are generally not recommended.
Q3: What’s the difference between PVC and polyethylene sprinkler lines, and why does it matter for repair?
PVC (polyvinyl chloride) pipes are rigid and typically white, joined with solvent cement. Polyethylene (poly) pipes are flexible, often black, and joined with barbed fittings and clamps. The repair methods and materials are distinctly different for each type, so it’s crucial to identify your pipe material before attempting a repair.
Q4: How do I find a leak if I don’t see any obvious wet spots?
If there are no visible wet spots, conduct a water meter test (as described above) to confirm a leak. Then, systematically inspect each zone while the system is running, listening for hissing sounds or looking for subtle shifts in soil moisture. You can also try using a screwdriver as a stethoscope: place the metal end on the ground near the pipe and put your ear to the handle to amplify any underground sounds of escaping water.
Q5: How often should I check my sprinkler system for leaks?
It’s a good practice to visually inspect your system at least once a month during its operational season. A more thorough annual inspection, typically in the spring when you reactivate the system, is highly recommended to catch any issues that may have developed over winter or during general use. Regular observation of your lawn’s health and your water bill will also serve as ongoing indicators.
Conclusion
A leaking sprinkler line can be a stealthy problem, silently draining your wallet and harming your landscape. By understanding the common causes, recognizing the tell-tale signs, and knowing how to approach a repair, you can effectively tackle most leaks yourself. Remember the importance of shutting off the water, careful excavation, and thorough testing. While DIY repair is often feasible, don’t hesitate to call a professional for complex issues or if you’re unsure. Proactive maintenance and regular inspections are your best defense against future leaks, ensuring your irrigation system remains an efficient and effective tool for a vibrant, healthy outdoor space.


