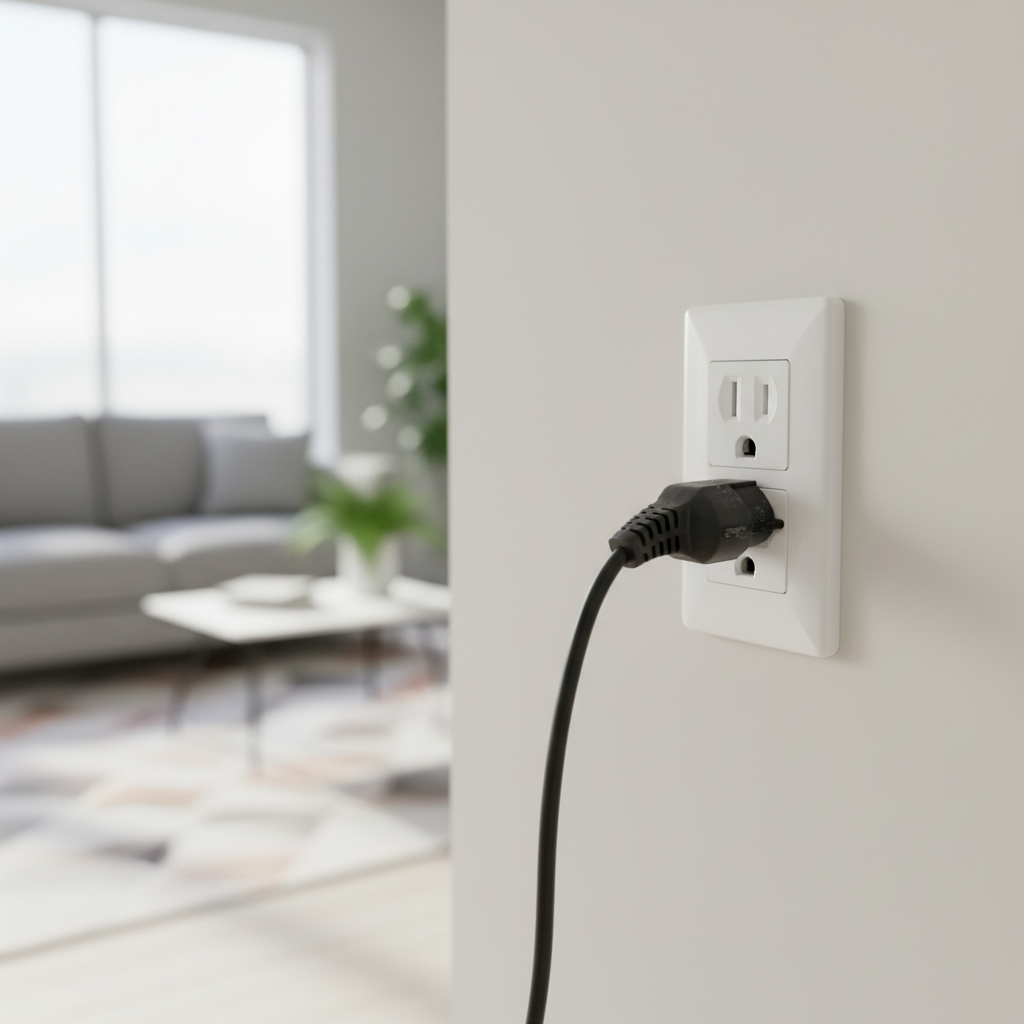
The Underlying Causes of Loose Outlets
When a plug doesn’t stay put in an electrical receptacle, it’s a clear sign that something isn’t right. Several factors can contribute to this problem, ranging from simple wear and tear to more serious installation errors or electrical faults.
Wear and Tear Over Time
Just like any other mechanical component, electrical outlets have a lifespan. The internal contacts within the receptacle that grip the plug prongs are made of metal. Over years of repeated plug insertions and removals, these metal contacts can lose their springiness and become fatigued. This constant flexing causes them to spread apart, weakening their ability to hold a plug firmly. High-traffic outlets, such as those in kitchens or living rooms where appliances are frequently plugged and unplugged, are particularly susceptible to this kind of wear.
Cheap or Poor Quality Outlets
Not all electrical outlets are created equal. Less expensive, lower-quality receptacles often use thinner, less robust metal contacts that are prone to weakening much faster than those found in premium, contractor-grade outlets. While the initial cost saving might seem appealing, these cheaper options can lead to issues with plugs falling out much sooner, necessitating more frequent replacements and potentially costing more in the long run.
Overloading and Overheating
Consistently drawing too much power from an outlet, or plugging in high-wattage appliances, can cause the internal components to heat up. This excessive heat can warp the plastic housing of the outlet and, more critically, weaken the metallic contacts. Over time, the repeated heating and cooling cycles will degrade the elasticity of the contacts, leading to them losing their grip. This is a common issue in kitchens where multiple appliances like toasters, coffee makers, and blenders might be used simultaneously on a single circuit.
Incorrect Installation
A significant number of electrical problems stem from improper installation. If an outlet isn’t securely fastened to the electrical box in the wall, it can wiggle and move when plugs are inserted or removed. This constant movement can stress the internal contacts and the wiring, leading to premature failure of the gripping mechanism. Furthermore, if the wires connecting to the outlet terminals are not properly tightened, it can create a poor electrical connection, generating heat and exacerbating wear.
Damaged or Corroded Receptacle Contacts
Physical damage, such as forcefully jamming oversized plugs into a standard outlet, can bend or break the internal contacts. Similarly, exposure to moisture or corrosive environments can lead to rust and corrosion on the metal parts, which degrades their conductivity and their ability to securely hold a plug. While less common, this can be an issue in basements, garages, or older homes with high humidity levels.
The Hidden Dangers of Loose Plugs
A loose plug isn’t just an inconvenience; it’s a serious safety concern that demands immediate attention. Ignoring a sagging or falling plug can lead to a cascade of dangerous issues.
Fire Hazards: The Spark of Trouble
This is arguably the most critical danger associated with loose outlets. When a plug fits loosely, it can create an intermittent connection. This unstable connection leads to arcing and sparking between the plug prongs and the receptacle contacts. This arcing generates significant heat, which can ignite nearby combustible materials like curtains, furniture, or even the insulation within the wall. The National Fire Protection Association (NFPA) consistently identifies electrical malfunctions, including faulty receptacles, as a leading cause of home fires.
Electrical Shock Risk
A loose plug can expose parts of the energized prongs, making accidental contact with them possible. If you or a family member, especially a child, touches an exposed live prong, it can result in a painful and potentially fatal electrical shock. This risk is amplified when trying to adjust a wobbly plug or when removing it, as the connection might briefly become active.
Damage to Appliances and Devices
Intermittent power flow from a loose outlet can be detrimental to the electronic devices and appliances plugged into it. The constant on-off cycling or voltage fluctuations can stress sensitive electronics, leading to premature wear, component failure, or even complete destruction of the device. This is particularly true for computers, televisions, and other expensive gadgets that require a stable power supply.
Intermittent Power and Frustration
Beyond the safety concerns, a loose outlet can be incredibly frustrating. Devices might constantly turn off and on, not charge properly, or simply fail to work when you need them. This can interrupt work, leisure, and everyday routines, leading to ongoing inconvenience and the need for frequent troubleshooting.
Is It Time for a DIY Fix or Professional Help?
Deciding whether to tackle a loose outlet yourself or call a professional electrician depends on your comfort level with electrical work, your experience, and the apparent cause of the problem. When it comes to electrical systems, safety should always be the top priority.
When to Call an Electrician (Safety First!)
If you are unsure about any aspect of electrical work, lack the proper tools, or notice any of the following, it’s imperative to call a licensed electrician:
- Flickering lights in multiple rooms or when using a specific outlet.
- Burning smells emanating from an outlet or wall.
- Smoke or scorch marks around an outlet.
- Buzzing or sizzling sounds from an outlet.
- Repeated tripping of circuit breakers or blowing of fuses.
- Outlets that feel hot to the touch.
- Any signs of water damage near an outlet.
- If you live in an older home and suspect outdated wiring.
A qualified electrician can diagnose the root cause of the problem, ensure all connections are safe and up to code, and provide peace of mind. For complex issues or if you lack confidence, the small cost of a professional is well worth avoiding potential hazards.
DIY Checks: What You Can Safely Observe
Before touching any electrical components, you can perform a few safe, observational checks:
- Visual Inspection: Look closely at the outlet and the plug. Are there any visible scorch marks? Does the plug itself look damaged? Is the outlet cover plate cracked or broken?
- Gently Wiggle the Plug: With a device plugged in (preferably one that has an indicator light like a phone charger), gently wiggle the plug. Does the power cut in and out? This confirms a loose connection.
- Check Neighboring Outlets: Do other outlets on the same wall or in the same room exhibit similar looseness? This might indicate a broader issue with the circuit or installation.
- Feel for Heat: Without touching the metal parts, carefully feel the outlet cover plate. Is it warm or hot? Heat is a major red flag.
Remember, these are observational steps only. Do not attempt to open the outlet or touch any wiring unless you are confident in your electrical knowledge and have followed all safety precautions.
Tools You Might Need (For professional or supervised work)
If you or a professional decide to proceed with an outlet replacement, here are common tools that might be required:
- Screwdrivers (Phillips and flathead)
- Non-contact voltage tester
- Wire strippers
- Pliers (needle-nose and/or lineman’s)
- Electrical tape
- New electrical receptacle (ensure it matches the existing type and amperage)
- New cover plate (optional)
- Safety glasses and electrical gloves
Step-by-Step Guide to Replacing a Loose Outlet (Disclaimer: For experienced DIYers only. Always consult a professional if unsure.)
Replacing an electrical outlet can be a straightforward task for someone with basic electrical knowledge, but it carries inherent risks. If you are not entirely confident, please hire a licensed electrician. This guide assumes you have basic electrical DIY experience.
Safety First: Cutting the Power
This step is non-negotiable. Go to your home’s main electrical panel (breaker box). Locate the breaker that controls the power to the problematic outlet. It may be labeled, but if not, you might need to turn off breakers one by one until the power to the outlet is off. Once identified, flip the breaker to the “OFF” position. It’s a good idea to tape the breaker switch in the off position or place a warning sign to prevent accidental re-energization.
Testing for De-energization
Return to the outlet. Use a non-contact voltage tester to confirm that the power is indeed off. Touch the tip of the tester to each slot of the outlet. The tester should not light up or beep. Test a known working outlet first to ensure your tester is functioning correctly. It’s also wise to plug in a small lamp or device into the outlet to ensure it doesn’t turn on.
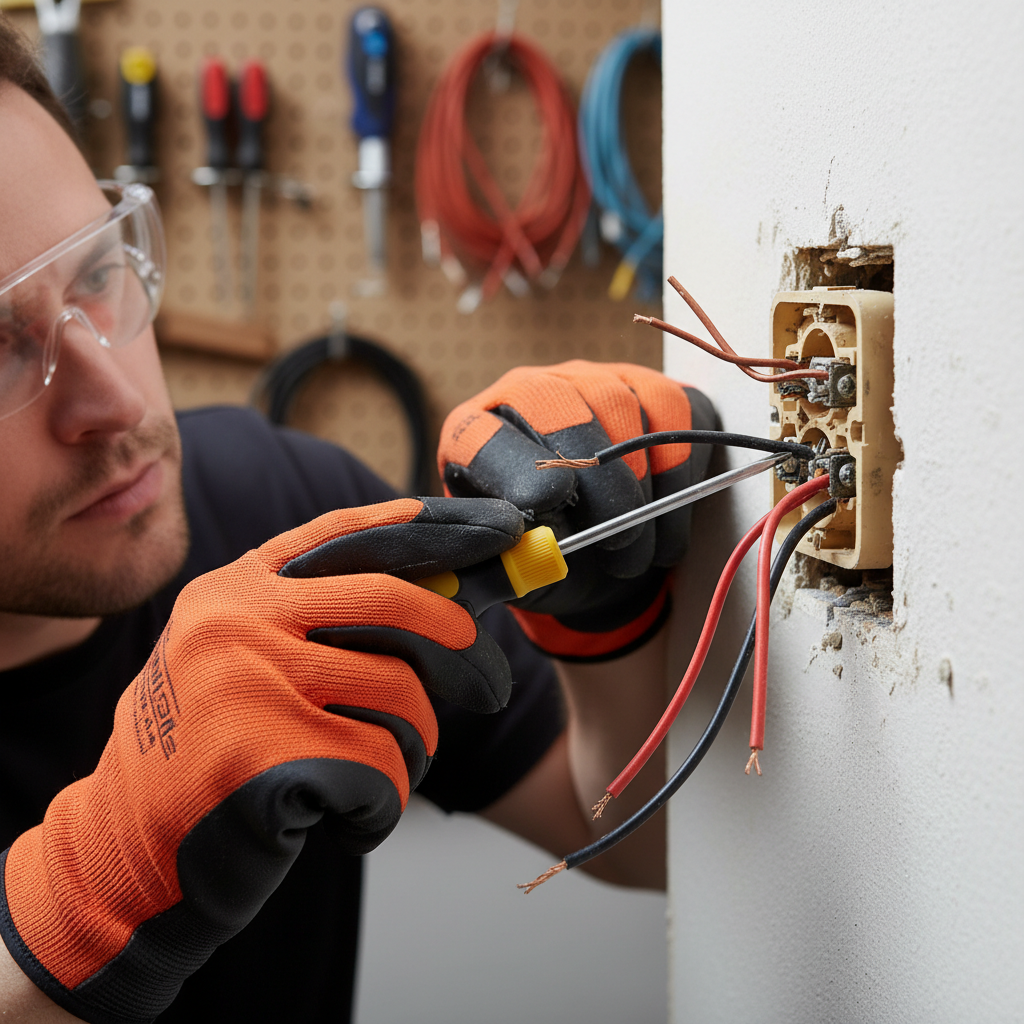
Removing the Old Outlet
Once you are absolutely certain the power is off, use a screwdriver to remove the screw holding the cover plate in place. Take off the cover plate. Then, remove the two screws that secure the outlet body to the electrical box in the wall. Gently pull the outlet straight out of the wall box. You will see several wires connected to it.
Inspecting the Wiring
Carefully note how the wires are connected to the old outlet. Typically, there will be:
- Black wire(s): “Hot” – usually connected to the brass-colored screws.
- White wire(s): “Neutral” – usually connected to the silver-colored screws.
- Bare copper or green wire: “Ground” – connected to the green screw.
Using a screwdriver, loosen the terminal screws and disconnect the wires from the old outlet. Inspect the wires for any signs of damage, fraying, or charring. If the wire ends look corroded or damaged, use wire strippers to cut off the damaged section and strip about 5/8 to 3/4 inch of insulation from the end of each wire to expose fresh copper.
Installing the New Outlet
Take your new outlet. Connect the wires to the corresponding screws: black to brass, white to silver, and ground to green. Ensure the wires are wrapped clockwise around the screw terminals and tightened securely. There should be no loose strands of wire. If your new outlet has “push-in” connectors on the back, it is generally recommended to use the screw terminals for a more secure connection, especially for high-amp devices. Gently fold the wires back into the electrical box and push the new outlet into place. Secure it to the box with the mounting screws. Finally, screw on the new cover plate.
Testing the New Outlet
Return to your electrical panel and flip the breaker back to the “ON” position. Go back to the newly installed outlet and plug in a small device, like a lamp or a phone charger, to confirm it’s working. Gently try to wiggle the plug; it should now feel firm and secure. For more advanced testing, you can use a receptacle tester to check for correct wiring.
For more detailed safety information regarding electrical work, consult reliable resources like Good Housekeeping’s electrical safety tips.
Preventing Future Loose Outlets
Once you’ve addressed a loose outlet, taking steps to prevent a recurrence is crucial for long-term safety and functionality.
Invest in Quality Outlets
When replacing outlets, opt for higher-quality, contractor-grade receptacles. While they cost a bit more upfront, their more robust internal components are designed to withstand more use and last significantly longer, reducing the frequency of replacements and the risk of loose connections.
Avoid Overloading
Be mindful of how many and what type of devices you plug into a single outlet or circuit. Avoid using power strips or multi-plug adapters to power numerous high-wattage appliances from one outlet. If you frequently need more outlets in a particular area, consider having an electrician install additional dedicated circuits.
Regular Inspections
Periodically check your outlets. Pay attention to any that are frequently used. Look for signs of wear, such as scorch marks, cracks in the cover plate, or plugs that don’t feel as snug as they once did. Early detection can prevent minor issues from escalating into major hazards.
Proper Plug Insertion and Removal
Always insert and remove plugs by gripping the plug body, not by pulling on the cord. Yanking on the cord can damage both the plug and the outlet, stressing the internal contacts and leading to premature loosening.
Consider Tamper-Resistant Receptacles
Especially in homes with children, tamper-resistant receptacles (TRRs) are a smart safety upgrade. They have internal shutters that prevent foreign objects from being inserted into the slots, reducing the risk of electrical shock. While not directly related to preventing looseness, they contribute to overall electrical safety.
Common Misconceptions About Loose Outlets
Dispelling common myths about electrical outlets is essential for promoting safety and informed decisions.
“It’s just cosmetic.”
Many people dismiss a loose plug as a minor aesthetic issue. This couldn’t be further from the truth. As discussed, a loose connection is a serious fire hazard and can lead to electrical shock or damage to appliances. It’s a functional problem, not just a visual one.
“I can just bend the prongs.”
Attempting to bend the prongs of a plug to make it fit tighter is a dangerous and ineffective “fix.” While it might temporarily create a slightly tighter connection, it can also damage the plug, the outlet, and lead to an even more unstable and hazardous electrical connection. The prongs are designed to be a specific width and thickness; altering them can create more problems than it solves.
“All outlets are the same quality.”
This is a common misconception, especially when purchasing replacement outlets. There’s a significant difference in quality between a 50-cent outlet and a $5 or $10 outlet. Higher-grade outlets use more durable materials, better internal mechanisms, and are built to last longer and provide a more secure connection. Investing in better quality is a wise decision for safety and longevity.
FAQs About Loose Electrical Outlets
Q1: How often should I replace my electrical outlets?
There’s no strict rule, but generally, outlets in high-use areas may need replacement every 10-15 years, or sooner if they show signs of wear, such as plugs not holding securely, scorch marks, or heat. Outlets in low-use areas might last much longer.
Q2: Can a loose outlet damage my devices?
Yes, absolutely. The intermittent power and voltage fluctuations caused by a loose connection can significantly damage sensitive electronics, leading to malfunction, reduced lifespan, or complete failure of appliances, computers, and charging devices.
Q3: What’s the difference between a loose outlet and a loose plug?
A “loose outlet” refers to the receptacle itself having worn internal contacts or being poorly secured to the wall, causing any plug inserted into it to feel loose. A “loose plug” refers to the prongs of the specific plug (on an appliance cord) being bent, damaged, or poorly constructed, making it fit loosely in any properly functioning outlet.
Q4: Is it safe to use outlet extenders with loose outlets?
No, it is not safe. Plugging an extender into an already loose outlet only compounds the problem by adding more weight and potential draw, increasing the risk of arcing, overheating, and fire. Address the loose outlet first before using any extenders.
Q5: How do I know if my outlet is truly loose or if it’s the plug?
To differentiate, try plugging the same device into several different outlets in your home. If the plug feels loose in all of them, the issue is likely with the plug itself. If the plug fits securely in other outlets but only feels loose in one specific outlet, then the problem lies with that particular outlet.
Addressing outlets not holding plugs securely is more than just a matter of convenience; it’s a critical safety measure for your home. By understanding the causes, recognizing the dangers, and taking appropriate action, you can prevent potential electrical hazards and ensure your electrical system operates safely and efficiently. Whether you choose to tackle the repair yourself with caution and proper knowledge or call in a trusted professional, prioritizing the integrity of your electrical outlets is an investment in your home’s safety and your peace of mind.


