A humming but silent disposal, water backing up in your sink, or a foul odor – these are all tell-tale signs of a problem no homeowner wants to face. A clogged garbage disposal fix is a common DIY task, and while it might seem daunting, most issues can be resolved with a few simple tools and a clear understanding of the process. This comprehensive guide will walk you through everything you need to know, from diagnosing the problem to effective troubleshooting methods and essential preventative measures. Don’t let a jammed disposal disrupt your kitchen routine; empower yourself with the knowledge to tackle it head-on.
Understanding Your Garbage Disposal: How It Works & Common Culprits
Before diving into fixes, it helps to understand what your garbage disposal is and how it functions. Unlike a blender, a garbage disposal doesn’t have blades. Instead, it uses rapidly spinning impellers (often called “shredder plates” or “flywheels”) to force food waste against a grind ring, pulverizing it into tiny particles that can be flushed down the drain with water. It’s a marvel of kitchen convenience, but its efficiency hinges on proper use.
Common Causes of Clogs and Jams
Most garbage disposal problems stem from putting the wrong things down the drain or not using enough water. Here are the usual suspects:
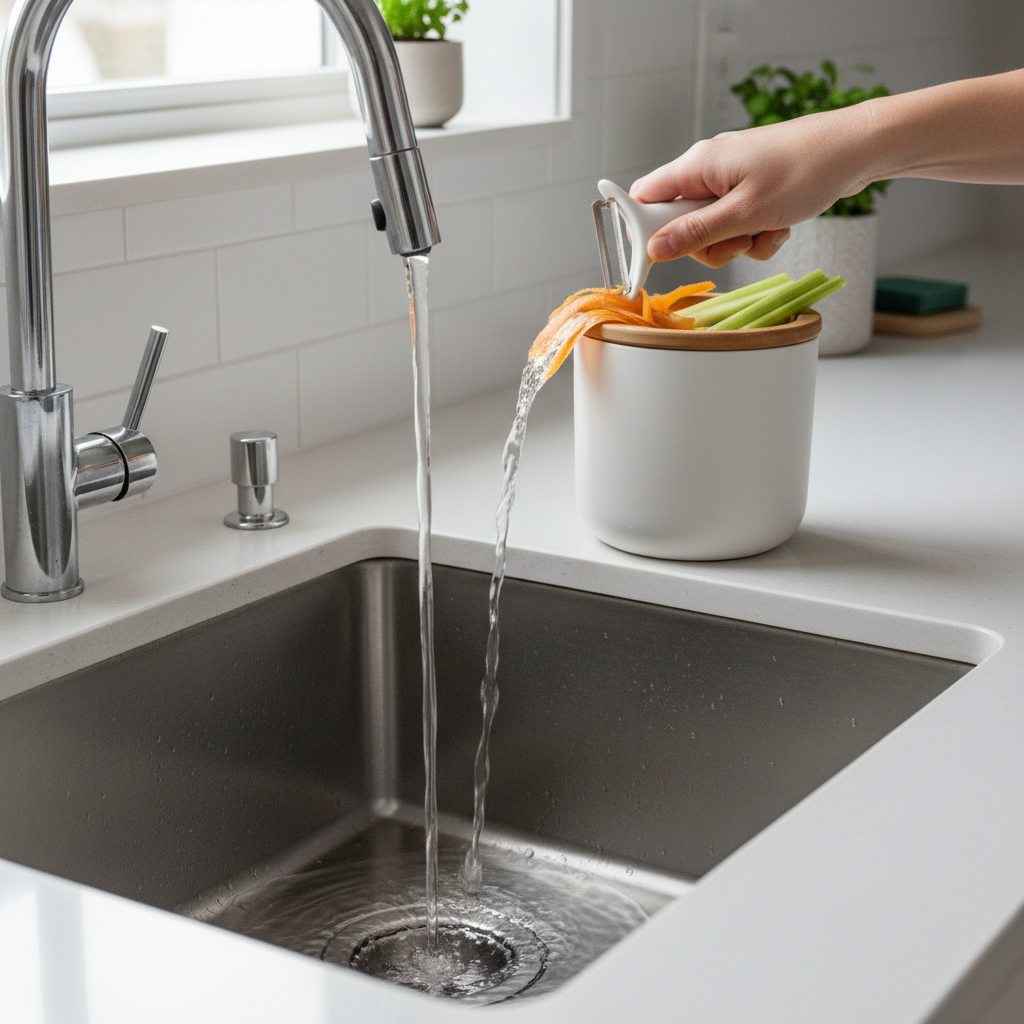
- Fibrous Foods: Celery stalks, asparagus, corn husks, onion skins, banana peels, and potato peels can wrap around the impellers, causing jams.
- Grease and Oil: While liquid when hot, grease solidifies as it cools, coating the disposal’s internal components and drain pipes, leading to blockages.
- Coffee Grounds: Often perceived as harmless, coffee grounds are fine and dense, accumulating in pipes and creating sludge-like clogs.
- Eggshells: The membrane inside eggshells can wrap around the grinding components, and the gritty shells themselves can contribute to blockages.
- Pasta and Rice: These foods expand when exposed to water, potentially swelling in the pipes and causing clogs.
- Hard Items: Fruit pits, bones, and nutshells are too hard for most disposals and can jam the motor or even damage the grinding mechanism.
- Non-Food Items: Silverware, sponges, plastic bags, twist ties, and even small toys accidentally falling into the drain are frequent causes of severe jams.
- Insufficient Water: Without a strong flow of cold water, food particles can’t be flushed away properly, leading to buildup and clogs.
Safety First: Before You Start Any Fix
Working with a garbage disposal involves electricity and moving parts. Your safety is paramount. Always follow these critical rules before attempting any repair:
- TURN OFF THE POWER: This is the most crucial step. Locate your home’s electrical panel (breaker box) and switch off the circuit breaker that controls your kitchen’s power, specifically the disposal. If unsure, turn off the main kitchen breaker or the main house breaker. You can also unplug the unit from the wall outlet under the sink if accessible.
- NEVER USE YOUR HANDS: Even with the power off, never reach your hand into the disposal. Sharp grinding components can still pose a risk, and you could inadvertently turn the power back on.
- USE SAFE TOOLS: Always use tongs, pliers, or an Allen wrench (hex key) to free jams and retrieve objects.
Step-by-Step Clogged Garbage Disposal Fixes
Once you’ve ensured the power is off, you can begin troubleshooting your clogged garbage disposal. We’ll start with the simplest solutions and progress to more involved methods.
The Reset Button Method
Sometimes, your disposal simply overheats or gets overloaded, triggering its internal circuit breaker. This is often the easiest fix.
- Locate the Reset Button: Look on the bottom of your garbage disposal unit. You’ll usually find a small red or black button.
- Press the Button: Firmly press the reset button. You should feel a click.
- Wait and Test: Wait about 10 minutes for the motor to cool down. Then, turn the power back on at the circuit breaker (or plug it back in). Run a strong stream of cold water and turn on the disposal. If it still doesn’t work, proceed to the next step.
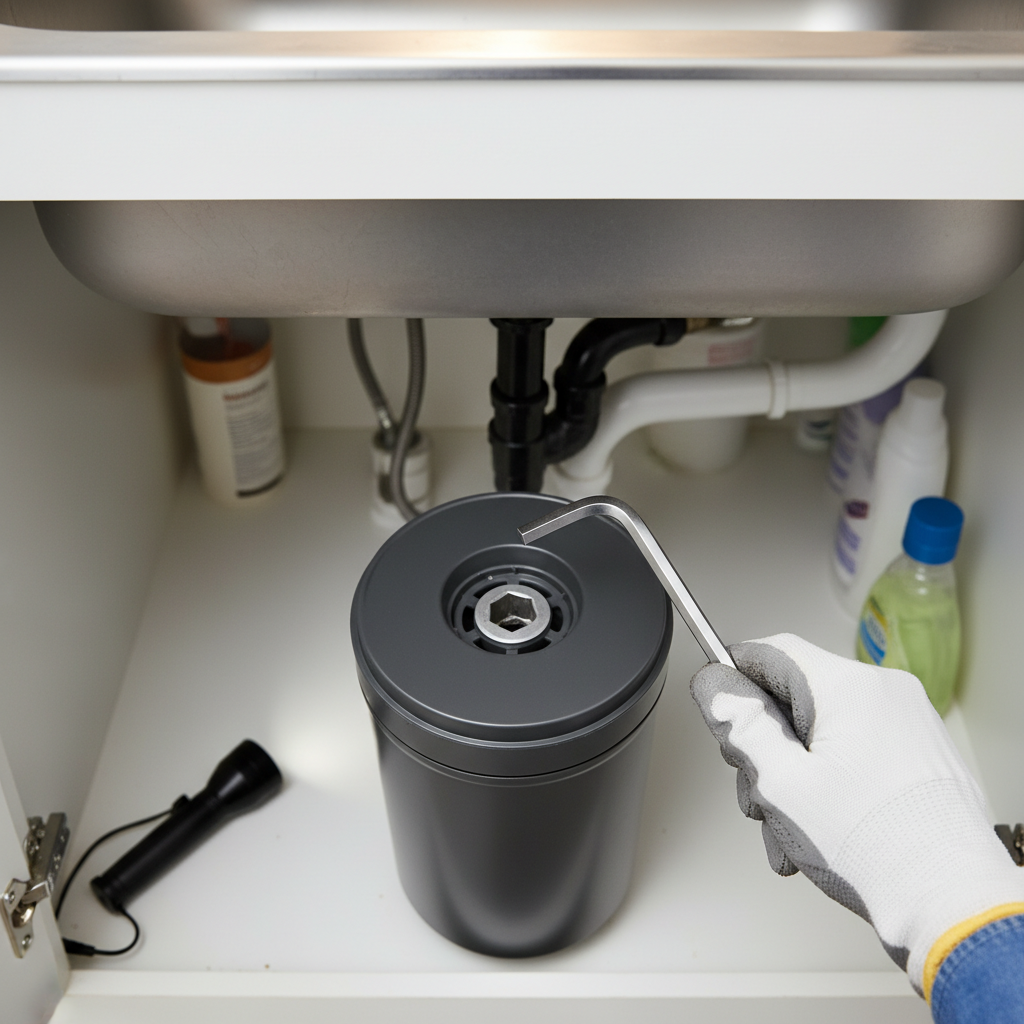
The Allen Wrench (Manual Crank) Method for Jams
If your disposal hums but doesn’t grind, or makes no sound at all after resetting, it’s likely jammed by a foreign object or food buildup. This method requires a 1/4-inch Allen wrench, which usually comes with the disposal unit. If you don’t have one, they’re inexpensive and available at any hardware store.
- Ensure Power is OFF: Reiterate this crucial step.
- Locate the Hex Hole: On the very bottom center of the garbage disposal unit, you’ll find a hexagonal-shaped hole.
- Insert the Allen Wrench: Insert the 1/4-inch Allen wrench into this hole.
- Manually Turn the Motor: Rock the wrench back and forth vigorously, clockwise and counter-clockwise. You might feel resistance at first. The goal is to dislodge whatever is jamming the grinding plates. Continue rocking until you can make a full 360-degree rotation. This indicates the impellers are free.
- Remove Debris: After freeing the motor, look down into the disposal opening with a flashlight. Use tongs or needle-nose pliers (NEVER your hands) to retrieve any visible objects or food debris.
- Reset and Test: Press the reset button on the bottom of the disposal again. Turn the power back on. Run cold water and then turn on the disposal. If it still doesn’t work, you might have a more stubborn clog or a different issue.
Plunger Power: For Drains That Won’t Budge
If the disposal motor runs fine but water is still backing up in the sink, the clog might be further down the drainpipe rather than within the disposal unit itself. A kitchen sink plunger can often clear these blockages.
- Ensure Disposal is Empty: Make sure there are no large food particles remaining in the disposal chamber.
- Seal the Other Drain (if double sink): If you have a double-basin sink, you’ll need to seal the opposite drain opening. You can use a stopper, a wet rag, or even have a helper hold it firmly closed. This creates the necessary suction.
- Fill with Water: Fill the sink with enough water to fully submerge the rubber cup of your plunger.
- Plunge Vigorously: Place the plunger firmly over the disposal drain opening, creating a tight seal. Plunge up and down vigorously for 10-20 seconds.
- Check Drainage: Remove the plunger and see if the water drains. You might need to repeat this process several times.
- Run Water and Disposal: Once the water starts to drain, run cold water down the drain for a minute or two, then turn on the disposal to ensure everything is flushed through.
The Ice & Salt Scrub: A Gentle Cleaning
This method isn’t for severe clogs, but it’s excellent for minor grease buildup, refreshing the disposal, and sharpening the impellers slightly.
- Fill with Ice: Pour a cup or two of ice cubes into the disposal.
- Add Coarse Salt: Add about a 1/2 cup of coarse salt (kosher salt or rock salt) over the ice. The salt acts as an abrasive.
- Run Cold Water: Turn on a steady stream of cold water.
- Activate Disposal: Turn on the garbage disposal and let it run until all the ice and salt are ground up (usually about 30 seconds to a minute). The ice helps solidify grease and scrape off buildup, while the salt provides extra scouring power.
Baking Soda and Vinegar: A Natural Approach (with caveats)
While often touted for drain cleaning, baking soda and vinegar are most effective for minor clogs, odors, or grease buildup, not for dislodging solid jams. They create a fizzy reaction that can help loosen grime. It’s also important to note that this method doesn’t “dissolve” clogs in the way chemical cleaners might claim, and should be used with caution and realistic expectations.
- Clear Standing Water: If there’s standing water in the sink, try to remove as much as possible.
- Pour Baking Soda: Pour 1/2 cup of baking soda directly into the disposal drain.
- Add Vinegar: Follow with 1 cup of white vinegar. You’ll hear a fizzing sound as the two react.
- Let it Sit: Place the stopper in the sink opening and let the mixture sit for 15-30 minutes, or even overnight for tough odors. This allows the fizzing action to work on grease and grime.
- Flush with Hot Water: After the waiting period, remove the stopper and flush the drain with hot tap water for several minutes. While some sources suggest boiling water, it’s generally safer to use hot tap water to avoid potential damage to PVC pipes or further melting grease that can re-solidify further down the line. For more detailed insights into using natural cleaning solutions for your drains, you can refer to resources like Better Homes & Gardens.
When to Call a Professional Plumber
While many garbage disposal issues are DIY-friendly, there are times when it’s best to call in the experts. Don’t hesitate to contact a professional if:
- The Disposal Still Won’t Work: You’ve tried all the troubleshooting steps, but the disposal still won’t turn on, or it hums but remains jammed.
- Persistent Clogs: You’ve cleared the immediate clog, but water continues to back up, indicating a deeper obstruction in your plumbing system.
- Water Leaks: If you notice water leaking from the disposal unit itself, the seals might be damaged, or the unit might be cracked.
- Strange Noises: Grinding sounds when nothing is in the disposal or other unusual noises could indicate internal damage to the motor or grinding plates.
- Multiple Clogged Drains: If your kitchen sink, dishwasher, or other nearby drains are also clogged, it suggests a larger issue in your main drain line, which requires professional attention.
Preventing Future Garbage Disposal Clogs
The best clogged garbage disposal fix is prevention. By adopting good habits, you can significantly extend the life of your unit and avoid future headaches.
The Golden Rules of Disposal Use
- Use Plenty of Cold Water: Always run a strong stream of cold water before, during, and for at least 30 seconds after grinding food waste. Cold water helps solidify grease, allowing it to be chopped into tiny pieces before it can coat your pipes.
- Grind Slowly and in Small Batches: Don’t overload the disposal. Feed food waste gradually, allowing the unit to fully process each batch before adding more.
- Avoid Problematic Foods: Steer clear of fibrous foods (celery, corn husks, onion skins, banana peels), starchy foods (pasta, rice), greasy foods, coffee grounds, eggshells, and hard items (bones, fruit pits).
- Don’t Pour Grease Down the Drain: This is arguably the biggest culprit for drain clogs. Scrape grease and oil into the trash or a disposable container.
- Regular Cleaning and Maintenance:
- Ice Cubes: Grind a cup of ice cubes weekly or bi-weekly. This helps scrape away minor buildup and keeps the impellers sharp.
- Citrus Peels: After grinding ice, throw in a few citrus peels (lemon, lime, orange) to freshen the scent and help clean the unit.
- Dish Soap: Occasionally, add a few drops of dish soap while running cold water and the disposal to help cut through grease residue.
- Run It Regularly: Even if you don’t have food waste, run your disposal with cold water for 30 seconds every few days to prevent rust and keep the parts moving freely.
Frequently Asked Questions About Garbage Disposal Clogs
Can I put boiling water down a clogged garbage disposal?
No, it’s generally not recommended. While hot water might seem to help melt grease, boiling water can damage PVC pipes and melt plastic components within the disposal itself. It can also push grease further down the drain where it cools and re-solidifies, creating a more severe clog. Hot tap water is safer for flushing after natural cleaning methods.
Is it safe to use chemical drain cleaners in a garbage disposal?
Most plumbers and manufacturers strongly advise against using chemical drain cleaners in garbage disposals. The harsh chemicals can corrode the rubber seals and plastic components of the disposal, leading to leaks or premature failure. They can also create dangerous fumes when mixed with food waste or other chemicals. Stick to mechanical methods or natural solutions like baking soda and vinegar.
My garbage disposal hums but doesn’t grind. What does that mean?
A humming sound indicates that the motor is receiving power but cannot spin the impellers. This is a classic sign of a jam. Refer to the “Allen Wrench (Manual Crank) Method” above to free the impellers.
How long should I run the water after using the disposal?
You should run cold water for at least 30 seconds after turning off the disposal. This ensures that all food particles are thoroughly flushed through the disposal and into the main drain line, preventing buildup and clogs further down the pipes.
What are common non-food items that clog disposals?
Accidental intruders often include silverware (spoons, forks), small bones, plastic bags, twist ties, sponges, bottle caps, and even small toys. Always check the disposal before turning it on, especially if children are around.
Conclusion
A clogged garbage disposal can be a significant inconvenience, but with the right approach, most issues can be resolved quickly and safely. By understanding the common causes, following proper safety precautions, and utilizing the step-by-step troubleshooting methods outlined in this guide, you can confidently tackle many disposal problems yourself. Remember, prevention is key; adopting good habits will keep your disposal running smoothly for years to come. If you encounter a problem that seems beyond your DIY capabilities, don’t hesitate to call a qualified plumber to ensure your plumbing system remains in top condition.


