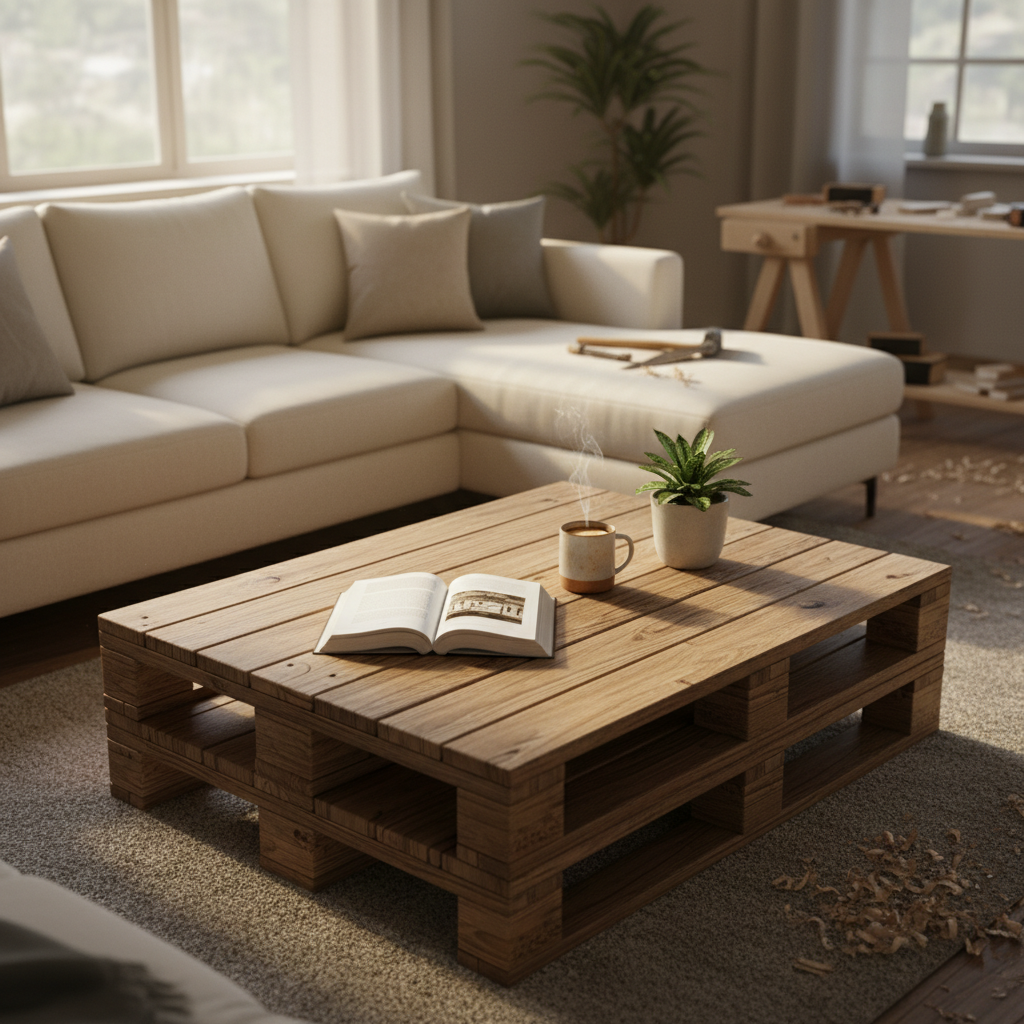
Ever walked into a furniture store, admired a beautiful rustic coffee table, then gasped at the price tag? Yeah, me too. That’s exactly what set me on a journey to build my own. And let me tell you, there’s something incredibly satisfying about transforming humble, discarded pallet wood into a piece of furniture that becomes the centerpiece of your living room. It’s not just about saving money; it’s about crafting something with character, a story, and a whole lot of heart.
If you’re reading this, you probably have that itch too – the urge to create, to reuse, and to add a unique, personal touch to your home. Well, you’re in the right place! I’m going to walk you through my own experience of building a stuing reclaimed pallet wood coffee table. We’ll cover everything from finding the right pallets to putting on the final coat of finish. Don’t worry if you’re not a seasoned woodworker; I started pretty much from scratch, and I’ll share all the tips and tricks I picked up along the way to make your project a success.
Why Pallet Wood? More Than Just Free Lumber!
Before we dive into the nitty-gritty, let’s talk about why pallet wood is such a fantastic material for DIY projects. For starters, it’s often free or very cheap. Who doesn’t love that? But beyond the cost, there’s a unique charm that comes with reclaimed wood. Every knot, every weathered patch, every nail hole tells a story, giving your furniture a character that you simply can’t buy off a shelf.
It’s also an incredibly sustainable choice. Instead of these pallets ending up in a landfill, you’re giving them a second life. Plus, it’s a great way to challenge yourself, learew skills, and truly make a piece that reflects your style. My motivation was a blend of saving money, loving the rustic aesthetic, and wanting to prove to myself that I could actually build something substantial.
Safety First: Choosing and Preparing Your Pallets
This is arguably the most important step, so please pay close attention! Not all pallets are created equal, and some can even be hazardous.
- Look for the “HT” Stamp: Always, always, *always* choose pallets marked with “HT.” This means the wood has been Heat Treated to prevent pest infestations. Avoid pallets marked with “MB” (Methyl Bromide), as this indicates they’ve been chemically treated, and you definitely don’t want those chemicals in your home. If there’s no stamp, it’s best to err on the side of caution and pass on it.
- Inspect for Contamination: Think about where the pallet has been. Has it carried food products? Chemicals? Look for stains, spills, or any unusual odors. I once found a pallet that smelled faintly of rotten fruit – hard pass! Your coffee table will be in your living space, so make sure the wood is clean and safe.
- Check for Structural Integrity: While a little wear and tear adds character, avoid pallets with excessive rot, severe cracks, or extensive insect damage. You want sturdy wood to build from.
- Source Responsibly: Ask businesses if you can take their discarded pallets. Many are happy to get rid of them. Construction sites, industrial areas, and even some supermarkets are good places to look. Just make sure you ask permission!
Once you’ve got your pallets home, give them a good initial cleaning. A stiff brush, some soap, and water will do wonders. Let them dry thoroughly before you start dismantling.
Gathering Your Tools & Materials
You don’t need a professional workshop, but a few key tools will make your life a lot easier:
Tools:
- Safety Gear: Gloves, safety glasses, and hearing protection are non-negotiable. Pallet wood can be stubborn and nails can fly.
- Pry Bar & Hammer: For dismantling. A dedicated pallet buster tool can be a game-changer if you plan on doing a lot of pallet projects.
- Circular Saw or Jigsaw: For cutting boards to length. A miter saw is fantastic if you have one, but not essential.
- Orbital Sander: Absolutely vital for getting a smooth, splinter-free finish. Stock up on various grits (80, 120, 220).
- Drill/Driver: For pre-drilling holes and driving screws.
- Tape Measure, Pencil, Speed Square: For accurate marking and cutting.
- Clamps: Essential for holding pieces together while gluing or screwing.
Materials:
- Pallet Wood: At least 2-3 pallets should be enough for a standard coffee table, but grab an extra just in case!
- Wood Glue: High-quality wood glue for strong joints.
- Wood Screws: Various lengths, suitable for outdoor use if you’re plaing on putting the table outside eventually (though usually not for coffee tables). I used 1.5-inch and 2.5-inch screws.
- Wood Filler (Optional): For filling larger gaps or nail holes if you want a smoother finish.
- Stain or Finish: Polyurethane, tung oil, Danish oil, or wax – choose based on the look and durability you desire.
- Shop Rags/Applicators: For applying finishes.
Dismantling the Pallets: The Grunt Work
This is often the most frustrating part of the process, but crucial for getting usable wood. My first time, I just went at it with a hammer and pry bar, which resulted in a lot of split boards and bent nails. Here’s what I’ve learned:
- The “Sawzall” Method: My preferred technique. Use a reciprocating saw (Sawzall) with a metal-cutting blade to cut through the nails that coect the deck boards to the stringers. It’s fast, relatively clean, and saves a lot of wood. Just be careful!
- The Pry Bar Method: If you don’t have a Sawzall, a good pry bar and hammer can work. Try to work slowly and methodically, prying up one board at a time. Prying near the stringer where the nail is can help prevent splitting.
- Remove ALL Nails: Once the boards are separated, spend time removing all the nails. A pair of pincers or vice grips is excellent for this. Any remaining metal can ruin your saw blades or sander pads later.
Once dismantled, sort your boards. Some will be perfect, some will have interesting imperfections, and some might be too damaged to use. Embrace the imperfections – they add character!
Designing Your Table: Form Meets Function
Before cutting, sketch out your design. Think about the dimensions that fit your living space. Do you want a rectangular, square, or even a round top? How tall should it be? Will it have a lower shelf for storage? My design was a simple rectangular top with sturdy legs and a lower slatted shelf.
- Dimensions: Standard coffee tables are usually 16-18 inches tall. Mine ended up around 17 inches, which felt just right with my sofa. The top was 40×24 inches.
- Legs: Will they be chunky, slender, or industrial? I opted for solid, square legs made from stacked pallet wood.
- Support Structure: How will the top attach to the legs? How will the lower shelf be supported? Simple aprons (horizontal pieces coecting the legs) are usually sufficient.
Milling Your Wood: Getting It Ready
Now that you have your individual boards, it’s time to prepare them. This step significantly impacts the final look and feel of your table.
- Rough Sanding: Start with 80-grit sandpaper on your orbital sander. This removes the surface grime, splintery bits, and starts to reveal the grain. Don’t press too hard; let the sander do the work.
- Trimming Edges: Use your circular saw or miter saw to cut off any severely damaged ends or edges. You want relatively straight edges for joinery.
- Planing (Optional but Recommended): If you have access to a thickness planer, ruing the boards through it can create perfectly flat and smooth surfaces, giving your reclaimed wood a more refined look. However, many DIYers skip this to keep the rustic charm and reduce tool requirements. I didn’t have a planer for my first table, and it still looked great!
- Final Sanding: Progress to 120-grit, then 220-grit sandpaper. This will give you a wonderfully smooth surface, ready for finishing. Don’t skip the higher grits; they make a huge difference in how the finish absorbs and how the table feels to the touch.
Building the Frame: The Foundation
This is where your table starts to take shape.
- Cut Legs and Aprons: Cut your leg pieces to the desired height (e.g., 17 inches). Cut your apron pieces to coect the legs. For a 40×24 inch top, you might have two 34-inch aprons (for the long sides) and two 18-inch aprons (for the short sides), leaving space for the legs.
- Assemble Leg Assemblies: Attach the short aprons between two legs using wood glue and screws (pre-drill to prevent splitting!). Make sure they are square. You’ll end up with two ‘H’ shaped assemblies.
- Coect the Assemblies: Attach the long aprons to coect your two ‘H’ assemblies, again using glue and screws. Now you have a sturdy rectangular frame. Check for squareness after each coection. Clamps are your best friend here!
Creating the Tabletop: The Star of the Show
- Lay Out Boards: Arrange your prepared pallet boards on a flat surface until you’re happy with the look and fit. Mix and match different widths and grains for visual interest.
- Join Boards: There are several ways to join them. For a rustic look, butt joints with glue and screws from underneath (or pocket holes if you have a Kreg Jig) work well. For added strength and a cleaner top, you could use biscuits or splines, but that’s more advanced. I opted for simply gluing the long edges of the boards together, clamping them tightly, and reinforcing with a few screws from the underside into a couple of cross-battens.
- Attach to Frame: Once your tabletop is one solid piece, center it on your frame. Secure it from the underside using screws driven up through the apron pieces into the tabletop. This allows for some wood movement with temperature/humidity changes.
- Optional Lower Shelf: If you’re adding a lower shelf, cut and sand the shelf boards. Attach them to small ledger strips (thin pieces of wood) screwed to the inside of the aprons, or directly screw them to cross-braces between the lower parts of the legs.
Finishing Touches: Bringing Out the Beauty
This step truly transforms your project from raw wood into a beautiful piece of furniture.
- Final Sanding: Yes, more sanding! Do one last light pass with 220-grit sandpaper to remove any handling marks or raised grain. Wipe away all dust with a tack cloth or a damp rag.
- Apply Finish: This is where your coffee table’s character truly shines.
- Polyurethane: My personal choice for durability. It creates a hard, protective layer. Apply thin coats, sanding lightly with 320-grit sandpaper between coats for a super smooth finish. I usually do 3-4 coats.
- Tung Oil or Danish Oil: These penetrate the wood, giving a more natural, hand-rubbed look. They are less protective than poly but easier to repair.
- Wax: For a soft, matte finish. Offers minimal protection but enhances the wood’s natural feel.
- Stain (Optional): If you want to change the color of the wood, apply wood stain *before* your protective finish. Always test on a scrap piece first!
- Allow to Cure: Let the finish cure completely according to the manufacturer’s instructions before placing anything on your new table. This can take several days to a week.
My Personal Takeaways & Tips
Building this coffee table was an amazing learning experience. Here are a few things I learned the hard way, so you don’t have to:
- Patience is Key: Don’t rush any step, especially sanding and finishing. The quality of your prep work directly impacts the final result.
- Embrace Imperfections: Reclaimed wood isn’t perfect, and that’s its charm! Don’t stress over every little ding or nail hole. They add character.
- Test Finishes: Always test your chosen stain or finish on a scrap piece of the same wood before applying it to your actual table. Colors can look very different on pallet wood than oew lumber.
- Measure Twice, Cut Once: This old adage holds true. Double-check all your measurements before making any cuts.
- Ask for Help: If you get stuck, there are tons of online resources, forums, and YouTube videos. Don’t be afraid to look for guidance.
Conclusion: Your Own Piece of Reclaimed Art
And there you have it! The journey from a stack of discarded pallets to a beautiful, functional coffee table is incredibly rewarding. Every time I look at my table, I don’t just see a place to put my coffee cup; I see the effort, the learning, and the satisfaction of creating something with my own two hands. It’s a conversation starter, a unique piece of home decor, and a testament to the beauty of reclaimed materials.
I genuinely hope this guide inspires you to start your own pallet wood adventure. It might seem daunting at first, but with a bit of patience, the right tools, and a willingness to learn, you’ll be amazed at what you can achieve. Go on, give it a try – you’ll be glad you did!


