Ever gazed at those gorgeous kitchen backsplashes on Pinterest, then quickly scrolled away thinking, “Too complicated, too expensive, not for me”? Well, let me tell you, I’ve been there! My kitchen felt a bit… bland. It was perfectly functional, but it lacked that spark, that personal touch that makes a house truly feel like home. And while I craved a fresh look, the thought of traditional tiling – with all its mortar, grout, and precise cuts – honestly terrified me. That’s when I stumbled upon the magic of peel and stick backsplash tiles. And let me tell you, it was a game-changer!
If you’re looking for a quick, affordable, and surprisingly satisfying way to transform your kitchen (or bathroom, or laundry room!), you’ve come to the right place. This isn’t just a generic guide; it’s my personal walkthrough, filled with the tips and tricks I picked up along the way, the little “aha!” moments, and even a few “oops!” that taught me valuable lessons. So, grab a cup of coffee, and let’s dive into making your kitchen backsplash dreams a reality – no professional tiler required!
Why Peel and Stick? My Kitchen’s Glow-Up Story
For a long time, my kitchen backsplash was just plain painted drywall. Functional, yes. Inspiring? Not so much. I wanted something that would add texture, a bit of shine, and reflect my style without breaking the bank or requiring weeks of messy work. Traditional tiles felt like a huge commitment, both in terms of cost and the potential for DIY disaster. I’m pretty handy, but tiling seemed like a whole different beast.
Then, during a late-night internet scroll (you know the drill!), I saw an ad for peel and stick tiles. My first thought was skepticism. “Can they really look good? Will they last? Won’t they look… cheap?” But the more I researched, the more intrigued I became. People were raving about their ease of installation and how much they loved the finished look. Plus, the price point was incredibly appealing. I figured, worst-case scenario, I peel them off. Best-case? A brand new kitchen vibe!
I took the plunge, ordered some beautiful subway tile-style sheets, and prepared for my weekend project. What I discovered was a surprisingly straightforward process that delivered stuing results. It wasn’t entirely without its learning curve – I definitely had a few moments of “what have I done?!” – but armed with a bit of patience and the right tools, it was genuinely enjoyable. My kitcheow has that ‘wow’ factor I was craving, and I get compliments all the time. The best part? I did it myself!
Gather Your Arsenal: What You’ll Absolutely Need
Before you even think about peeling that first backing, let’s make sure you’ve got all your tools ready. Trust me on this; there’s nothing worse than being halfway through a project and realizing you need to run to the store. Here’s my essential list:
- Peel and Stick Tiles: Obviously! Make sure you measure your area carefully and buy about 10-15% extra for cuts and mistakes.
- Measuring Tape: For accurate measurements (no surprises there!).
- Pencil: For marking your cuts.
- Level: Non-negotiable! A straight line is crucial for a professional look. I used a long spirit level.
- Utility Knife with Fresh Blades: Essential for clean cuts. New blades make a huge difference.
- Straight Edge or Ruler: To guide your utility knife for perfectly straight lines.
- Scissors: Handy for smaller, less precise cuts or trimming edges.
- Clean Rags/Microfiber Cloths: For prepping the surface.
- Degreaser/Cleaner: To ensure your surface is spotless.
- Sponge or Smoother Tool: To press the tiles firmly and remove air bubbles. A small rubber roller or even a credit card wrapped in a cloth works too.
- Optional: Caulk/Sealant Gun & Clear Caulk: If you want to seal edges, especially around sinks or stove areas, for extra water resistance and a finished look.
Prep Work is Key (Seriously, Don’t Skip This!)
This might be the most crucial step, and it’s where many first-timers (including past me!) can go wrong. A perfectly prepared surface is the secret to tiles that stick well and look fantastic for years to come.
- Clean, Clean, Clean: Your wall needs to be immaculate. Grease, dust, food splatter – anything – will prevent the adhesive from bonding properly. Use a good degreaser (like TSP substitute or even just dish soap and water) and scrub that area thoroughly. Rinse well and let it dry completely.
- Smooth Surface: Peel and stick tiles are pretty forgiving, but they will show imperfections on the wall underneath. If you have any holes or bumps, patch and sand them smooth. My walls were pretty good, but I did a quick wipe-down to remove any leftover dust from previous projects.
- Measure Twice, Cut Once (or Just Measure for Now): Determine your starting point. I highly recommend starting from the center of your most visible wall section and working outwards. This ensures symmetry and that any partial tiles are less noticeable. Or, if you have a clear corner, that can work too. Use your level to draw a straight horizontal line where the top edge of your first row of tiles will sit. This is your anchor! I can’t stress enough how important this initial line is; it dictates the straightness of every tile that follows.
The Installation Dance: Step-by-Step to a Stuing Backsplash
Alright, tools ready, walls prepped, now for the fun part! Take a deep breath; you’ve got this.
1. The Starting Line
Remember that perfectly level line you drew? That’s where your first full tile will go. Peel off a small section of the backing from your first tile sheet, align it precisely with your marked line and the starting corner (or center point), and gently press it into place. Don’t peel the whole backing off yet! This allows for minor adjustments.
2. Peel, Stick, Press!
Once you’re happy with the initial alignment, slowly peel the rest of the backing off while simultaneously pressing the tile firmly onto the wall. Use your hand or a smoother tool to press out any air bubbles, working from the center outwards. Overlap the edges of the tiles slightly if they are designed to interlock (most are). This creates that seamless, grouted look.
3. Mastering the Cuts: Straight Lines and Tricky Outlets
This is where the utility knife and straight edge become your best friends. For straight cuts, measure the gap, mark the tile (on the front or back, depending on visibility), place your straight edge along the mark, and score deeply with your utility knife. Multiple scores will help you get a clean break. Some tiles are thin enough to cut with heavy-duty scissors, but I found the utility knife gives a much cleaner edge for most designs.
Dealing with outlets and switches might seem intimidating, but it’s totally doable. First, turn off the power to those outlets at your breaker box (safety first!). Then, remove the cover plates. Hold your tile sheet up to the outlet, carefully mark the outline of the outlet on the tile. Using your utility knife, cut out the marked area. You might need to do a few small cuts and trim to get it just right. Remember, the outlet cover will hide minor imperfections, so don’t stress too much about perfection here.
4. Working Your Way Up and Around
Continue working in rows, aligning each new tile sheet with the one before it. Always use your level periodically to ensure you’re still going straight, especially if you’re not interlocking. Small deviations can become very noticeable over time. Take your time, don’t rush. If a tile isn’t quite right, you usually have a minute or two to gently pull it off and reposition it before the adhesive fully sets.
Finishing Touches and Post-Installation TLC
Once all your tiles are up and you’ve admired your handiwork, there are just a couple more steps to really make it shine.
1. The Final Press
Go over every single tile with your smoother tool or a clean sponge, applying firm, even pressure. This ensures maximum adhesion and helps prevent edges from lifting later on.
2. To Caulk or Not to Caulk?
For most peel and stick backsplashes, no grouting is needed, which is one of their biggest perks! However, you might want to consider applying a thin bead of clear or color-matched silicone caulk along the top edge of your backsplash, where it meets the countertop, and around any outlets. This isn’t strictly necessary for all tiles, but it offers an extra layer of protection against moisture, especially in high-splash areas like near the sink, and gives a very polished, finished look. I opted for clear caulk around my sink, and it really sealed the deal (pun intended!).
3. Maintenance Magic
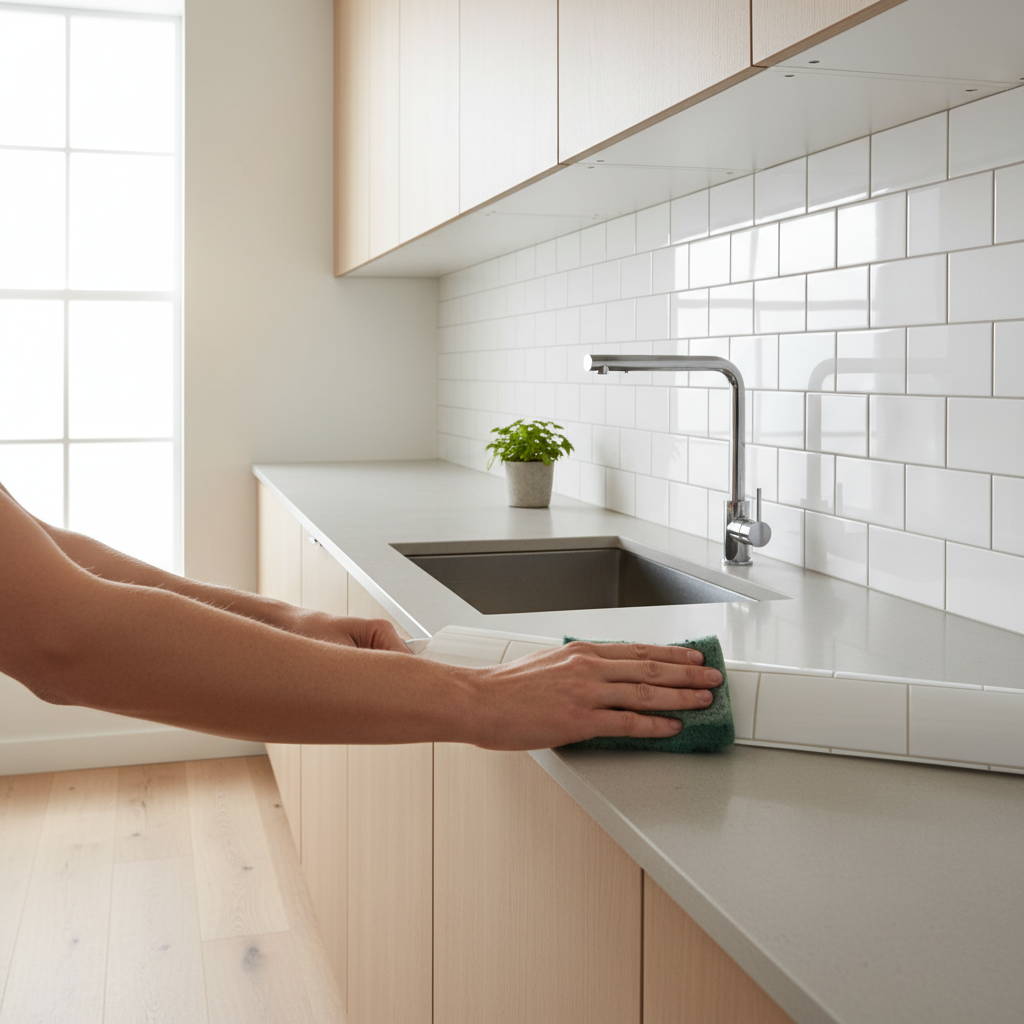
Cleaning peel and stick backsplashes is super easy. Just wipe them down with a damp cloth and mild soap. Avoid abrasive cleaners or harsh scrubbing pads, as they can damage the surface or the adhesive.
Conclusion: You Did It!
There you have it! Installing peel and stick backsplash tiles might seem daunting at first, but with a little preparation, the right tools, and a dash of patience, you can absolutely achieve a professional-looking result. I went from a bland, uninspired kitchen to one that feels fresh, modern, and uniquely mine – all thanks to a weekend project and some clever tiles.
The sense of accomplishment you get from a DIY project like this is truly rewarding. So, if you’ve been dreaming of a kitchen refresh but hesitated at the thought of traditional tiling, I wholeheartedly encourage you to give peel and stick a try. It’s an accessible, budget-friendly way to inject personality and style into your home. Now, step back, admire your beautiful new backsplash, and enjoy that well-deserved feeling of “I made this!”
