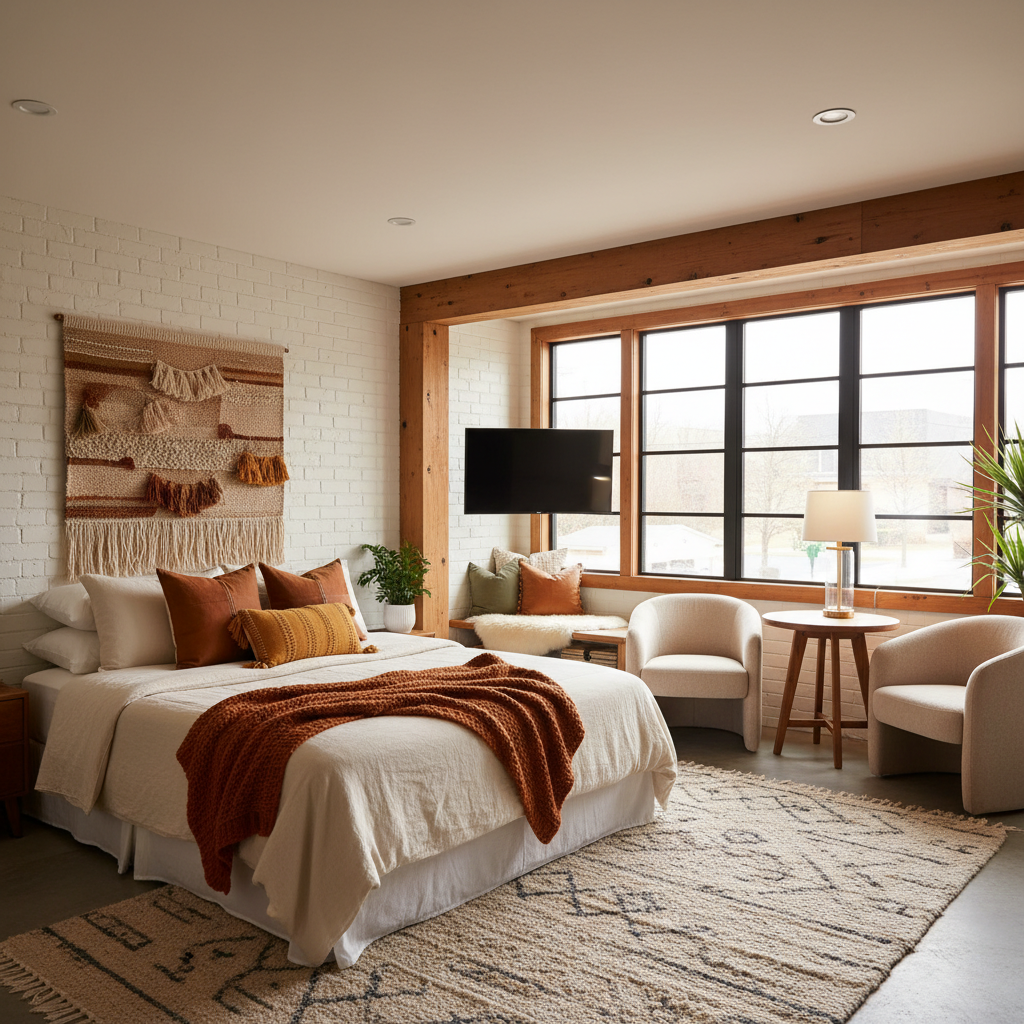
Ever look at your garage and think, “There’s so much wasted potential here!”? You’re not alone! Many homeowners, myself included, have envisioned transforming that dusty, underutilized space into something truly special. And what could be more special than a beautiful, cozy guest suite? It’s not just about adding value to your home; it’s about creating a welcoming haven for friends and family, or even a potential income stream.
I remember standing in my own garage, surrounded by tools and forgotten boxes, dreaming of soft lighting, a comfy bed, and the gentle hum of happy guests. The journey from that vision to reality was an adventure, filled with learning curves, a few unexpected challenges, and immense satisfaction. This article isn’t just a list of steps; it’s a shared experience, offering insights and practical advice I picked up along the way to help you embark on your own garage-to-guest-suite transformation with confidence.
Is a Garage Conversion Right for You? Initial Considerations
Before you even think about swinging a hammer, there are some crucial groundwork steps. Trust me, skipping these can lead to headaches and costly delays down the line.
-
Check Local Zoning Laws & Permits
This is probably the most important first step. Garage conversions often fall under what’s called an “Accessory Dwelling Unit” (ADU) or a similar classification. Your local municipality will have specific rules about what you can and caot do. Things like minimum lot size, parking requirements, and even the number of occupants might be regulated. You’ll definitely need permits for structural changes, electrical work, and plumbing. I caot stress enough: DO NOT SKIP THE PERMITS! Doing so can lead to fines, forced demolition, or issues when you try to sell your home.
-
Assess Your Budget
Conversions aren’t cheap, but they are often more affordable than a traditional extension. Think about everything: architectural plans, permits, demolition, framing, insulation, plumbing, electrical, flooring, windows, doors, finishes, and furniture. Get multiple quotes from contractors for different parts of the job, or for the whole project if you’re going full-service. Always add a 15-20% contingency fund for unexpected issues – because they almost always pop up!
-
DIY vs. Professional Help
Are you a seasoned DIYer, or do you prefer to hand things over to experts? While some cosmetic aspects can be DIY, critical elements like electrical, plumbing, and structural changes often require licensed professionals for safety and code compliance. My advice? Tackle what you’re confident in, but don’t hesitate to bring in the pros for the big stuff. It’s an investment in safety and peace of mind.
-
Evaluate the Existing Structure
Is your garage’s foundation solid? Are the walls in good shape? Is the roof sound? You might need to address issues like dampness, cracks, or an uneven floor before you start the conversion. This is where a structural engineer’s opinion can be invaluable.
Plaing Your Dream Layout: More Than Just Walls
Once you’ve got the green light on the initial checks, it’s time for the fun part: designing! This is where your vision truly starts to take shape.
-
Functional Floor Plan
Think about what your guests will need. A bedroom is a given, but what about a small bathroom? A kitchenette with a mini-fridge, microwave, and coffee maker can make a huge difference to their comfort and independence. Sketch out different layouts. Consider how natural light will enter and how you’ll maximize the available square footage. Remember, garages are often long and narrow, so clever design is key.
-
Natural Light & Ventilation
A garage typically has one large opening and maybe a small window or two. To make it feel like a true living space, you’ll want to add more windows or even a skylight. Not only does this flood the space with natural light, but it also provides much-needed ventilation. Think about window placement for privacy and views.
-
Insulation & Climate Control
Garages are rarely insulated to residential standards. This is a non-negotiable step for comfort. You’ll need to insulate the walls, ceiling, and especially the floor (often a concrete slab). Good insulation keeps the space warm in winter and cool in summer, drastically improving the guest experience and saving on energy bills. Consider adding an independent HVAC unit or tying into your existing system if feasible.
-
Plumbing & Electrical Upgrades
These are the core utilities that transform a storage space into a living space. If you’re adding a bathroom or kitchenette, you’ll need to ruew water supply and drainage lines. Electrical wiring will also need a complete overhaul to accommodate lighting, outlets, and appliances. This is definitely a job for licensed professionals.
-
Soundproofing Considerations
If your garage is attached to your main home, you might want to consider some soundproofing to ensure privacy for both your guests and your family. Adding extra insulation or specific sound-dampening drywall can make a big difference.
The Nitty-Gritty: Essential Steps for a Smooth Conversion
Now that the plaing is done, let’s get into the physical transformation. This is where you really see progress!
-
Clearing Out & Demolition
First, empty everything out! This is a great opportunity to declutter. Then, any existing garage door mechanisms, old shelving, or non-load-bearing walls can be removed. Be mindful of dust and debris, and wear appropriate safety gear.
-
Foundation & Flooring
Most garage floors are concrete slabs, which can be cold and hard. To make it cozy, you’ll want to raise the floor or add substantial insulation. A common method is to build a subfloor over the concrete, allowing for insulation and creating a warmer, more comfortable surface for your final flooring (laminate, vinyl, carpet, or engineered wood all work well).
-
Framing & Walls
If you’re creating separate rooms (like a bedroom and bathroom), you’ll need to frame new interior walls. The opening where the garage door once stood will also need to be framed and sealed. This might involve building a new wall and installing a new exterior door and perhaps a window or two.
-
Windows & Doors
Install your new windows and exterior doors. This dramatically changes the look and feel from the outside and brings in that crucial natural light. Consider energy-efficient options to keep your guest suite comfortable year-round.
-
Rough-Ins (Electrical & Plumbing)
Before closing up the walls, the electricians and plumbers will do their “rough-in” work. This means ruing all the wires, pipes, and ducts to their designated locations. This stage typically requires inspection by your local building department to ensure everything meets code.
-
Insulation & Drywall
Once the rough-ins are approved, it’s time to insulate! Fill all wall cavities and the ceiling with appropriate insulation. After insulation, drywall goes up, creating the smooth surfaces ready for paint and finishes. This is another stage that transforms the space from a construction zone to something resembling a room.
Bringing the ‘Cozy’ to Life: Finishing Touches and Decor
This is where your guest suite truly earns the “cozy” title. The finishing touches make all the difference, creating an inviting and comfortable atmosphere.
-
Warm Paint Colors
Opt for warm, neutral tones like soft greys, creams, or light blues. These colors create a calming backdrop and make the space feel larger and more inviting. Accent walls can add a touch of personality.
-
Layered Lighting
Don’t rely on a single overhead light. Incorporate various light sources: recessed lighting for general illumination, bedside lamps for reading, and perhaps a stylish floor lamp to add ambiance. Dimmers are a fantastic addition for setting the perfect mood.
-
Comfortable & Space-Saving Furniture
Choose a comfortable bed as the focal point. If space is tight, consider a full-size bed instead of a king, or even a pull-out sofa if you need ultimate flexibility. Add a small armchair, a compact desk, and a wardrobe or built-in shelving for guest storage. Multifunctional furniture is your friend here!
-
Soft Textiles & Textures
This is key to coziness! Layer up with plush rugs, inviting throws, and decorative pillows. Choose curtains that block light for sleeping but can be easily opened to let the sunshine in. Good quality bedding is essential for a luxurious feel.
-
Thoughtful Kitchenette & Bathroom Essentials
In the kitchenette, provide a mini-fridge, microwave, coffee maker, and some basic dishes and cutlery. For the bathroom, ensure fresh towels, complimentary toiletries, and good ventilation. Little touches like a small plant or a scented candle can elevate the experience.
-
Integrate with the Exterior
Think about how the exterior of your new guest suite looks. A nice pathway, some simple landscaping, and perhaps an outdoor light can help it blend seamlessly with the rest of your home and make guests feel truly welcomed from the moment they arrive.
My Top Tips for a Stress-Free Conversion
Having navigated this journey myself, here are a few extra nuggets of wisdom I want to share:
- Don’t Rush the Plaing: Spend ample time on design and getting permits. Haste makes waste, especially in construction.
- Over-Communicate with Contractors: Ensure everyone is on the same page. Ask questions, get updates, and clarify expectations.
- Protect Your Main Home: Construction is messy. Put up dust barriers and protect your living spaces from dust and debris.
- Think About Access: How will guests enter? Will it be a separate entrance? Ensure it’s well-lit and easy to navigate.
- Prioritize Quality Materials: While budgeting is important, don’t skimp on insulation, windows, or crucial structural elements. These are long-term investments.
- Document Everything: Keep records of permits, plans, invoices, and communication. This is invaluable for future reference or if any issues arise.
Conclusion
Converting a garage into a cozy guest suite is a significant undertaking, but the rewards are truly immense. From the initial spark of an idea to the joy of seeing your first guests settle in, it’s a journey that adds tangible value and comfort to your home. It transformed what was once an overlooked space into a vibrant, welcoming addition, and I couldn’t be happier with the outcome.
So, if you’re staring at your garage, dreaming of what could be, take that first step. Do your research, plan meticulously, and don’t be afraid to get a little help along the way. Your future guests (and your home’s value) will thank you for creating that perfect, cozy retreat.


