Introduction: Your Kitchen’s Secret Weapon for a Budget Glow-Up
Ever walked into your kitchen and felt like something was… off? Maybe it’s not the cabinets, or the countertops, but that one area that ties it all together: the backsplash. A tired, dated, or just plain boring backsplash can drag down the entire vibe of your kitchen. And let’s be honest, replacing it entirely with new, expensive tiles and professional installation can feel like a daunting and costly endeavor. But what if I told you there are fantastic, budget-friendly ways to give your backsplash a complete refresh without breaking the bank?
I’ve been there. My first apartment had the most uninspiring beige tiles, and my friend’s kitchen was stuck in the 80s with avocado green grout. We both dreamed of a modern, fresh look but had student loans breathing down our necks. That’s when we started exploring the world of DIY backsplash makeovers. And let me tell you, the results can be astonishing! You don’t need to be a seasoned contractor or an interior designer to achieve a stuing transformation. All you need is a little creativity, some elbow grease, and the right budget-friendly strategy. Ready to dive in? Let’s refresh your kitchen!
Paint It! The Simplest Splash of Color
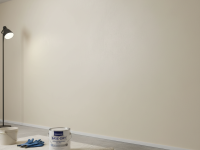
This is often the first thing people think of, and for good reason: it’s incredibly effective and affordable. Painting your existing backsplash can dramatically change its look, whether it’s plain drywall, laminate, or even old tiles. I remember when my sister tackled her kitchen’s bland ceramic tiles with a fresh coat of paint. It went from dull cream to a bright, modern white, instantly making the whole room feel bigger and cleaner.
How to do it:
- Prep is Key: Thoroughly clean your backsplash to remove grease and grime. Sand lightly if it’s glossy tile or laminate for better adhesion. Use painter’s tape to protect cabinets and countertops.
- Prime Time: Apply a good quality primer, especially one designed for challenging surfaces like glossy tiles or laminate. This ensures your paint sticks.
- Pick Your Paint: For high-moisture, high-traffic areas like a kitchen, choose durable paint. Epoxy paint, cabinet paint, or even specific tile paints are excellent choices. They’re hard-wearing and often washable.
- Seal the Deal: Once dry, consider a clear, protective topcoat, especially if you’re painting a high-splatter zone behind the stove.
You can go for a solid color for a sleek, minimalist look, or get creative with patterns using stencils (more on that later!). The possibilities are endless, and a gallon of paint is significantly cheaper than a box of new tiles!
Peel-and-Stick Tiles: Instant Gratification & Easy Removal
If you’re looking for a quick, impactful change with minimal fuss, peel-and-stick tiles are your best friend. I’ve seen these transform rental kitchens from drab to fab in an afternoon. They come in an incredible array of styles – subway, mosaic, geometric, even faux stone or brick – and are designed to adhere directly over your existing backsplash or a clean, smooth wall.
Why they’re great:
- DIY Friendly: No messy grout, no specialized tools, often just a utility knife and a ruler.
- Budget-Conscious: Much more affordable than traditional tiles and professional installation.
- Temporary & Flexible: Perfect for renters or those who like to change their decor frequently, as most can be removed without damaging the underlying surface.
- Variety: You won’t believe the realistic textures and finishes available.
Tips for application: Make sure your surface is perfectly clean and smooth. Overlap edges carefully if required by the manufacturer, and use a level to keep everything straight. Take your time, and don’t be afraid to pull up and reposition if needed.
Tile Stickers & Decals: A Quick Style Swap
Similar to peel-and-stick tiles but often even thier and more like a vinyl sticker, tile stickers and decals are fantastic for covering up outdated patterns or simply adding a fresh design element. My friend used these to cover some truly hideous floral tiles in her kitchen – she chose a geometric Moroccan pattern, and you’d never guess they weren’t real tiles unless you looked incredibly closely.
- What they are: Adhesive vinyl sheets cut to the size of individual tiles, or larger decals designed to cover a section.
- Best for: Covering existing patterned tiles you dislike, or adding a unique design to plain tiles.
- Installation: Clean your tiles thoroughly. Peel the backing and carefully apply each sticker, smoothing out any air bubbles.
This method offers immense flexibility. You can choose a bold pattern to make a statement or a subtle design to complement your existing decor. Plus, if you get tired of it, just peel them off and try a new look!
Stenciling: Custom Design on a Shoestring
If you love the idea of a truly customized look, stenciling is a fantastic option. This method allows you to create intricate patterns directly onto a painted or existing smooth backsplash surface. It’s like creating your own wallpaper, but with paint!
- Get Creative: From geometric patterns to floral motifs or classic damask, stencils come in countless designs.
- How it works: After preparing and possibly painting your base color, position your stencil, secure it with painter’s tape, and apply paint with a stencil brush or foam roller. Lift carefully and reposition for the next section.
- Durability: Just like general painting, ensure you use durable paint and seal it with a clear topcoat for longevity and easy cleaning.
Stenciling requires a bit more patience and a steady hand, but the results are incredibly rewarding and unique. I’ve seen kitchens where a simple white backsplash was transformed into a work of art with a contrasting stenciled pattern, giving it an expensive, custom tile look for a fraction of the cost.
Plywood or MDF Panels: Smooth & Paintable Foundations
Sometimes, your existing backsplash isn’t just ugly; it’s uneven, damaged, or simply not a good surface for painting or sticking. In such cases, creating a new, smooth foundation can be the best approach. I helped a neighbor with this when their old kitchen had chipped plaster behind the stove. We opted for thin plywood panels.
- The Process: Measure your backsplash area carefully. Cut thin plywood or MDF panels to fit. You can attach them directly over the old backsplash (if it’s not too bumpy) or to the wall studs.
- Finish it: Once installed, fill any gaps with caulk, prime, and then paint them with your desired color. You can even create shiplap or beadboard effects with this method!
- Benefits: Provides a perfectly smooth canvas for paint, stencils, or even lighter peel-and-stick tiles. It’s relatively inexpensive and creates a clean, uniform look.
This method is a bit more involved than just painting but still very much a DIY-friendly project. It’s perfect if you need to cover significant imperfections.
Grout Pen Magic: Refreshing Tired Grout
Sometimes, it’s not the tiles themselves that are the problem, but the dingy, discolored grout lines. Over time, grout can accumulate dirt, mildew, or simply fade, making even the prettiest tiles look tired. A grout pen is a super simple, incredibly satisfying solution.
- What it does: These pens contain a special, quick-drying, often waterproof and mildew-resistant paint designed specifically for grout lines.
- How to use: Clean your grout thoroughly. Then, simply trace over each grout line with the pen. The tip is usually fine enough to get into the crevices.
- Instant Impact: I tried this on my bathroom tiles, and the transformation was immediate. My grout went from a sad, patchy gray to crisp, clean white, making the whole wall look new.
This is probably the lowest effort, highest impact budget refresh you can do if your tiles are in good condition but your grout is not. It’s incredibly cheap and you can knock out an entire kitchen backsplash in an hour or two.
Important Considerations Before You Start
No matter which method you choose, a little plaing goes a long way. Trust me, I’ve learned this the hard way!
- Cleanliness is Godliness: Seriously, grease and grime are the enemies of good adhesion and a smooth finish. Degrease and clean thoroughly.
- Measure Twice, Cut Once: This applies to everything from calculating paint needed to cutting peel-and-stick sheets.
- Ventilation: If you’re painting or using strong adhesives, ensure good airflow. Open windows, use a fan.
- Patience, My Friend: Don’t rush drying times between coats or steps. It’s tempting, but it can ruin your finish.
- Test It Out: If you’re unsure about a paint color or a sticker’s adhesion, test it in an inconspicuous spot first.
Conclusion: Your Dream Kitchen, Closer Than You Think
You don’t need a massive renovation budget to fall back in love with your kitchen. As you’ve seen, there are so many creative, affordable, and DIY-friendly ways to refresh your backsplash. From a simple coat of paint or a magic grout pen to the instant style of peel-and-stick tiles or a custom stenciled design, the power to transform your kitchen is literally in your hands.
I hope these ideas, shared from my own experiences and observations, inspire you to tackle that backsplash you’ve been eyeing. A small change in this one focal area can create a ripple effect, making your entire kitchen feel brighter, fresher, and more ‘you.’ So, pick your favorite method, roll up your sleeves, and get ready to enjoy the satisfaction of a beautiful, budget-friendly kitchen refresh!


